Battery installation, Getting started, Important – VTech CS6124_-2-31 (without CHARGE LED) Manual User Manual
Page 8
4
Getting started
Battery installation
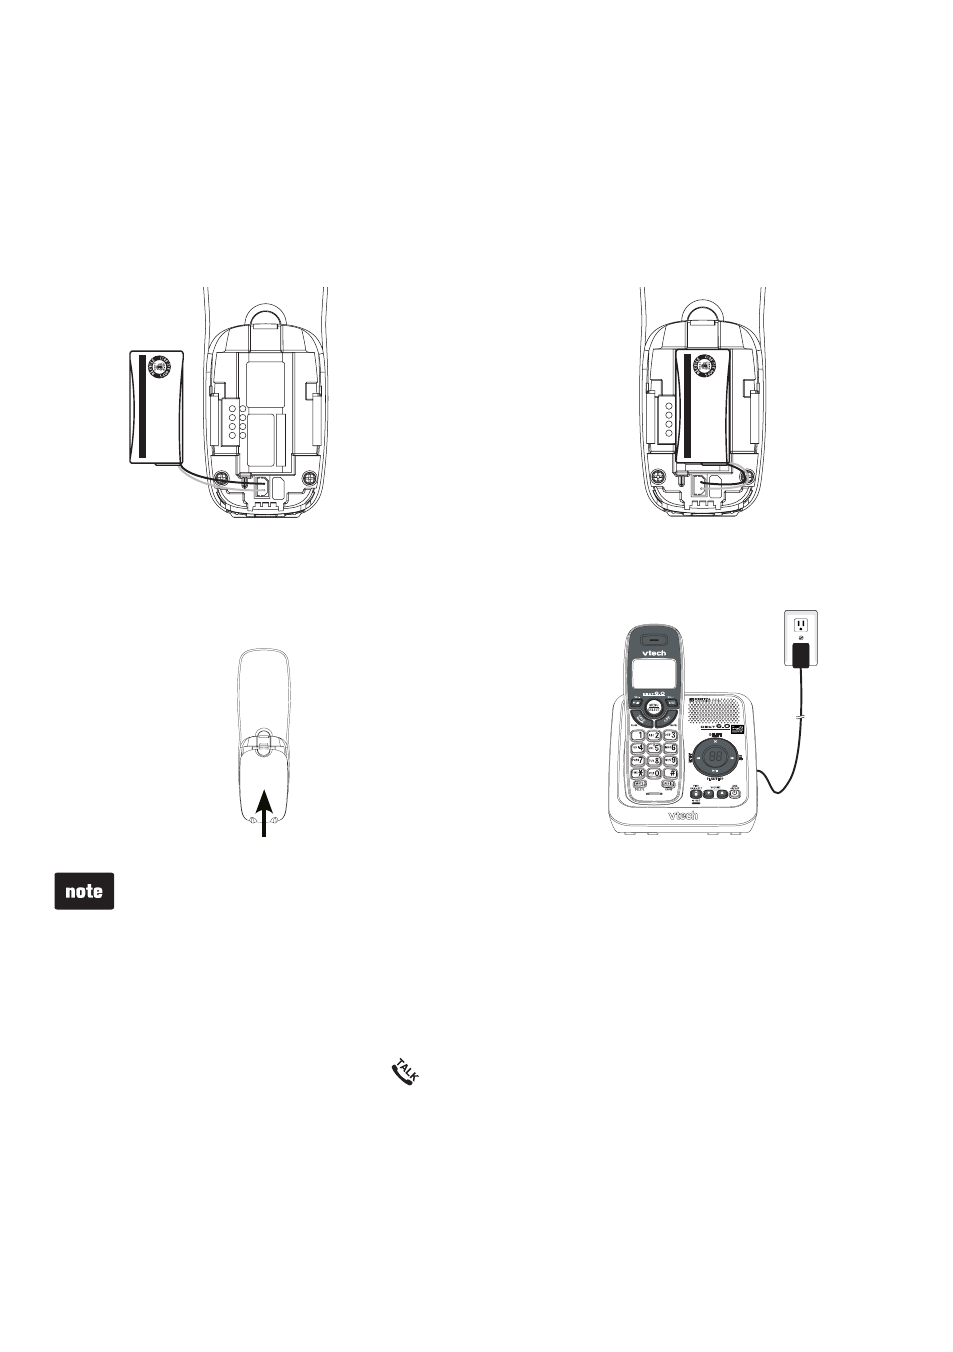
Install the battery as shown below.
Plug the battery connector securely
into the socket inside the handset
battery compartment, matching the
color-coded label.
1.
Batter
y P
ack / Bloc
-piles
:
(2.4V Ni-MH)
W
A
RNING /
A
V
ERTISSEMENT
:
DO NO
T BURN OR PUNC
TU
R
E
B
A
TT
ERIES.
NE
PA
S INCINÉRER OU PERCER LES PILES
.
Made in China /
Fa
briqué en chine
TH
IS
S
ID
E
U
P
/ C
E
CÔ
TÉ
V
ER
S
LE
H
A
U
T
CR1232
Batter
y
Pa
ck / Bloc
-piles
:
(2.4V Ni-MH)
W
A
RNING /
A
V
ERTISSEMENT
:
DO NO
T BURN OR PUNC
TU
R
E
B
A
TT
ERIES.
NE
PA
S INCINÉRER OU PERCER LES PILES
.
Made in China /
Fa
briqué en chine
TH
IS
S
ID
E
U
P
/ C
E
CÔ
TÉ
V
ER
S
LE
H
A
U
T
CR1232
Place the battery with the label
THIS SIDE UP facing up and the wires
inside the battery compartment.
2.
Align the cover flat against the battery
compartment, then slide it towards
the center of the handset until it clicks
into place.
3.
Charge the handset by placing it in
the telephone base or charger.
4.
If the handset will not be used for a long time, disconnect and remove the battery
to prevent possible leakage.
To purchase replacement batteries, visit our website at
www.vtechphones.com
or call
1 (800) 595-9511. In Canada, go to www.vtechcanada.com or dial
1 (800) 267-7377.
•
•
IMPORTANT:
Check for a dial tone by pressing . If you hear a dial tone, the installation
is successful.
If you do not hear a dial tone:
Make sure the installation procedures described above are properly done.
It may be a wiring problem. If you have changed your telephone service to digital
service from a cable company or a VoIP service provider, the telephone line may
need to be rewired to allow all existing telephone jacks to work. Contact your
cable/VoIP service provider for more information.
•
•