Spicer 23105S User Manual
Page 4
5. Install at least one of the new carrier fasteners to hold the carrier in place so you can remove the alignment
studs.
6. Remove the alignment studs.
7. Install new carrier to housing fasteners to all but the bottom two positions. The 5:30 and 6:30 positions will utilize
two unique 3” long capscrew to mount the boss support bracket.
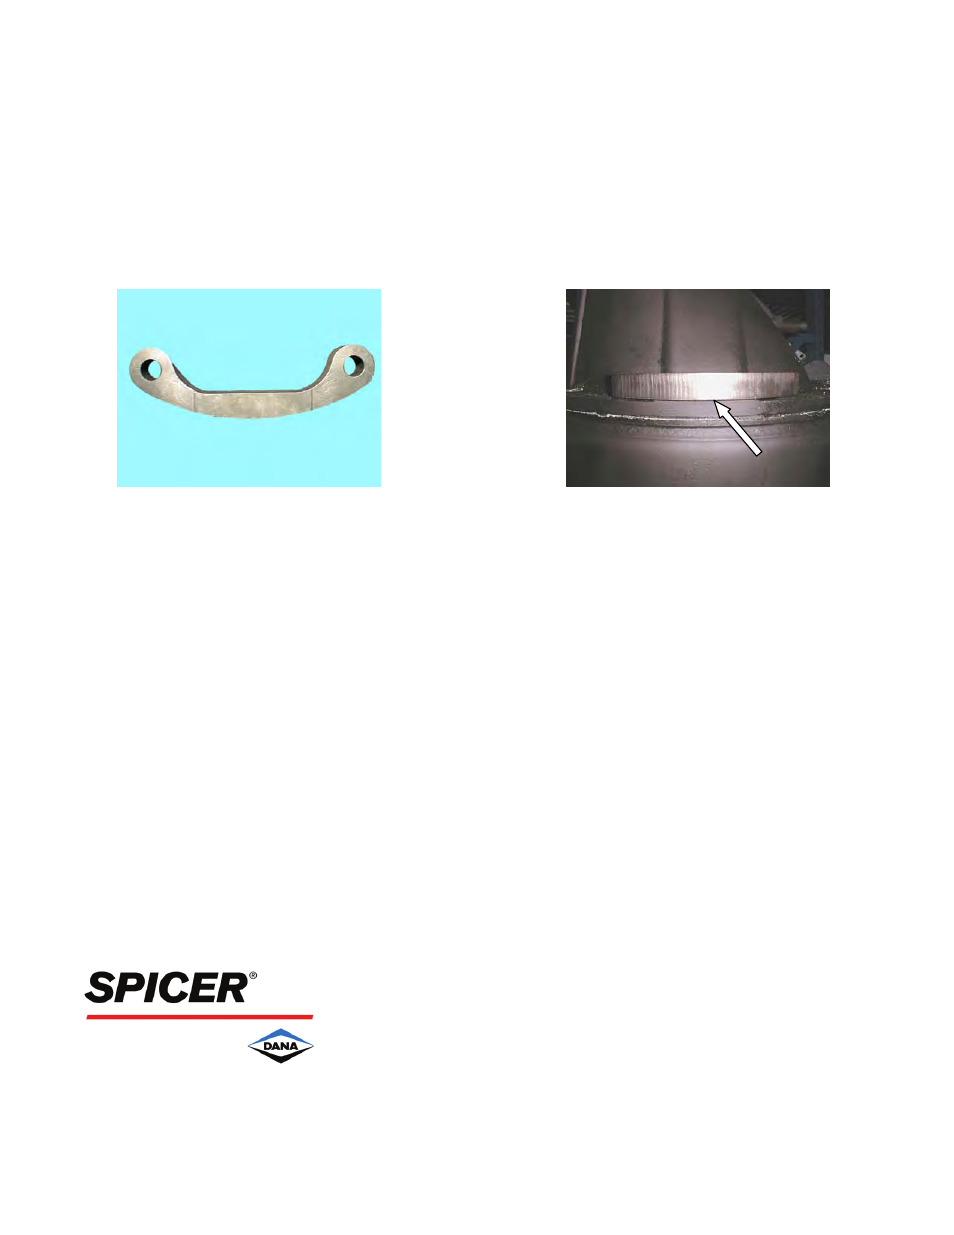
8. Position the boss support bracket so that the side with the machined raised area is facing the carrier flange
surface.
Raised Area
Boss Support Bracket
Raised Area Faces the Carrier Flange
9. Install two 3” long capscrew, and torque to 250–270 ft. lbs.
10. Torque remaining carrier to housing fasteners in a crisscross pattern to 250–270 ft. lbs.
11. Clean axle shaft flanges and wheel hub surfaces and install new axle shaft gasket.
12. Reinstall the axle shaft, washers and nuts, torque to spec.
13. Reinstall the driveline.
14. Remove fill plug from housing cover and refill the housing using the same lubricant that was removed. If
needed, add lube and fill until level with the bottom of the fill hole.
For spec’ing or service assistance, call 1-800-
621-8084 24 hours a day, 7 days a week.
Or visit our web site at:
www.
spicerparts.com
Dana Corporation
ABIB-0215
Copyright Dana Corporation, 2002 Commercial Vehicle Axle Division
September 2002
All Rights Reserved.
P.O. Box
321
Printed in U.S.A.
KToledo, Ohio 43697-0321