Carrier reinstallation – Spicer 23105S User Manual
Page 3
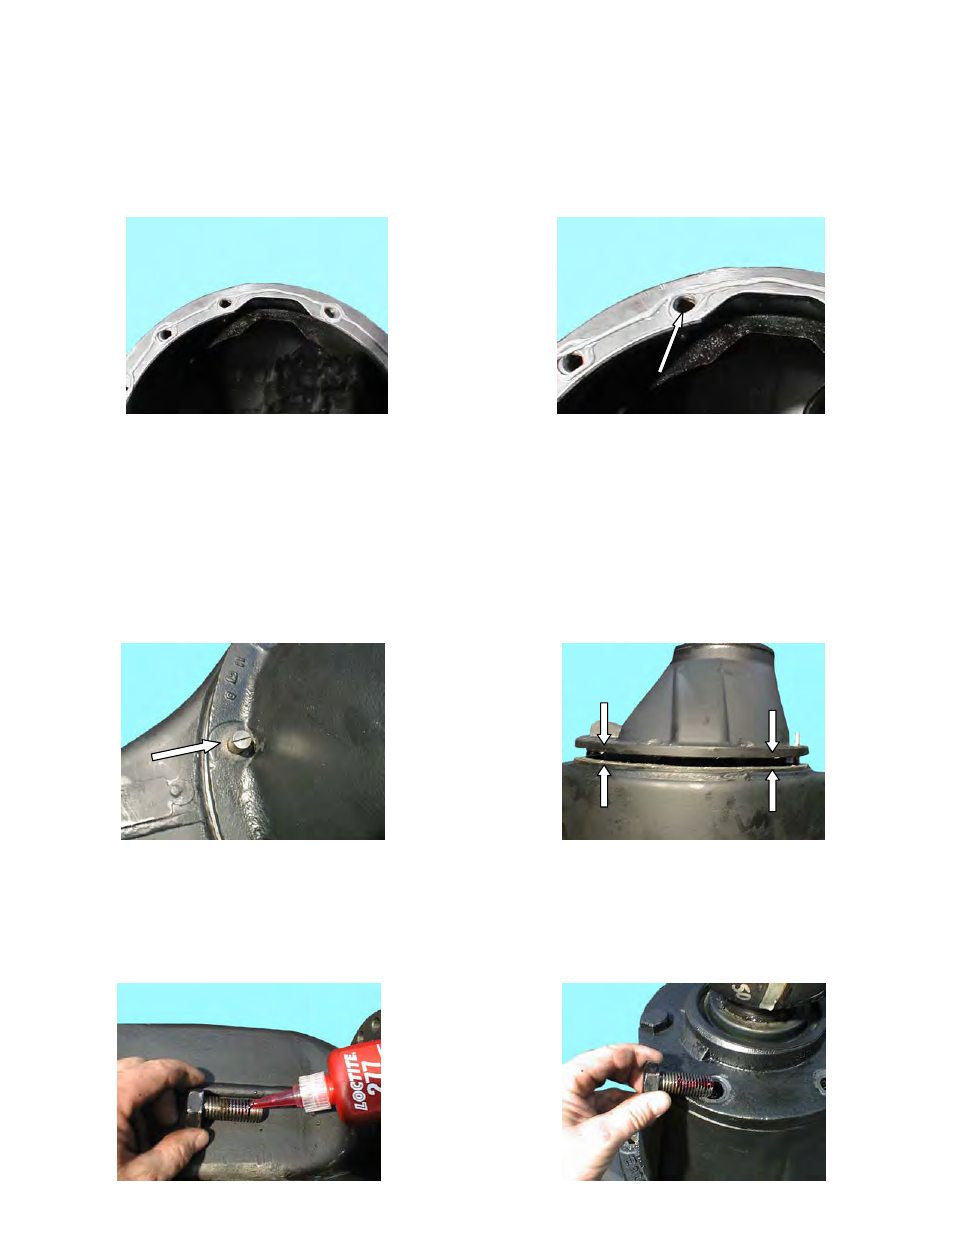
2. Apply a 1/8” bead of Loctite 5699 Ultra Grey or Dow Corning 3-0100 Automotive Sealant to the housing
surface, it’s important to apply the sealant around (make a loop) all of the threaded bolt holes.
IMPORTANT:
Do not spread or smooth-out RTV once applied. RTV will set in 20 minutes. Install carrier
before RTV sets or reapply.
1/8” Bead of Approved RTV
Make Loop Around all Bolt Holes
Carrier Reinstallation
1. Adjust the Transmission jack to start the carrier on the guide pins.
Note: The carrier may have moved forward when it was removed from the housing, the transmission
jack table should be readjusted to compensate for this movement.
2. It is important that the carrier is at the same angle as the housing. The gap between the carrier flange and the
housing ring should be the same all the way around.
Adjust Jack to Start Carrier on Guide Pins Same Gap Top-to-Bottom and Right-to-Left
3. Raise or lower the assembly until it slides into place. If it does not slide in easy, check the carrier-to-housing
alignment. Right-to-left, top-to-bottom.
4. Disconnect carrier adapter plate. Apply Loctite 277 to the threads of the original pinion cage capscrews,
reinstall and torque to 240–300 ft. lbs.
Apply Loctite 277
Reinstall Capscrews