Operation – Bosch GML SoundBoxx Professional 14,4 V User Manual
Page 12
12 | English
1 619 929 L56 | (6.12.12)
Bosch Power Tools
Note: The battery pack is supplied partially charged. To en-
sure full capacity of the battery pack, completely charge the
battery pack in the battery charger before using for the first
time.
Use only the battery chargers listed on the accessories
page. Only these battery chargers are matched to the lith-
ium ion batteries used in your construction site radio.
The Lithium-Ion battery can be charged at any time without
reducing its service life. Interrupting the charging procedure
does not damage the battery.
The battery is equipped with a NTC temperature control
which allows charging only within a temperature range of be-
tween 0 °C and 45 °C. A long battery service life is achieved
in this manner.
Insert a battery into the battery port
15 in such a manner that
the connections of the battery face against the connections in
the charging compartment
15, and allow the battery to en-
gage in the battery port.
The battery charge-control indicator
b appears on the display
as soon as a battery pack with sufficient voltage is inserted
and the construction site radio is not connected to the mains
supply via the power-supply plug
20.
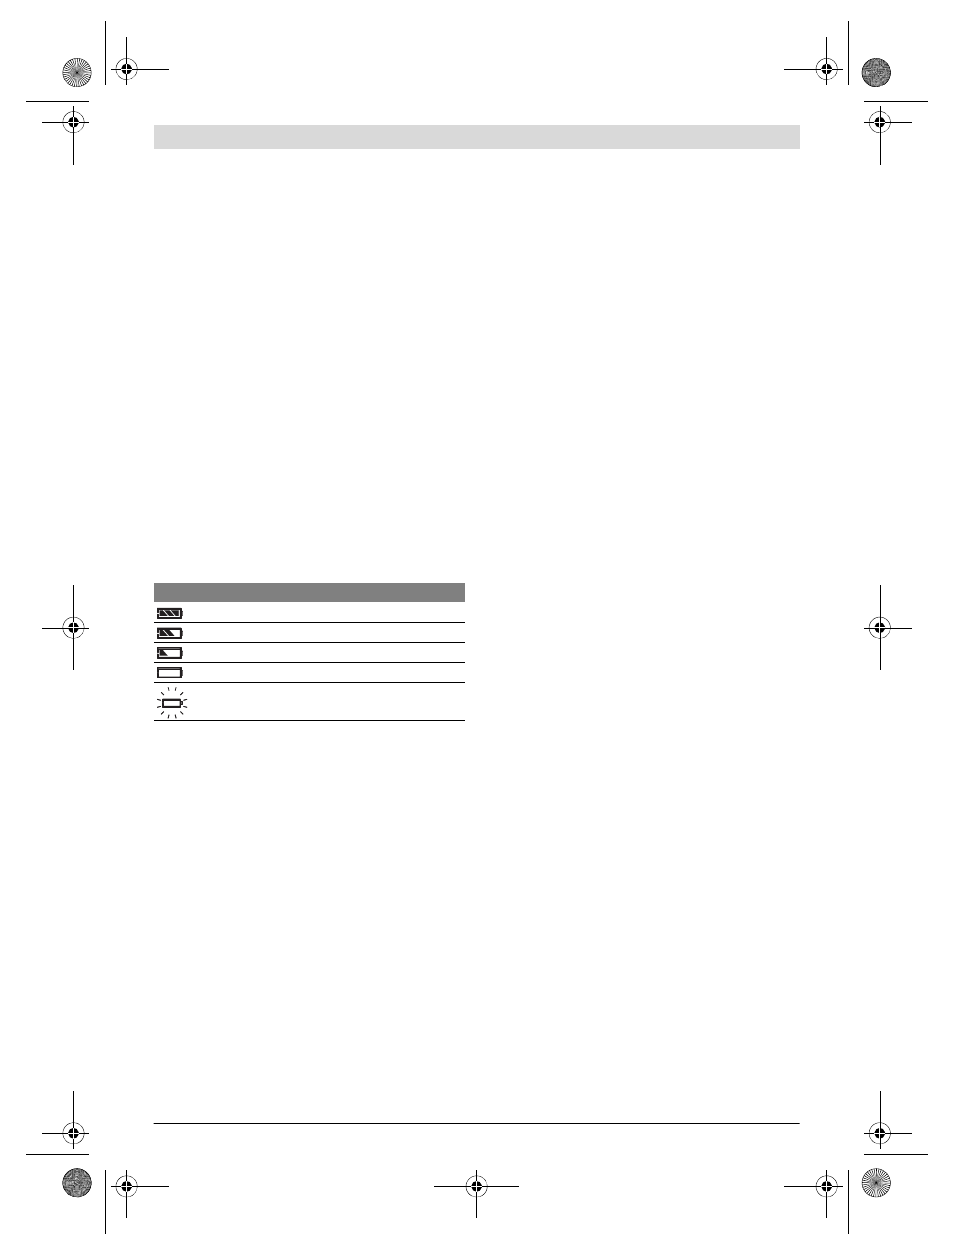
The battery charge-control indicator
b indicates the current
battery pack status. When the battery charge-control indica-
tor flashes, the battery pack must be charged.
To remove the battery
19, press the release button on the
battery and pull it out of the battery port
15.
Operation with Power-supply Plug
Observe the mains voltage! The voltage of the power
source for the power-supply plug must correspond with
the data on the type plate of the power-supply plug.
Open the protective cap of the 12 V connection socket
24. In-
sert the plug-in connector
21 of the 12 V power-supply plug
into the 12 V connection socket
24. Connect the power-sup-
ply plug to the mains supply.
Use only the original Bosch power-supply plug intend-
ed for your construction site radio. This measure will en-
sure proper operation of the construction site radio.
After removing the plug-in connector, reattach the protective
cap of the 12 V connection socket
24 to protect against
dirt/debris.
Inserting/Replacing the Back-up Battery
In order to store the time in the construction site radio, back-
up batteries have to be inserted. Using alkali-manganese bat-
teries is recommended for this purpose.
To open the battery compartment, loosen screw
22 and re-
move battery lid
23. Insert the back-up batteries. When in-
serting, pay attention to the correct polarity according to the
representation on the outside of the battery lid.
Mount the battery lid
23 again and tighten it with screw 22.
Replace the back-up batteries when the time indication
e be-
comes weaker and the construction site radio no longer
stores the time.
Always replace all batteries at the same time. Only use batter-
ies from one brand and with the identical capacity.
Remove the back-up batteries from the construction
site radio when not using it for longer periods. When
storing for longer periods, the back-up batteries can cor-
rode and discharge themselves.
Operation
Protect the construction site radio against moisture
and direct sunlight. The construction site radio is suitable
only for indoor use.
Audio Operation
Switching On and Off
To
switch on the construction site radio, press the On/Off
button
2. The display 1 goes on and the last set audio source
after switching off the construction site radio is activated.
Note: When operating the first time via battery pack or when
not having used the construction site radio for a longer peri-
od, it may be necessary to press the On/Off button
2 several
times or longer, to switch the radio on.
Each time after pressing a button, the display
1 is illuminated
for several seconds.
To
switch off the construction site radio, press the On/Off
button
2 again. The current audio source setting is stored.
When not using the construction site radio, switch it off in or-
der to save energy.
Adjusting the Volume
After switching on the construction site radio, a mean volume
level (value 10) is always set.
To increase the volume, press the
“Vol +” button 5; to reduce
the volume, press the
“Vol –” button 3. The volume setting
“VL” is indicated with a value between 0 and 20 for a few sec-
onds in indicator
e on the display.
Before adjusting or changing a radio station, set the volume to
a lower setting; before starting an external audio source, set
the volume to medium.
The sound can be switched off by pressing the
“Mute” button
12. To switch the sound on again, either press the “Mute”
button
12 once more or either of the “Vol +” 5 or “Vol –” but-
tons
3.
Adjusting the Sound
An equalizer is integrated in the construction site radio for op-
timal sound reproduction.
To manually change the bass level, press the
“Equalizer” but-
ton
4 once. “BA” is indicated on the display along with the
stored bass level value in the multi-function indicator
e. To
manually change the treble, press the
“Equalizer” button 4
again;
“TR” as well as the stored treble value are indicated in
the multi-function indicator
e.
Indication
Capacity
2/3
1/3
<1/3
Reserve
Battery pack empty
OBJ_BUCH-1777-001.book Page 12 Thursday, December 6, 2012 1:42 PM