Installation, Installing the appliance – Zanussi ZMC40ST User Manual
Page 42
40
INSTALLATION
D
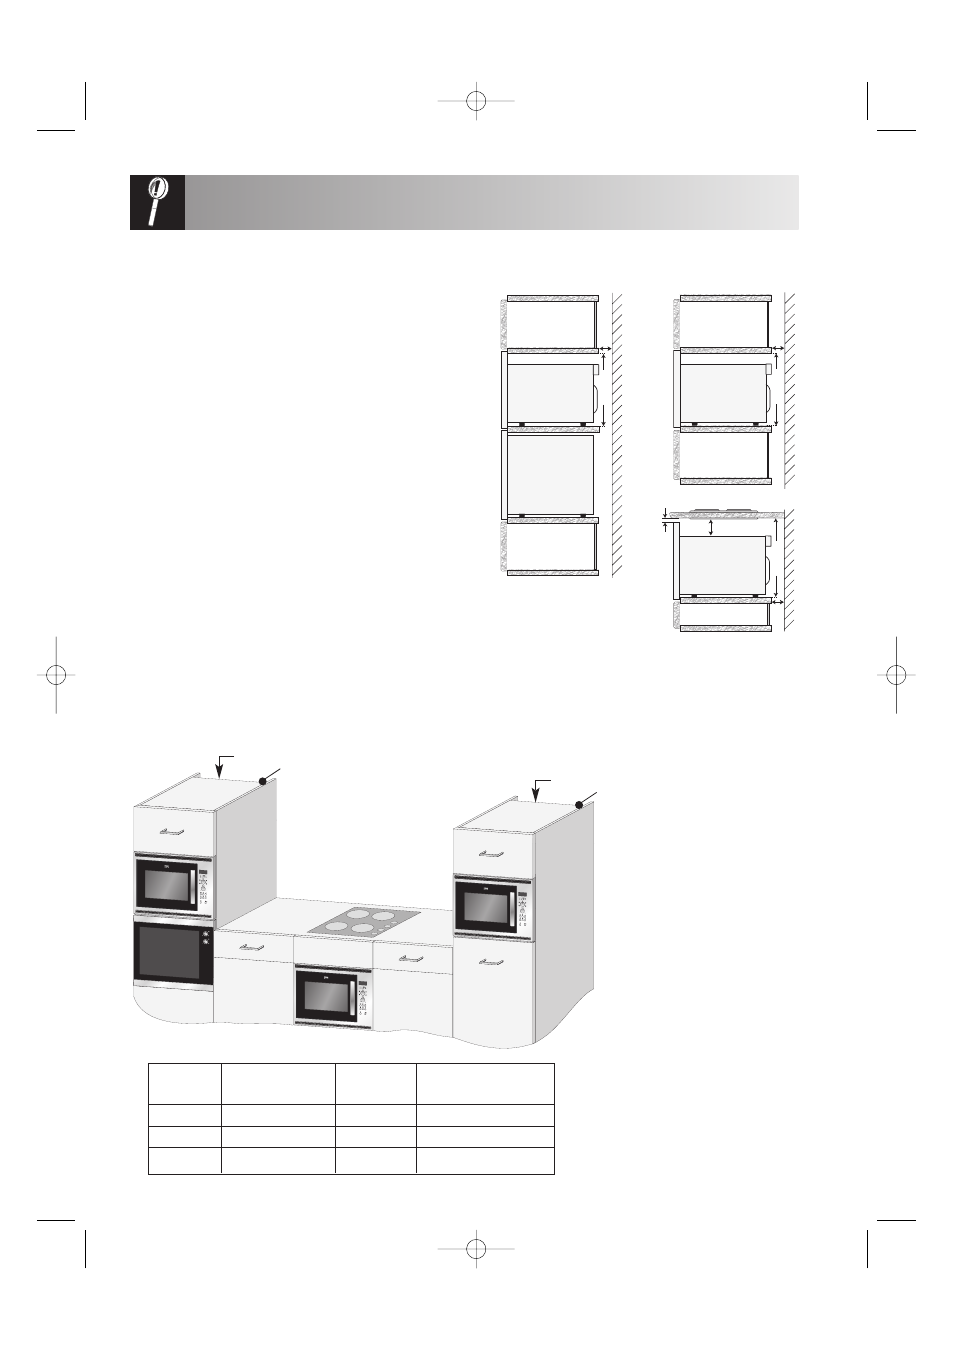
Position A
Position C
Position B
Conventional
oven
The microwave can be fitted in position A, B or C:
POSITION
NICHE SIZE
CHIMNEY
Gap Between
W
D
H
(min)
Cupboard & Ceiling
A
560x550x450
20
50
B
560x550x450
20
50
C
560x550x460
20
Not Applicable
Measurements in (mm)
INSTALLING THE APPLIANCE
1. Remove all packaging and check carefully for
any signs of damage.
2. If the microwave is fitted in position C, ensure that
the minimum air gaps are maintained as shown in
the diagram.
3. Secure four cupboard retention blocks in position
using the setting template (TMAPTA004URR0).
4. Fit the appliance into the kitchen cupboard, lift
over the bottom/front blocks then push slowly,
and without force, until the front frame of the oven
seals against the front opening of the cupboard.
5. Ensure the appliance is stable and not leaning.
6. Fix the oven in position with the screws provided.
The fixing points are located within the louvre
areas at the top and bottom of the oven (see
diagram, item 1, on page 5).
7. Fit the frame fastner caps to the four fixing
positions (2 spare caps are provided).
8. It is important to ensure that the installation of this
product conforms to the instructions in this
operation manual and the conventional oven or
hob manufacturer’s installation instructions.
65 mm
5 mm
460 mm
20 mm
min. 20 mm
450 mm
Conventional
oven
Position A
Position C
min. 20 mm
450 mm
Position B
Chimney
Cable clip
Chimney
Cable clip
1. ZD-91D-UK ENGLISH 10/02/2005 11:49 Page 40