Blower wheel removal, Wheel puller hooked to lugs on bearing housing, Pressing blower wheel out of housing – Walker MT User Manual
Page 76: Blower wheel installation, Ghs blower assembly installation, Maintenance instructions
Maintenance Instructions
REPLACING/REPAIRING
72
4.
Remove the blower assembly from the chassis
as follows:
a. Remove the blower skid bar by removing
front and rear mounting bolts from the skid
bar (underneath the blower) and removing
the bolt connecting the blower housing to
the skid bar.
b. Remove the blower belt tightener idler arm
assembly by removing the pivot bolt.
c. Remove two (2) bolts mounting the blower
housing to the frame.
d. Lower the blower assembly straight down
out of the chassis frame and remove.
Blower Wheel Removal
When required, replace the blower wheel using the
following procedure:
1.
Loosen blower pulley set screws and remove
the pulley using a wheel puller.
2.
Remove the locking collar from the back bear-
ing (closest to the pulley) by loosening the set
screw and rotating the collar counterclockwise
(use punch to drive).
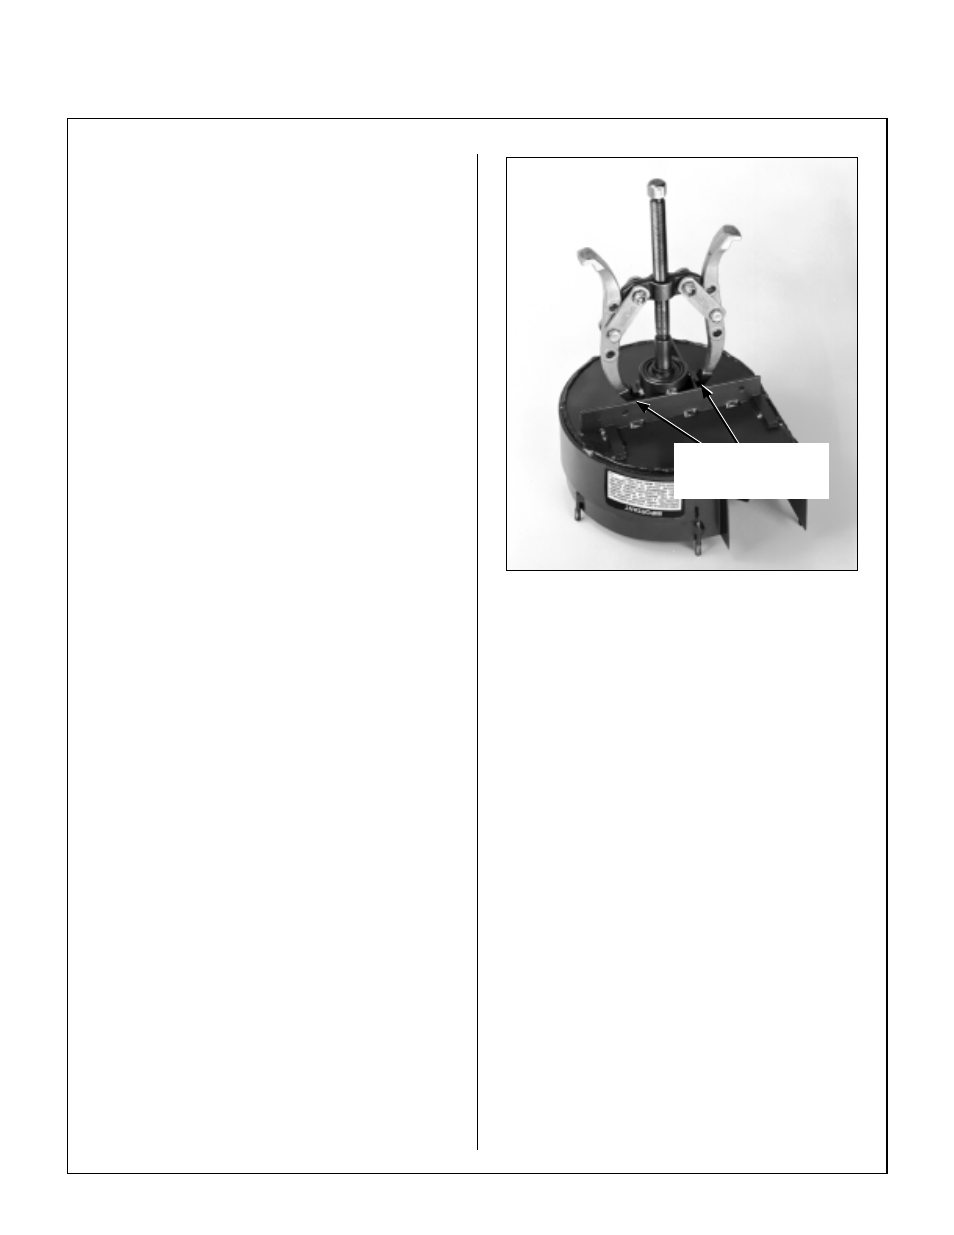
3.
Press blower wheel out of the housing using a
wheel puller hooked to lugs on the bearing hous-
ing. The bearings have been secured in the
housing with a retaining compound - Loctite
®
RC/680, and considerable force will be re-
quired to break this bond. After the bearings
have “broken loose” from the housing, only light
pressure should be required to remove the
wheel assembly out of the housing.
NOTE: It may or may not be possible to remove
the front bearing from the blower wheel without
damaging it. If the bearing is damaged, it will
need to be replaced along with the wheel.
Pressing Blower Wheel Out of Housing
Blower Wheel Installation
1.
To install the blower wheel, reverse the remov-
al procedures. The front bearing is mounted
on the blower wheel shaft, secured by a locking
collar. Drive the locking collar clockwise with a
punch, and tighten the set screw.
2.
Press blower wheel and front bearing into the
blower housing. Use Loctite
®
RC/680 retaining
compound on the outer bearing race and inside
the bearing housing.
3.
Press the rear bearing into place, using Loctite
®
on both the outer bearing race and the housing.
4.
Install the locking collar on the rear bearing and
install the blower pulley to complete the blower
assembly. Torque the blower pulley set screws
to 250 in-lb (28.3 N
⋅
m).
GHS Blower Assembly Installation
Reinstall the blower assembly into the mower using
the reverse procedures of
GHS Blower Assembly
Removal.
Wheel Puller
Hooked to Lugs
on Bearing Housing