Adjusting the display, Factory presets, auto-sync, and user settings, On screen display (osd) settings – Wacom DTU-2231 User Manual
Page 23: Using the pen display
23
23
Interactive pen display
ADJUSTING THE DISPLAY
FACTORY PRESETS, AUTO-SYNC, AND USER SETTINGS
Factory presets: For optimal display quality, set your video card to the maximum (native) resolution that can
be used with your pen display. See the
Auto-sync: The interactive pen display automatically synchronizes to the incoming signal. The auto-sync
function sets the horizontal and vertical screen position, as well as pitch and phase. Auto-sync will
function between the supported horizontal and vertical frequency ranges. See the
for details.
If the pen display does not automatically synchronize with the incoming signal, you can use the OSD A
UTO
A
DJUST
option to initiate display synchronization. Further screen display adjustments can be manually
made using the On Screen Display (OSD) controls.
Color calibration: Changing the color, color temperature, contrast, brightness, or backlight from their
default settings will invalidate the ICC color profile that was included on the Installation CD. (Some models
may not include a color profile.)
ON SCREEN DISPLAY (OSD) SETTINGS
The OSD function enables you to optimize a variety of display settings at the touch of a button.
Make adjustments using the OSD controls located on the upper left edge of the unit.
Note: After changing a setting, the OSD menu will automatically close after a few moments of inactivity.
You can also press the M
ENU
button to close the OSD menu. All settings are automatically saved
when the OSD menu closes and will be used the next time the unit receives a similar video signal.
This is applicable to all display modes. If you make changes to the display appearance and cannot
return to the original settings, use the R
ESET
option to return the pen display to its original factory
defaults.
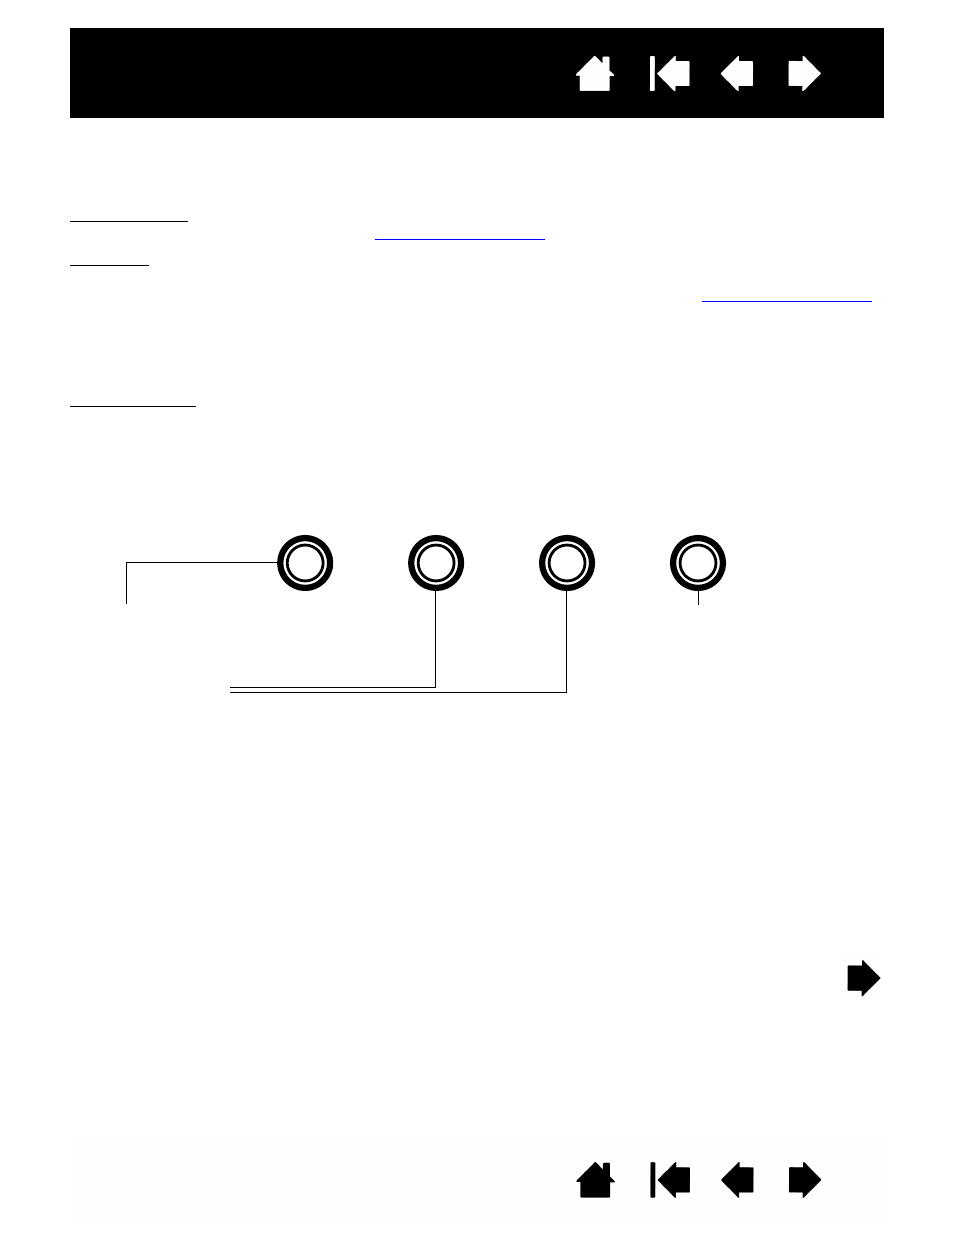
1. M
ENU
button
Press to open or exit the OSD menu.
2. Selection buttons
Use these buttons to select and highlight an option. Then press the E
NTER
button. The current settings and
adjustment sub-menu for that option will appear. Some settings may not be available when in DVI mode.
Use the buttons to select and adjust the option settings. (Press the + button to increase a selected item value.
Press the – button to decrease it.)
After making changes, press the E
NTER
button to save.
See the following pages for a detailed description of menu options.
E
NTER
button
Activates the selected OSD
menu option.
–
+