1.2 install cd-rom/cd-rw drive in cd-rom box – VIPowER SmartDup VP-8220 User Manual
Page 9
SmartDup IDE CD Duplicator User’s Guide
7
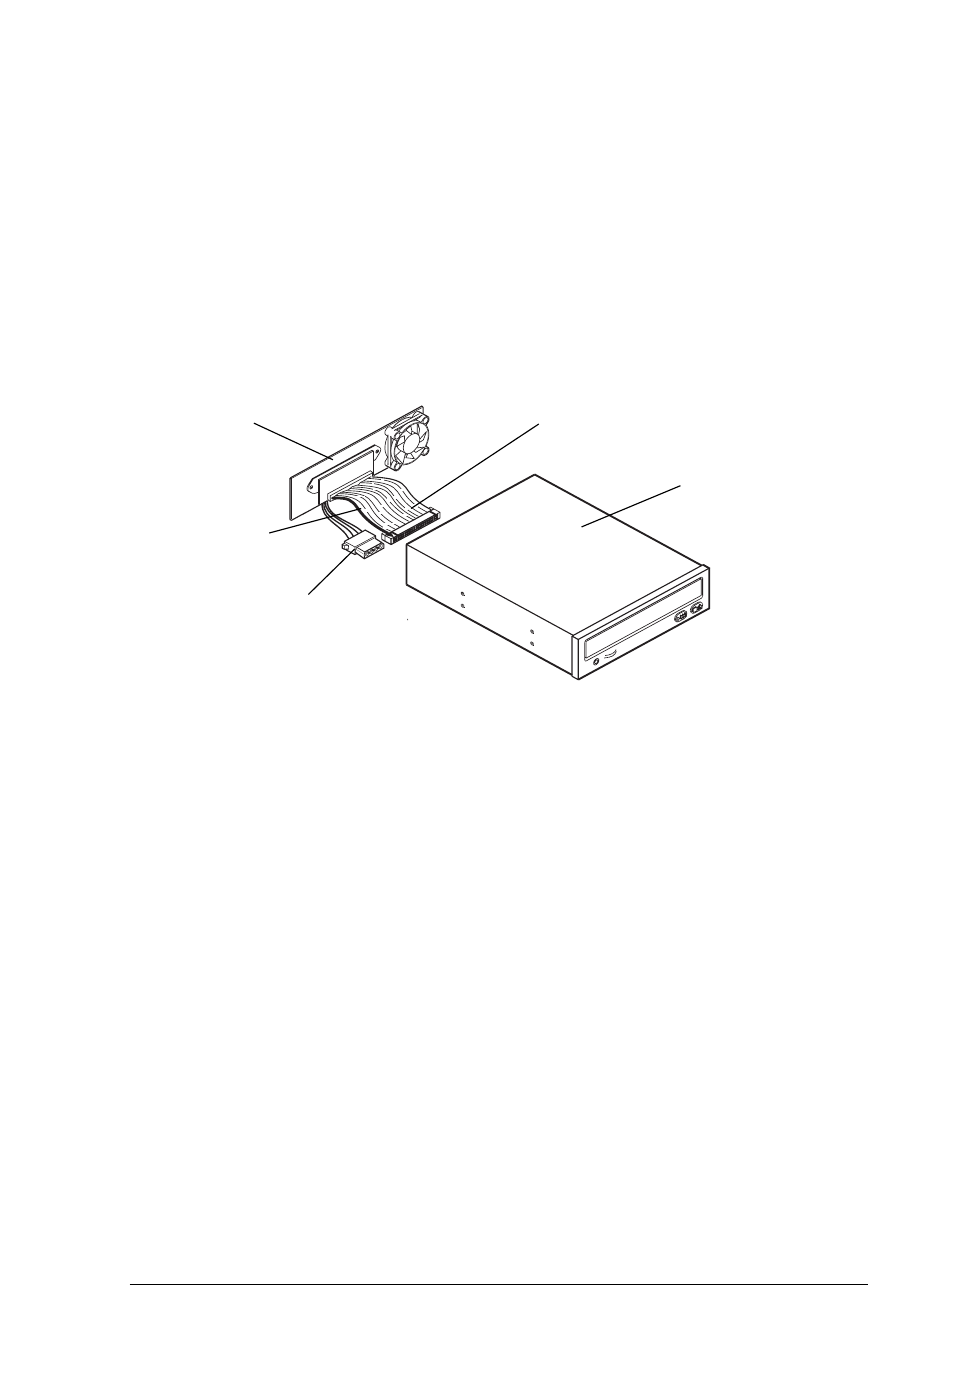
2-1.2 Install CD-ROM/CD-RW Drive in CD-ROM Box
1. Attach the two connectors from the end-panel assembly to the appropriate
connectors on the CD-ROM drive.
a. Attach the IDE 40-pin data cable from the end-panel to the 40-pin connector
on the back of the CD-ROM drive. To ensure pin-1 to pin-1 connection,
orient the cable so the colored stripe edge is closest to the power connector.
b. Attach the 4-pin power cable from the end-panel to the 4-pin connector on the
back of the CD-ROM drive. The connector is ‘D’ shaped to ensure proper
connection.
Power and Data Connector Drive Connections
4-pin Power
Connector
40-pin IDE
Data Connector
CD-ROM
Drive
Pin-1 Colored
Stripe
End-Panel
Assembly
2. Place the CD-ROM drive in the bottom enclosure cover. The CD-ROM drive’s
front face panel should be flush with the front corners of the case (positioned in
front of the guide flanges.)
3. Align the CD-ROM drive’s mounting holes with the mounting holes on the drive
rails and secure with four screws (two on each side).
4. Slide the back-panel connector assembly back into the end groove guide.
5. Place the top cover over the drive assembly, making sure the end-panel assembly
slides into its end groove guide.
6. Align the cover’s mounting holes with the mounting holes on the drive rails and
secure with four screws (two on each side).