3 lcd module, 4 rear view, Introduction – Tripp Lite B020-016-17-IP User Manual
Page 7
7
4.4 Components
(continued)
4. Introduction
(continued)
1
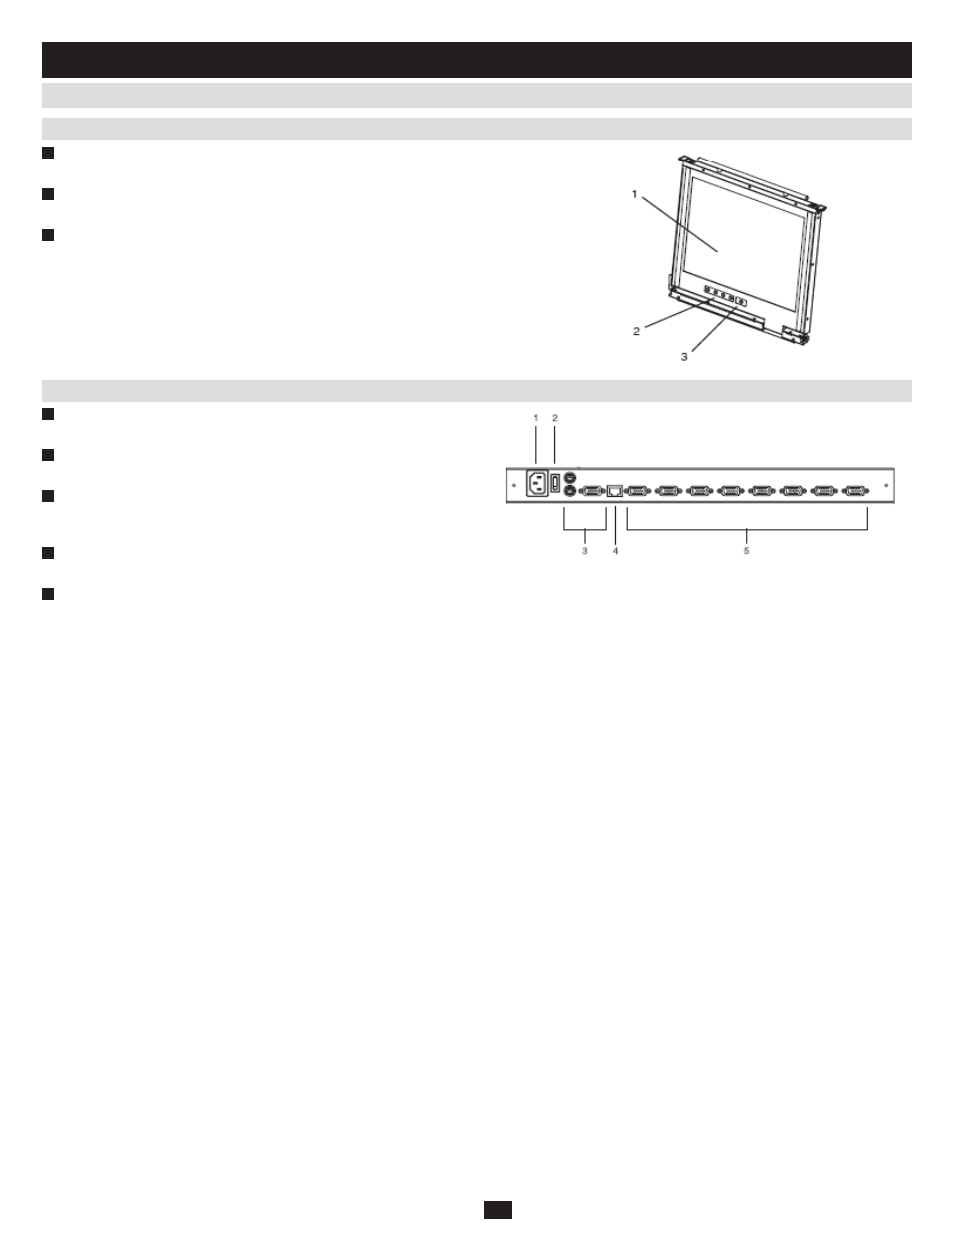
LCD Display: To access the LCD monitor, slide the LCD module out
and flip up the cover.
2
LCD Controls: These buttons control the position and picture setting
of the LCD display.
3
LCD On/Off Button: Push this button to turn the LCD monitor on
and off. The button lights (orange) when the LCD monitor is off to
indicate that only the monitor is off – not the KVM switch itself.
1
Power Socket: This is a standard C14 AC power socket. The power
cord that comes with the unit plugs in here.
2
Power Switch: This is a standard rocker switch that powers the unit
on and off.
3
External Console Ports: For flexibility and convenience, the
NetDirector Console KVM Switch with IP Access supports an
external KVM console.
4
LAN Port: The cable that connects the KVM switch to a LAN, WAN,
or Internet plugs in here.
5
KVM Ports: The custom wired KVM cable kits that connect to the
computers plug in here.
Note: The shape of these 15-pin connectors has been specifically modified to work only
with Tripp Lite P774-Series (PS/2) and P776-Series (USB) KVM cable kits.
4.4.3 LCD Module
4.4.4 Rear View
Note: The B020-008-17-IP is pictured above. The only difference between this and
the B020-016-17-IP is the number of KVM Ports.