Erasing images, Tap the [ ] icon – Toshiba PDR-T20 User Manual
Page 47
47
èÄîıÇ
∑
ÇÈ
Getting Ready
Playing Back/Deleting
Photographed Images
Connecting to the
PC
Other Useful
Information
T
aking Photographs
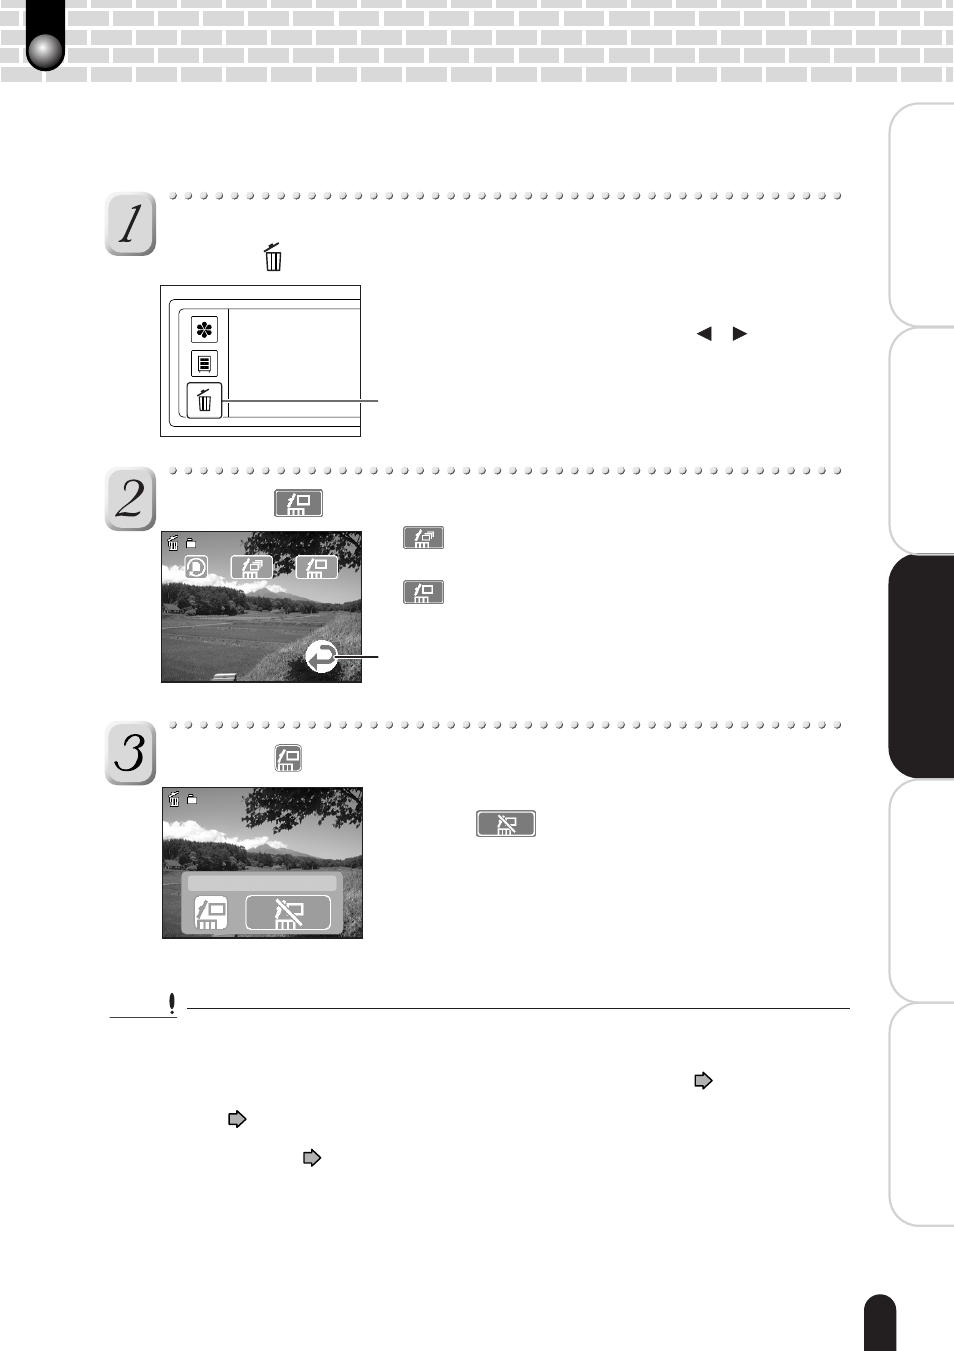
In the playback mode select an image to be erased, then
tap the [ ] key.
The erase mode screen appears.
When in the playback mode: Select an image to be
erased, using the Direction button [ / ].
When in the photography mode: The last image
photographed is displayed.
Tap the [
] icon.
[
] : Erases all the images in the SD card other
than the protected ones.
[
] : Erases the currently displayed image.
A confirmation screen appears.
Tap the [
] icon.
The selected image is erased.
Tapping [
] icon restores the previous screen.
To erase another image, repeat steps 1 to 3.
Important
• Erased images cannot be restored. Before erasing images, make sure that the images are
unnecessary.
• The protected images are not erased. See “Protecting Images (Protect)”
page 46.
• Images cannot be erased when the SD card has been locked. See “Handling the SD Card
Correctly”
page 13.
• Images saved in the DPOF format cannot be erased. In order to erase them, first clear
their DPOF settings
page 62.
Erasing Images
You can erase recorded images. Erasing unnecessary images will increase free space in
the SD card.
100
100 - 0088
0088
Erase key
Tapping this restores the Display screen.
100
100 - 0088
0088
Erase?
Erase?
Yes