Remote controller, Installing the batteries, Aiming the remote controller – Onkyo HTX-22HD User Manual
Page 14
14
Remote Controller
Notes:
• If the remote controller doesn’t work reli-
ably, try replacing the batteries.
• Don’t mix new and old batteries or differ-
ent types of batteries.
• If you intend not to use the remote control-
ler for a long time, remove the batteries to
prevent damage from leakage or corrosion.
• Expired batteries should be removed as
soon as possible to prevent damage from
leakage or corrosion.
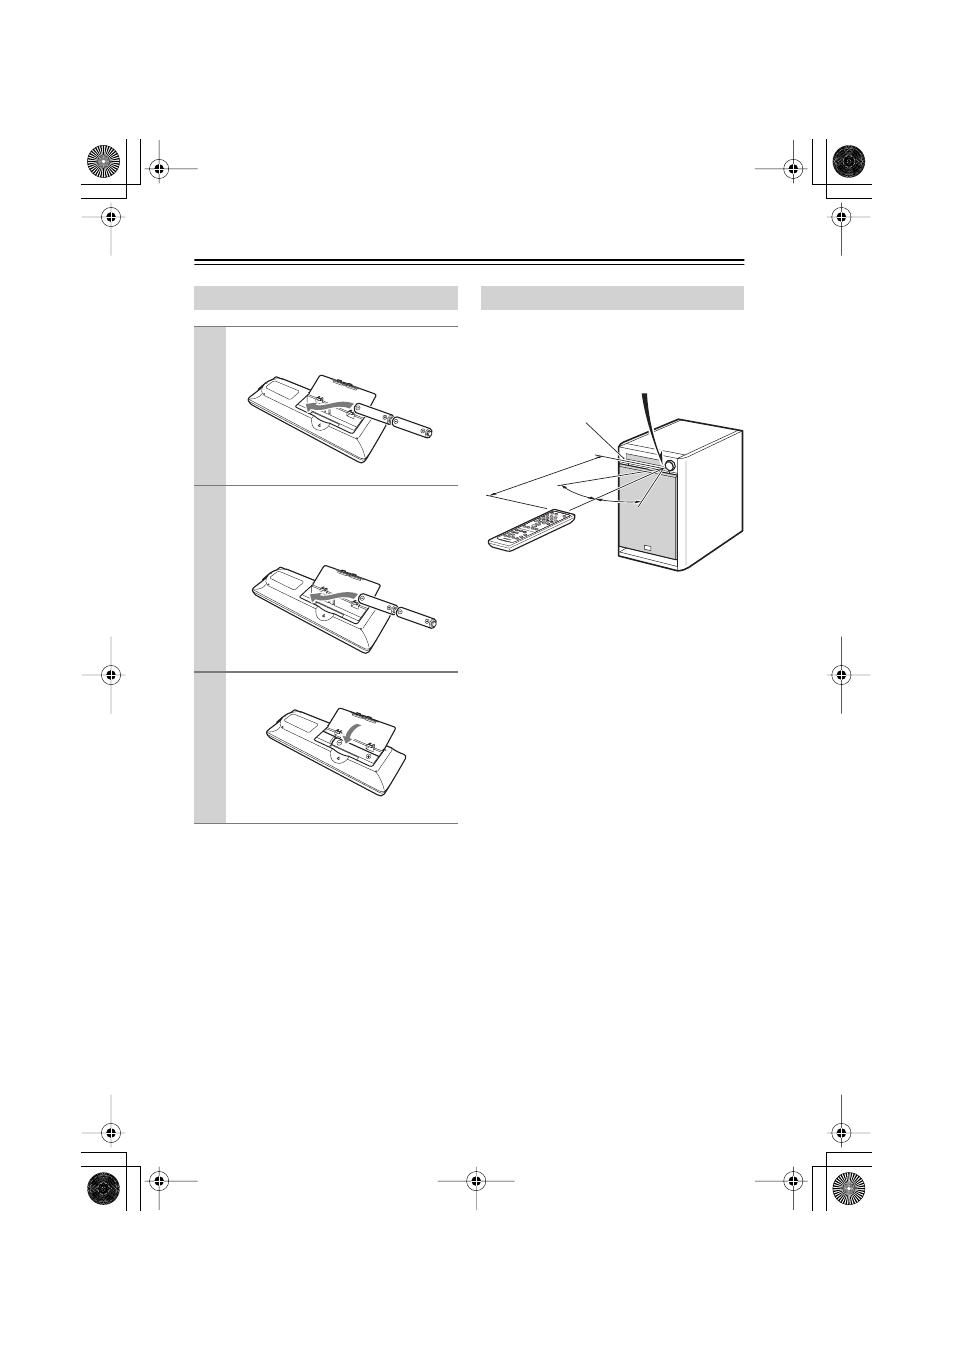
When using the remote controller, point it
toward the HTX-22HD’s remote control sen-
sor, as shown below.
Notes:
• The remote controller may not work reli-
ably if the HTX-22HD is subjected to
bright light, such as direct sunlight or
inverter-type fluorescent lights. Keep this
in mind when installing.
• If another remote controller of the same
type is used in the same room, or the HTX-
22HD is installed close to equipment that
uses infrared rays, the remote controller
may not work reliably.
• Don’t put anything on top of the remote
controller, such as a book or magazine,
because a button may be pressed continu-
ously, thereby draining the batteries.
• The remote controller may not work reli-
ably if the HTX-22HD is installed in a rack
behind colored glass doors. Keep this in
mind when installing.
• The remote controller will not work if
there’s an obstacle between it and the
HTX-22HD’s remote control sensor.
Installing the Batteries
1
Open the battery compartment, as
shown.
2
Insert the two supplied batteries (AA/
R6) in accordance with the polarity
diagram inside the battery compart-
ment.
3
Close the battery compartment.
Aiming the Remote Controller
30˚
30˚
Approx. 16 ft.
(5 m)
Remote control sensor
STANDBY indicator
HTX-22HDPAW