Basic playback, Playing dvds, video cds, cds and mp3s, When a menu screen is displayed – Onkyo DR-C500 User Manual
Page 33: About the, Marks in the pages related to disc operation, Before operating the remote controller, Select the item you want to view, Press 0, Place a disc on the disc tray, Press mode dvd
33
DVD
VCD
CD
MP3
1
2
3
4
5
6
7
8
9
0
2
Playing DVDs, Video CDs, CDs and
MP3s
Basic Playback
■ About the
DVD
,
VCD
,
CD
and
MP3
marks in
the pages related to disc operation
DVD
means the function or title is related to DVD-Video operation.
VCD
means the function or title is related to Video CD operation.
CD
means the function or title is related to audio CD operation.
MP3
means the function or title is related to MP3 operation.
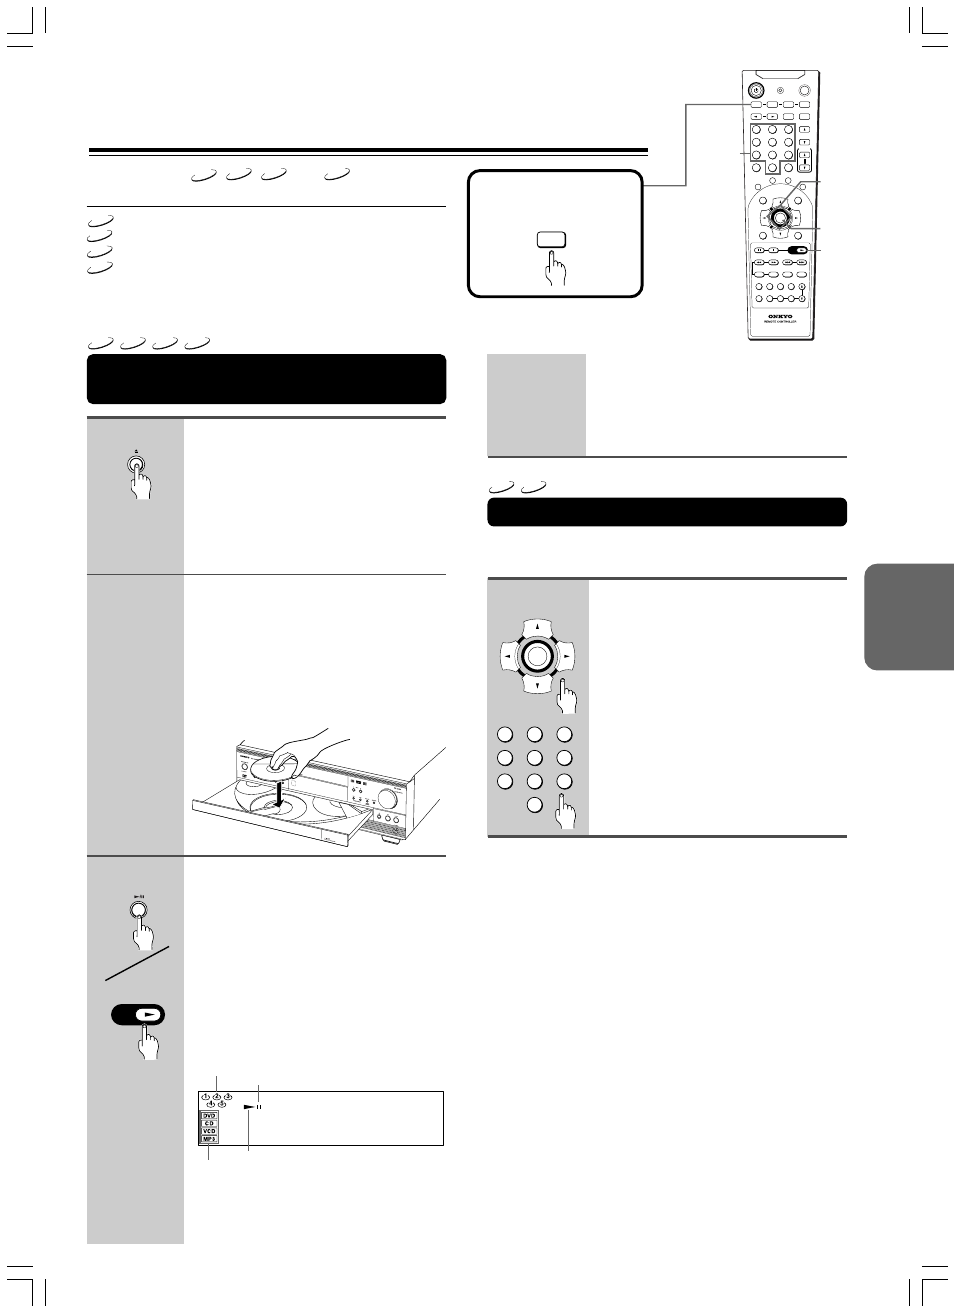
Inserted disc indicator
(DVD, CD, VCD, MP3)
Pause indicator
Play indicator
• The appropriate inserted disc, disc
number and the play indicators
illuminate.
ENTER
1
Unit
3
Unit
Remote
controller
PLAY
PLAY
• If the DVD Changer Receiver is in
standby mode when
£/8 button is
pressed, the DVD Changer Receiver
turns on and playback starts. In this
case it may take several seconds until
playback starts.
DVD
VCD
Number
buttons
-- / ---
SEND / LEARN
TOP MENU
MENU
RETURN
ON SCREEN
CH CH
VOLUME
UP
DOWN
TV / VCR
S
TA
ND
BY / O
N
EN
TER
LIGHT
DVD
RCVR / VCR
T V
CBL / SAT
INPUT
DIMMER
SLEEP
MASTER
VOLUME
PRESET
1
2
3
4
5
6
7
8
9
MEM
CLR
0
R
EP
EA
T
A-B
RANDOM
MU
TIN
G
ENTER
PLAY
PLAY
SP A
SP B
FM MODE
SURROUND
SP SETUP
IPM
ACOUSTIC
CONTROL
LATE
NIGHT
AUDIO ANGLE SUBTITLE ZOOM
SW MODE T.TONE
CH SEL DISTANCE
PRGV
DISC
SLOW
STEP
RC-
504
M
MODE
–
+
PLAY
£
2/3/5/∞
ENTER
Before operating the
remote controller
Press MODE DVD.
DVD
Remote
controller
When a Menu Screen is Displayed
Menu screens are displayed for DVDs that have menu
screens or Video CDs that include Playback Control (PBC).
Select the item you want to view.
• When a DVD is loaded:
Select the item with the cursor buttons
(
2/3/5/∞) or the number buttons then
press ENTER.
• When a Video CD is loaded:
Use the number buttons to select the
item.
Notes
• The TV screen size is factory set to present the standard screen
format (4:3 aspect ratio). If you have a wide screen TV (16:9
aspect ratio), this setting can be changed to match your TV
screen size (page 51).
• Do not move the DVD Changer Receiver during playback. Doing
so may damage the disc.
• Use
0 on the DVD Changer Receiver to open and close the disc
tray. Do not touch the disc tray while it is moving. Doing so may
cause the DVD Changer Receiver to malfunction.
• Do not press down on the disc tray or put any objects other than
playable discs on the disc tray. Doing so may cause the DVD
Changer Receiver to malfunction.
• In many instances, a menu screen appears when playback of a
movie is complete. Prolonged display of an on-screen menu may
damage your television set, permanently etching that image onto
its screen. To avoid this, be sure to press
7 once the movie is
complete.
• Do not push on the disc tray to close it.
• Do not turn the disc carousel by hand.
• Do not place a new disc in the tray number of a currently playing
disc. This may result in damage to the disc and/or DVD Changer
Receiver.
Disc number indicator
Press
£/8 on the unit or PLAY £
on the remote controller.
• The disc tray closes, and playback
starts.
• If you press
0 to close the tray after
step 2, playback may automatically
start.
• MP3 only: It may take a few seconds for
the DVD Changer Receiver to locate
the track on the disc, depending on the
complexity of the file structure.
Press
0.
• The disc tray comes out.
• If the DVD Changer Receiver is in
standby mode when
0 button is
pressed, the DVD Changer Receiver
turns on and the disc tray opens. In this
case, it takes several seconds until the
disc tray opens.
Place a disc on the disc tray.
• To insert or remove another disc by
changing the tray position, press
DISC SKIP.
• Put the disc in the tray with the label
side facing up.
• There are two different disc sizes. Place
the disc in the correct guide on the disc
tray.