Using the timer functions, Setting the record timer, Before operating the remote controller – Onkyo DR-L50 User Manual
Page 46: Press ( 5 / ∞ ) to select the recording source, Press ( 5 / ∞ ) to set the recording end time, Press mode receiver, Press enter after selecting “rec, Select tv, fm or am then press enter, When the desired time is displayed, press enter, Display the desired time, then press enter
46
Using the Timer Functions
Setting the record timer
Be sure to preset FM and AM stations beforehand (page
37).
Caution
• If the current time is not set, you cannot preset the playback timer
make sure that the current time is set.
• Except for EVERY, all record timers record only once. When the
recording is finished, the timer is deactivated.
1
2
3
TIMER
«
4
«
«
«
«
«
TV/ SETUP
TV/ SETUP
TEST TONE
SP SETUP
CH SEL
DISTANCE
SW MODE
UP
TV MUTING
TV
POWER
TV
INPUT
T-D SETUP
IPM
DOWN
TV VOL
+
TV VOL -
9
TV CH -
TV CH
+
VOLUME
ON
STANDBY
INPUT SELECTOR
RECEIVER
COND.M
LAST M
FUNC.M
ANGLE
AUDIO
SUBTITLE
T-D/ ST
LATE NIGHT
TOP MENU
MENU
RETURN
DVD
SETUP
REPEAT
TUNING
TUNER PRESET
MD / CDR / TAPE
A-B
STEP/ SLOW
TIMER
CLEAR
PROGRAM
SEARCH
ACOUSTIC
CONTROL
SURROUND
RANDOM
--/---
MODE
SLEEP
MUTING
DIMMER
DISPLAY
CLOCK
MODE
+10
0
SHIFT
9
4
5
6
7
8
1
2
3
TIMER
2/3/5/∞
ENTER
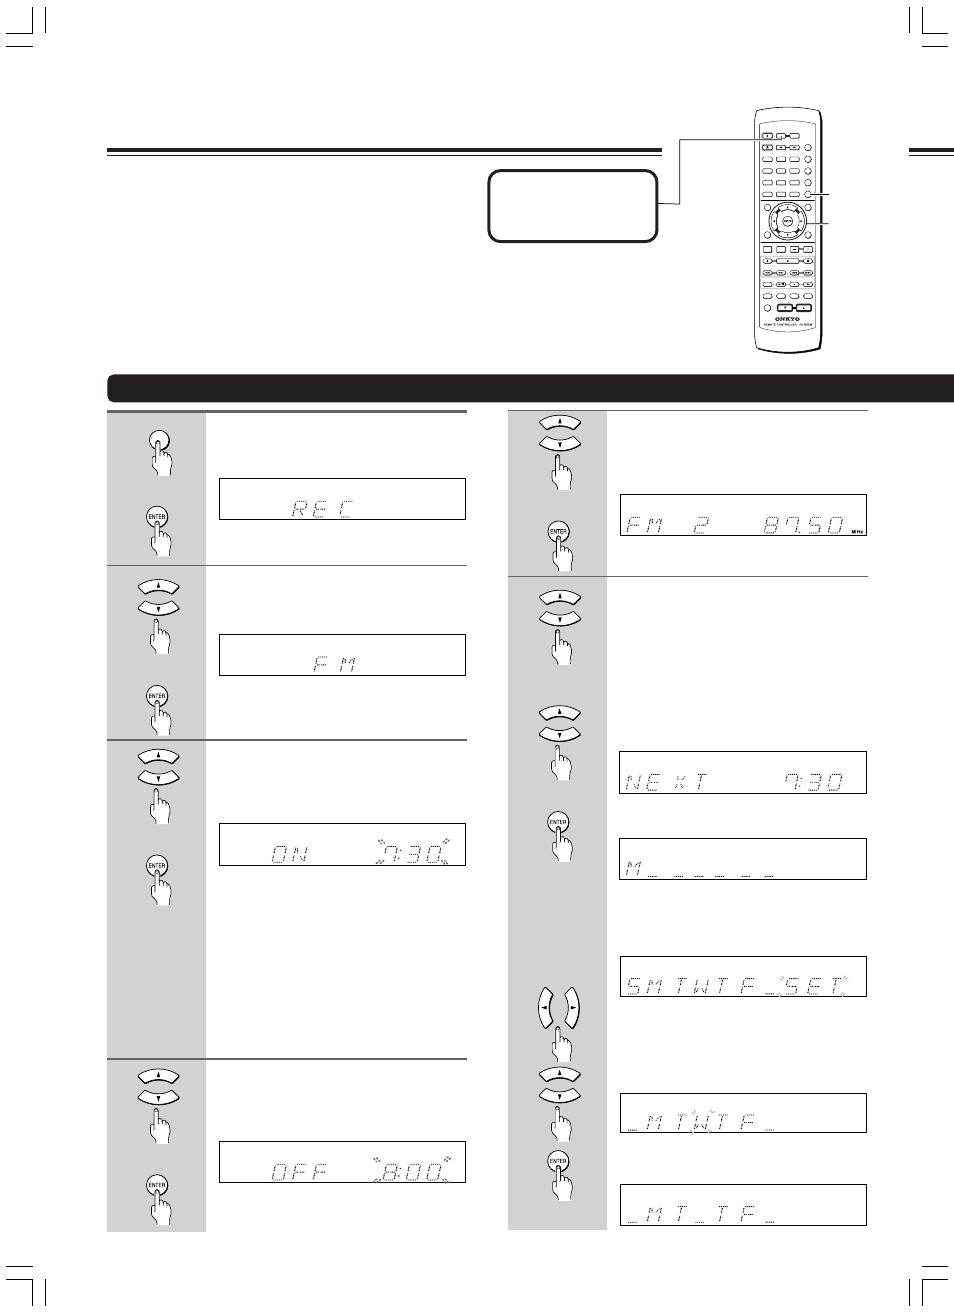
Before operating the
remote controller
Press MODE RECEIVER.
Repeatedly press TIMER on the
remote control to select REC.
Press ENTER after selecting “REC”.
Press (
5/∞) to select the recording
source.
Select TV, FM or AM then press ENTER.
Repeatedly press (
5/∞) to select
the recording start time.
When the desired time is displayed, press
ENTER.
Tip
• When setting the timer for MD recording, set
the recording to start one minute in ahead
since there are cases when recording will not
start for a few seconds.
• When set to the desired playback start time
(ON) is set, playback is automatically set to
stop (OFF) in an hour.
• When using the 24 hour display, you can use
the number buttons to set the time.
Press (
5/∞) to set the recording
end time.
Display the desired time, then press
ENTER.
Press (
5/∞) to select the desired
radio station.
Display the desired radio station, then
press ENTER.
Press the (
5/∞) cursor buttons to
select ONCE or EVERY.
Caution
Setting the recording timer to ONCE will only
record one time.
ONCE recording:
Press (
5/∞) to select a day (or NEXT),
then press ENTER.
(Displays when your next set time)
OR
(Selects the day of week)
At first, only the current day blinks.
EVERY recording:
Set the day.
The TIMER indicator at the top of the display
lights up when the respective timer is set.
To change the day of week setting:
Press (
2/3) so that the desired day blinks.
Presses (
5/∞) to select/deselect the day.
Press ENTER to confirm the setting.
5
6