Selecting preset stations, Receiving rds (european models only), Theater-dimensional progressive scan ipm – Onkyo DR-L50 User Manual
Page 39: See page 48, Erase” appears in the display, The selected preset channel will be erased
39
1
2
3
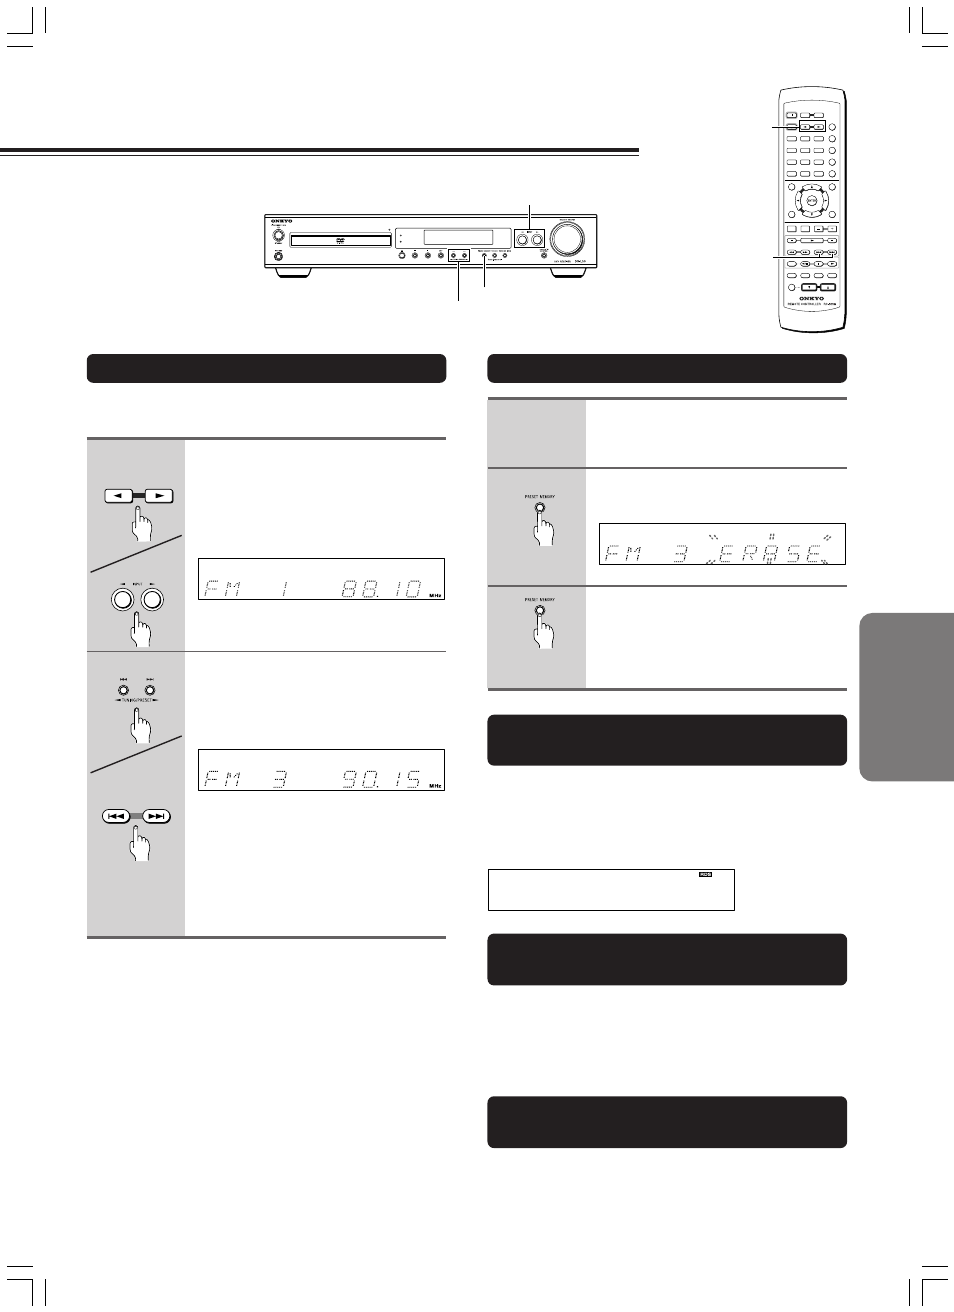
Erasing a Preset Station
Enjoying the Sound Effects While
Listening to Radio Programs
See page 48.
Various Functions While Listening to
Radio Programs
To use the following functions, see page 42.
• Adjusting the Volume
• Muting the Sound
• Listening Through Headphones
• Controlling the Brightness of the display on the DVD Receiver
Select the preset channel you wish
to erase (see steps in the left
column of this page).
Press PRESET MEMORY.
“ERASE” appears in the display.
While “ERASE” is flashed (for
about 8 seconds), press PRESET
MEMORY again.
The selected preset channel will be
erased.
Unit only
1
Selecting Preset Stations
Before selecting preset stations, you need to preset the radio
stations. See “Presetting Radio Stations” on page 37.
Remote
controller
Unit
Remote
controller
Receiving RDS (European models
only)
When an RDS (Radio Data System) station broadcasting PS
(Program Service Name) information is received, the RDS
indicator lights up and the name of the station is displayed.
(RDS reception is only available in areas where RDS
broadcasts are available.)
INPUT SELECTOR
TUNER PRESET
Theater-Dimensional
PROGRESSIVE SCAN
IPM
TUNING/PRESET
2/3
PRESET MEMORY
INPUT
2/3
TV/ SETUP
TV/ SETUP
TEST TONE
SP SETUP
CH SEL
DISTANCE
SW MODE
UP
TV MUTING
TV
POWER
TV
INPUT
T-D SETUP
IPM
DOWN
TV VOL
+
TV VOL -
9
TV CH -
TV CH
+
VOLUME
ON
STANDBY
INPUT SELECTOR
RECEIVER
COND.M
LAST M
FUNC.M
ANGLE
AUDIO
SUBTITLE
T-D/ ST
LATE NIGHT
TOP MENU
MENU
RETURN
DVD
SETUP
REPEAT
TUNING
TUNER PRESET
MD / CDR / TAPE
A-B
STEP/ SLOW
TIMER
CLEAR
PROGRAM
SEARCH
ACOUSTIC
CONTROL
SURROUND
RANDOM
--/---
MODE
SLEEP
MUTING
DIMMER
DISPLAY
CLOCK
MODE
+10
0
SHIFT
9
4
5
6
7
8
1
2
3
INPUT SELECTOR
2/3
TUNER PRESET
4/¢
Press INPUT SELECTOR
2/3 on
the remote controller or INPUT
2/3
on the unit to switch the input
source to the FM or AM.
The band selected in this step will not
affect the next step.
Press TUNING/PRESET
2/3 on the
unit or TUNER PRESET
4/¢ on
the remote controller repeatedly to
select the preset number of the
desired radio station.
Note
If you press TUNING/PRESET
2/3 on
the unit or TUNER/PRESET
4/¢ on
the remote control for more than 0.5
seconds, the unit enters the manual
tuning mode. See step 2 in “Tuning
Manually” on page 37.
2
Unit