Front & rear panels —continued, Rear panel – Onkyo TX-8011 User Manual
Page 8
8
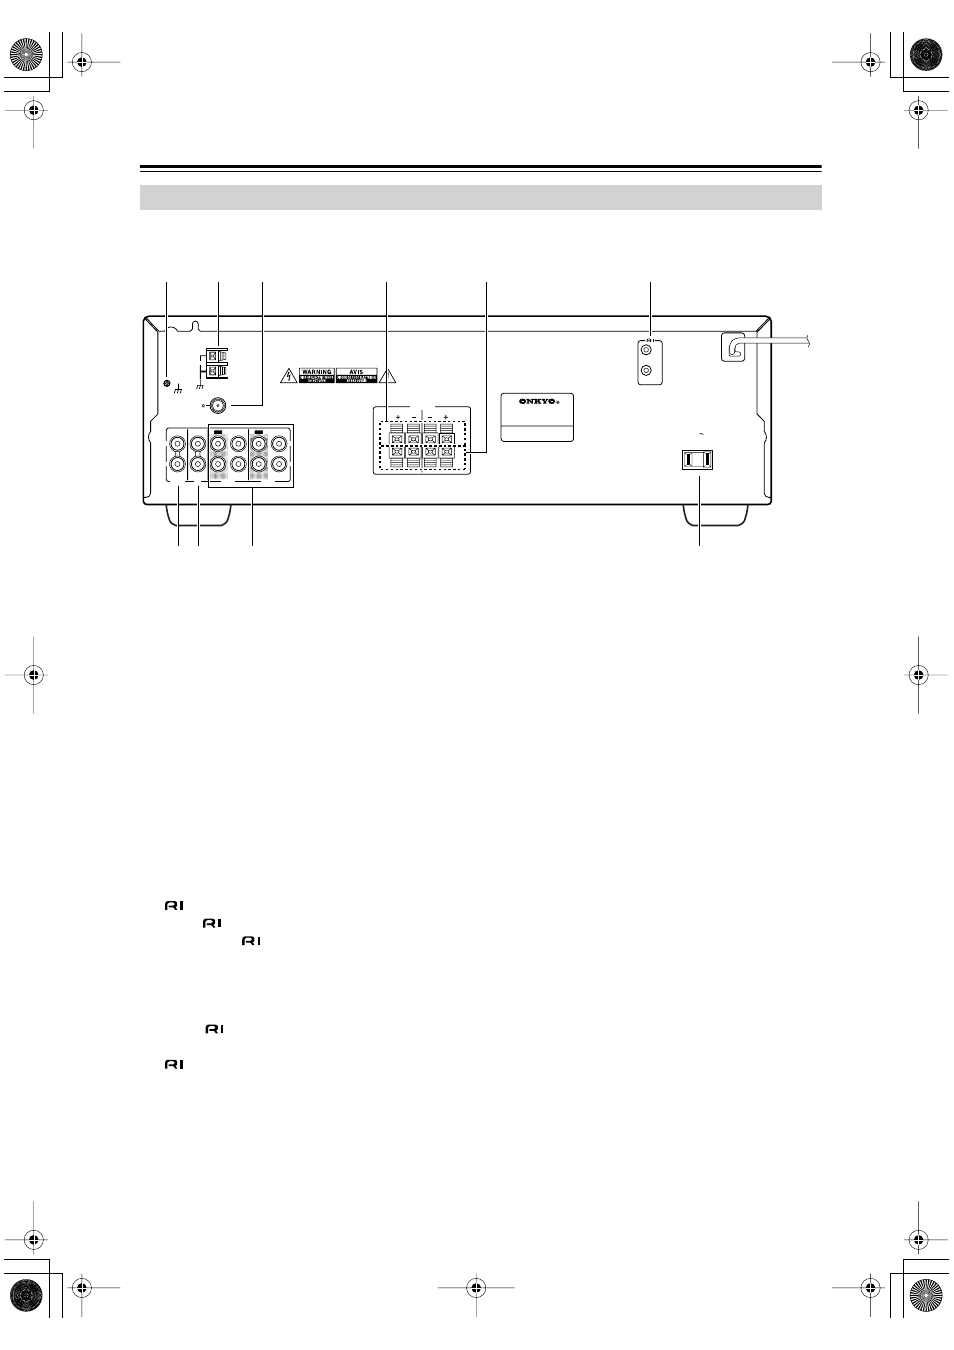
Front & Rear Panels
—Continued
A
Grounding screw (14)
This screw is for connecting a turntable’s ground
wire.
B
AM ANTENNA (12, 13)
These push terminals are for connecting an AM
antenna.
C
FM ANTENNA (12, 13)
This socket is for connecting an FM antenna.
D
SPEAKERS A (11)
These lever terminals are for connecting speaker set
A.
E
SPEAKERS B (11)
These lever terminals are for connecting speaker set
B.
F
(15)
These
(Remote Interactive) jacks can be con-
nected to the
jacks on other Onkyo CD player
and cassette recorder. The TX-8011’s remote con-
troller can then be used to control those compo-
nents.
Note:
To use
, you must make an analog audio connec-
tion between the TX-8011 and the other component.
can only be used with Onkyo components.
G
PHONO IN (14)
These jacks can be used to connect a turntable with
a moving-magnet cartridge.
H
CD IN (14)
These jacks can be used to connect a CD player
with an analog output.
I
TAPE 1, 2 IN/OUT (14)
This analog audio input and output can be used to
connect a cassette recorder, CD recorder, or other
recorder with an analog input and output. Alterna-
tively, they could be used to connect a graphic
equalizer.
J
AC OUTLET (15)
This switched AC outlet can be used to supply
power to another component.
Rear Panel
ANTENNA
AM
GND
FM 75
TAPE 1
TAPE 2
CD
L
R
L
R
IN
IN
OUT
OUT
IN
IN
PHONO
SPEAKERS
A
B
A
B
L
R
REMOTE
CONTROL
AC OUTLET
AC 120V
60Hz
SWITCHED
120W 1A MAX.
2
1
3
6
J
4
5
8
7
9