Assembly (continued) – RIDGID WL1200LS1 User Manual
Page 16
16
Assembly (continued)
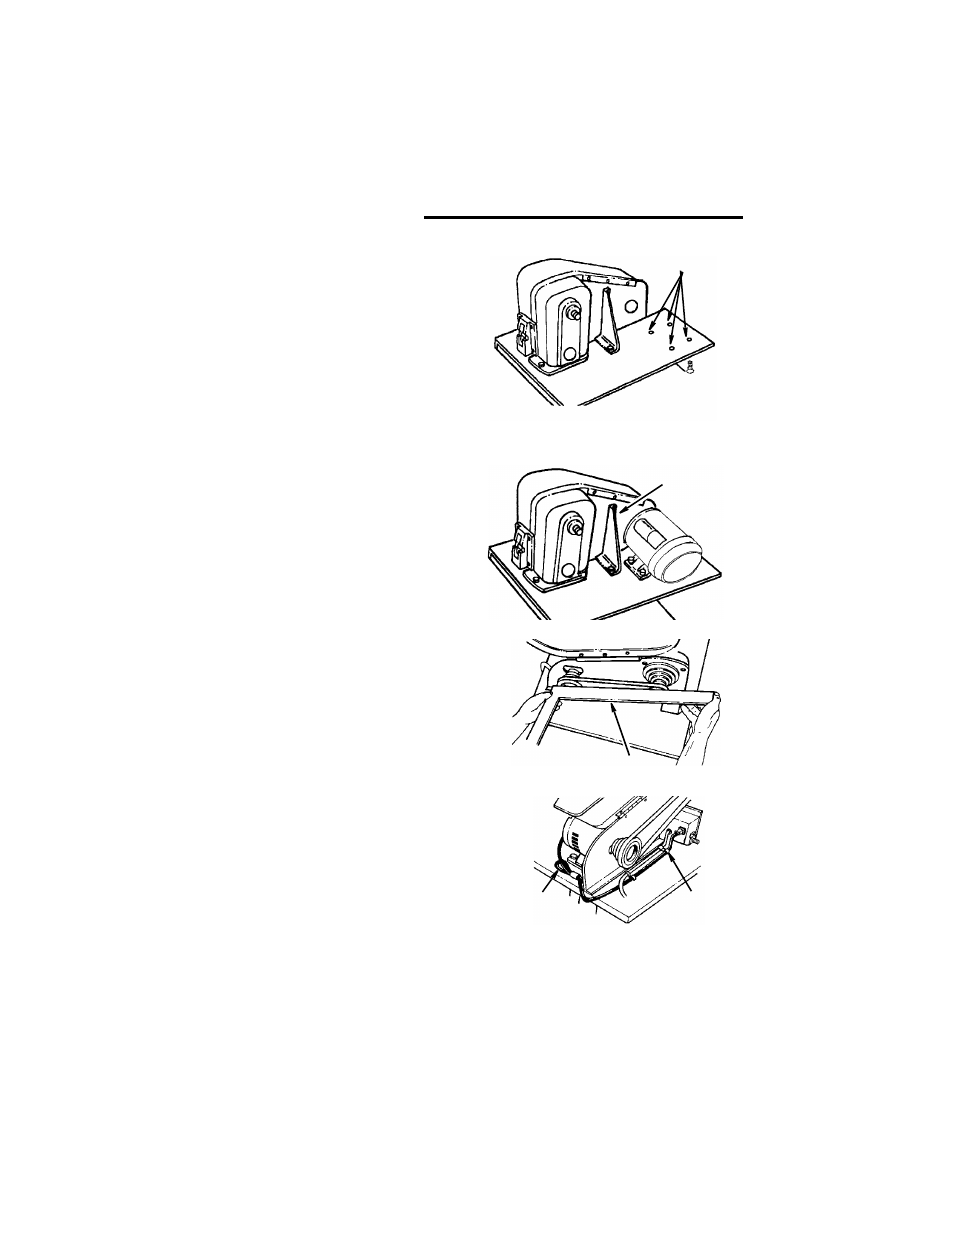
3. Locate the four holes Labeled H on the
plate support.
4. Place the motor over these holes with
the motor shaft extending through the
belt guard plate. Secure in place with
carriage bolts, washers, lockwashers
and nuts.
5. Plug motor cord into outlet on back of
switch box. Do Not plug motor cord into
power source outlet.
6. Route the motor cord and power cord
along side the headstock as shown.
Secure the motor cord and power cord
with two cord clamps and an M4 x 0.7-6
pan head screw into the tapped holes
Labeled J in the motor mounting plate.
7. Place the motor pulley on the motor
shaft so that the small diameter is
approximately 1/16" away from the
motor. Tighten the setscrew with the
4mm Hex “L” wrench securely against
the flat spot on the motor shaft.
8. Place the belt on the pulleys and slide
the motor toward the rear of workbench
until all the slack is removed from the
belt. Tighten only two of the motor
mounting bolts at this time.
NOTE: 1/2 inch deflection of belt under
moderate pressure applied between
the two pulleys is adequate tension.
9. Place a straightedge such as a piece of
wood, metal or framing square across
the pulleys to see if they are in line with
each other. If they are, tighten the other
two motor mounting bolts. If they are
not in line, loosen the two motor bolts
and move the motor sideways until pul-
leys are in line. Tighten the bolts.
NOTE: Changing speeds is accom-
plished by repositioning the V-Belt on
the pulleys (see Changing Speeds”
section). There needs to be sufficient
slack in the V-belt to allow for this.
Holes for Mounting
Motor (H)
Install Carriage Bolts
from the Bottom Up
Plate Bracket
Straightedge
Motor
Cord
Clamps
Cord