3. image, Unit, High voltage unit – NEC 2060 User Manual
Page 47
n
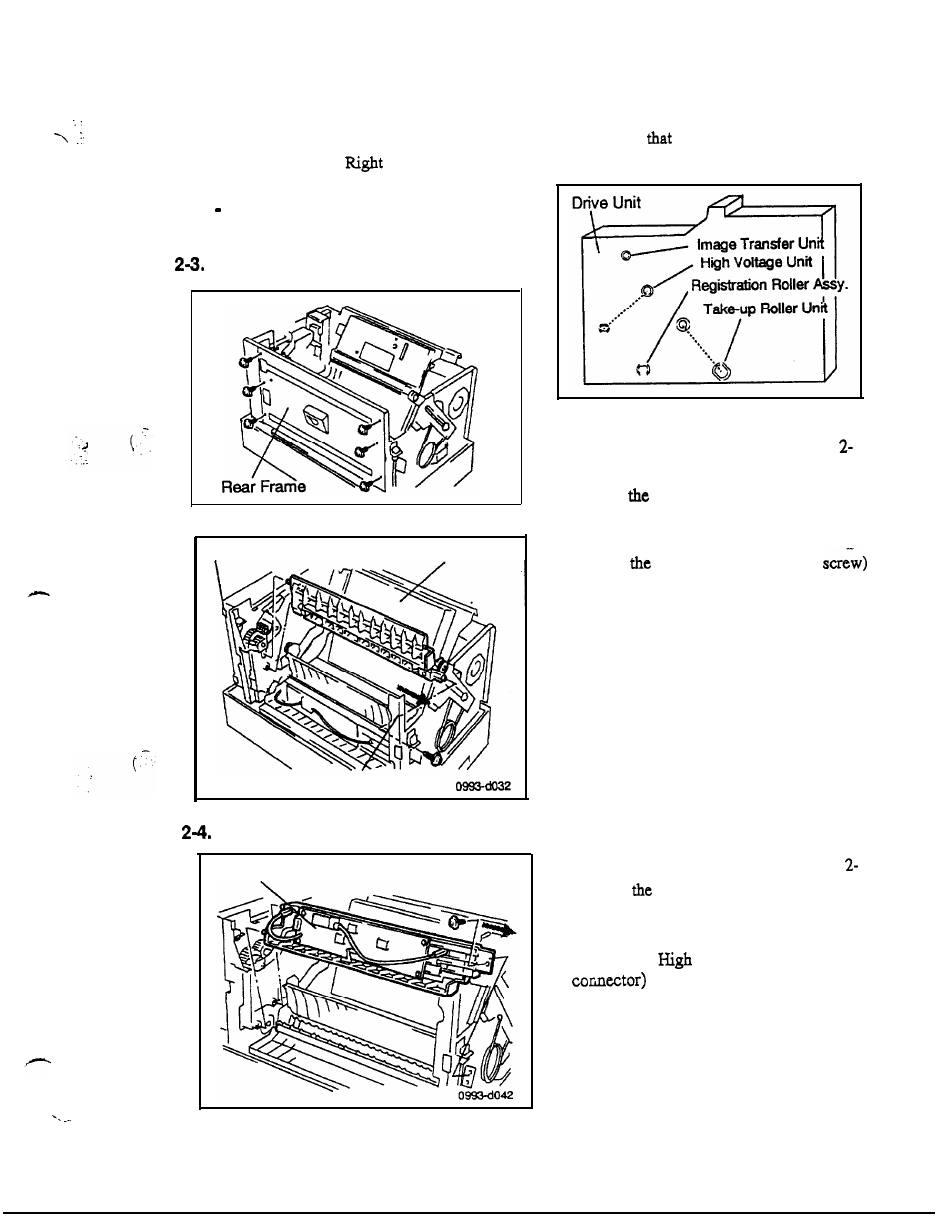
Note: When disassembling/ reassembling the Transfer Unit, High Voltage Unit, Registration
.
Roller Assy. and Paper Take-up Roller Unit, please note
each has a peg that fits into
a hole in the
Frame and a screw that secures the unit in the Left Frame.
Release each unit from the Drive Unit
when removing the unit.
Image Transfer Unit
Inter-face Plate Image Transfer Unit
Left Frame
High Voltage Unit
High Voltage Unit
1. Remove the Outer Cover. (Refer to sect. 1)
2.
Remove the Fusing Unit. (Refer to sect. 2-2)
3. Remove
Rear Frame. (6 screws, 1
connector)
4. Remove
Image Transfer Unit. (1
Note: With the Left Frame open, release
the Transfer Unit. Pulling the Transfer
Unit in the direction indicated by
the
arrow, remove it.
Note: Don’t touch the surface of the
Transfer Roller with the hand.
1. Remove the Outer Cover. (Refer to sect. 1)
2.
Remove
Fusing Unit. (Refer to sect. 2-2)
3. Remove the Transfer Unit. (Refer to sect. 2-
3)
4.
Remove the
Voltage Unit. (1 screw, 1
Note: Pulling the High Voltage Unit in the
direction indicated by the arrow,
remove it.
D-6