Network setup, Easylink setup – Philips BDP9600 User Manual
Page 22
23
Tip
The test tone is emitted from the speaker while adjusting
•
the volume level.
Allow 1ms setting for every 30cm distance between the
•
speaker and the listening position.
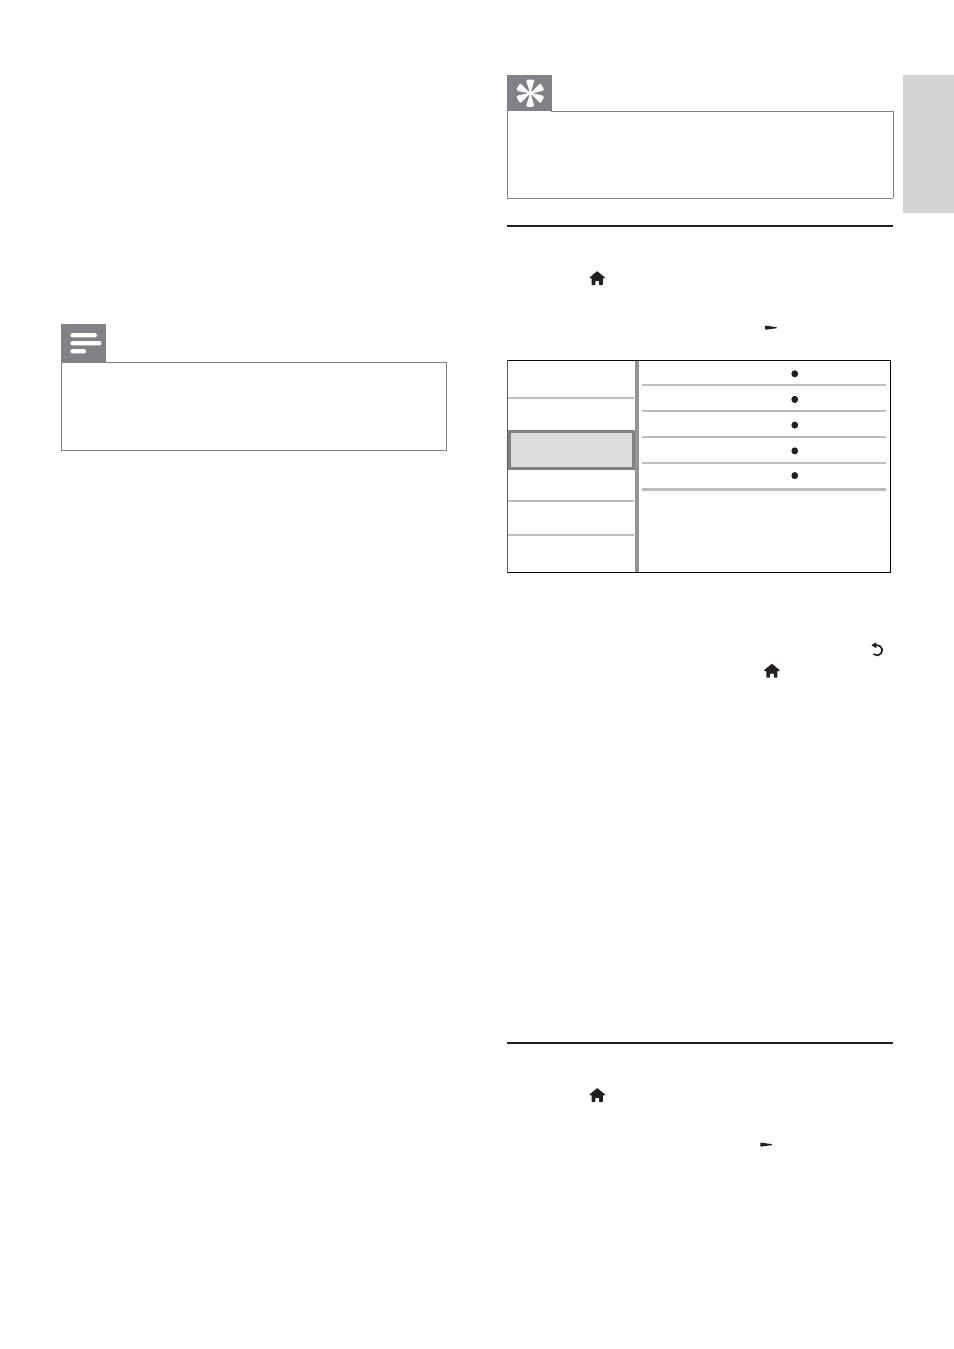
Network setup
1
Press .
2
Select
[Setup], and press OK.
3
Select
[Network], and press
.
4
Select an option, and press OK.
5
Select a setting, and press OK.
To return to the previous menu, press
•
.
To exit the menu, press
•
.
[Network Installation]
Install the network connection.
[View Network Settings]
Display the information for the current network
status and the MAC address of this player.
[View Wireless Settings]
Display the information for the current Wi-Fi status.
[Net TV User Location]
Select the location of the Philips server which
provides Net TV services.
If your country location is not in the list, select
[International].
[Clear Net TV Memory]
Clear the cookies, history, data you input for Net
TV which are stored in the cache area of the web
browser.
EasyLink setup
1
Press .
2
Select
[Setup], and press OK.
3
Select
[EasyLink], and press
.
View Network Settings
Network Installation
View Wireless Settings
Net TV User Location
Clear Net TV Memory
Video
Advanced
Audio
Network
Preference
EasyLink
[Digital Audio]
Select an audio format for the sound output from
the DIGITAL OUT jack (coaxial/optical).
•
[Auto] - Detect and select the best supported
audio format automatically.
•
[PCM] - The audio device does not support
multi-channel format. Audio is downmixed to
two-channel sound.
•
[Bitstream] - Select the original audio to
experience Dolby or DTS audio (BD-video
special sound effect is disabled).
Note
Ensure that the audio format is supported by the disc
•
and the connected audio device (amplifier/receiver).
When
•
[Bitstream] is selected, interactive audio like
button sound is muted.
[PCM Downsampling]
Set the sampling rate for PCM audio output from
the DIGITAL OUT jack (coaxial/optical).
•
[On] - PCM audio is down-sampled at 48kHz.
•
[Off] - For BD or DVD recorded in LPCM
without copyright protection, two-channel
audio signals up to 96 kHz are output as LPCM
signals with no conversion.
[Speaker Setup]
Optimize the surround output for the connected
speaker system.
•
[Speaker Setup] - Activate the test tone for
the speakers and the subwoofer.
•
[Speaker Distance] - Set the delay time for
the speakers and the subwoofer if they are
placed closer to the listening position, so that
the sound output from all speakers reach the
listening position at the same time.
•
[Speaker Volume] - Set the volume level of
the speakes and the subwoofer to get the ideal
audio balance.
•
[Speaker Size]
Set the speaker size for the speakers and
•
the subwoofer.
Select
•
[Large] size for speakers that can
produce low frequency signal below
120 Hz.
Select
•
[Off] if there is no speaker
connected.
If the front speakers are set to
•
[Small],
the subwoofer setting is [On] by default.
If the subwoofer is set to
•
[Off], the front
speakers settings are [Large] by default.
English
EN