Adjusting the blanking, Adjustment procedure – Panasonic PT-D9610U User Manual
Page 52
52
Adjusting the blanking
Adjustment procedure
Press the MENU button. ... The MENU screen will be displayed.
Press the UP (
) and DOWN (
) arrow buttons to select POSITION.
Press the ENTER button. ... The POSITION screen will be displayed.
Press the UP (
) and DOWN (
) arrow buttons to select BLK.
Press the ENTER button. ... The BLK screen will be displayed.
Press the control level buttons (
+ and − ) to select the desired BLK mode from
those indicated below.
UPPER, LOWER, LEFT, RIGHT
Press the UP (
) and DOWN (
) arrow buttons to adjust UPPER and LOWER,
or Press the LEFT (
) and RIGHT(
) arrow buttons to adjust LEFT and RIGHT.
• The adjustment values will change from 0 (min.) to 511 (max.).
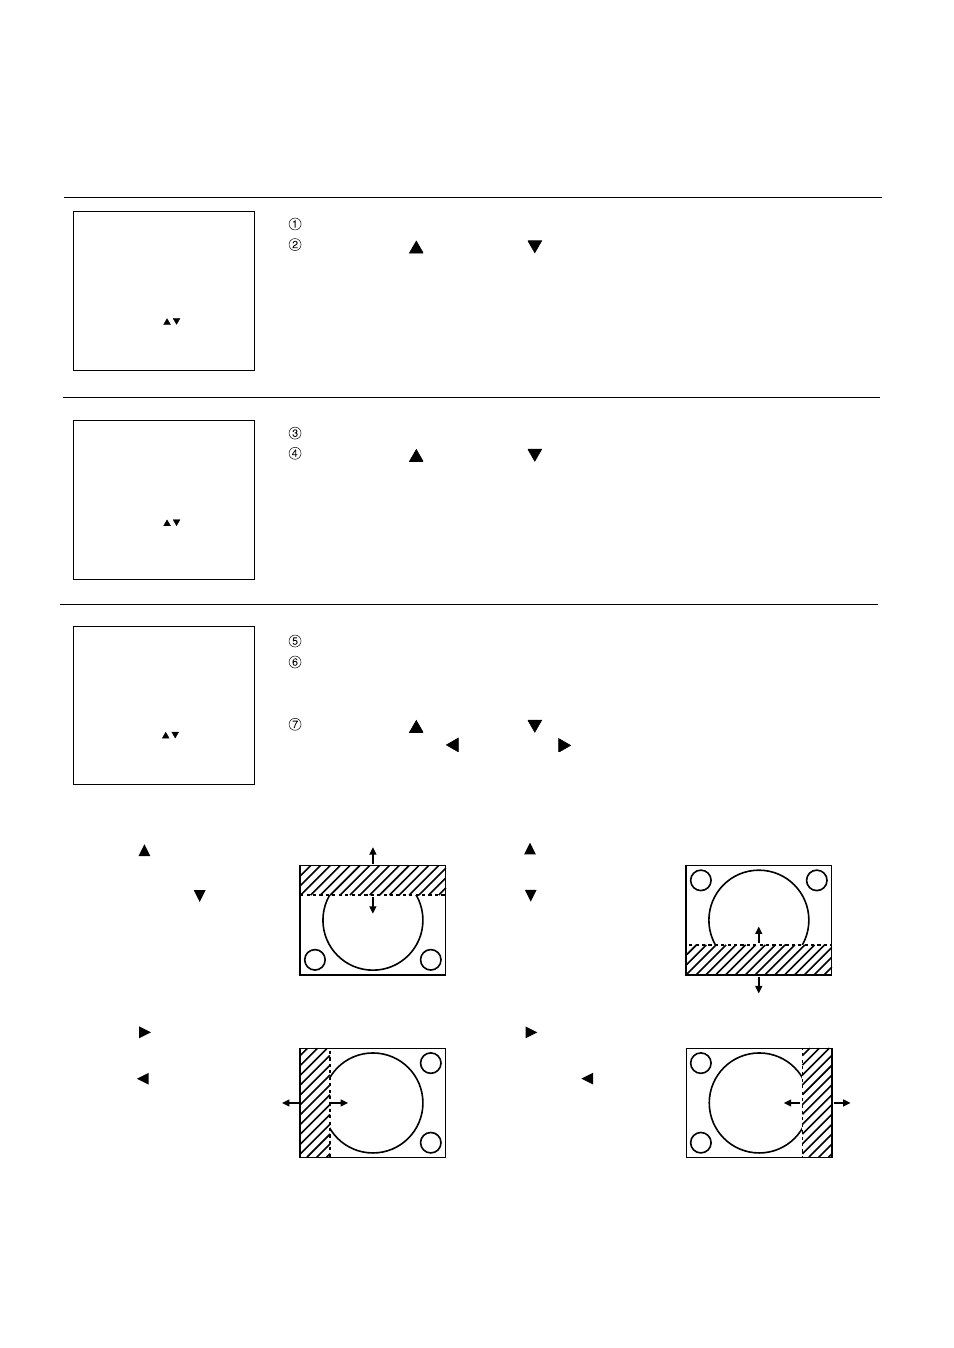
If picture noise appears at the perimeter of the screen or a picture extends off the screen a little, adjust the blanking
to fine-tune the screen.
If the
button is pressed,
the blanking portion moves
upward. If the
button is
pressed, the blanking portion
moves downward.
If the
button is pressed,
the picture moves upward.
If the
button is pressed,
the blanking portion moves
downward
If the
button is pressed,
the picture moves to the right.
If the
button is pressed,
the blanking portion moves
to the left.
If the
button is pressed,
the blanking portion moves to
the right. If the
button is
pressed, the blanking
portion moves to the left.
When adjusting the left blanking
When adjusting the lower blanking
When adjusting the right blanking
When adjusting the upper blanking