Installation connecting to an external monitor, Mac/pc – Philips LC4331 User Manual
Page 14
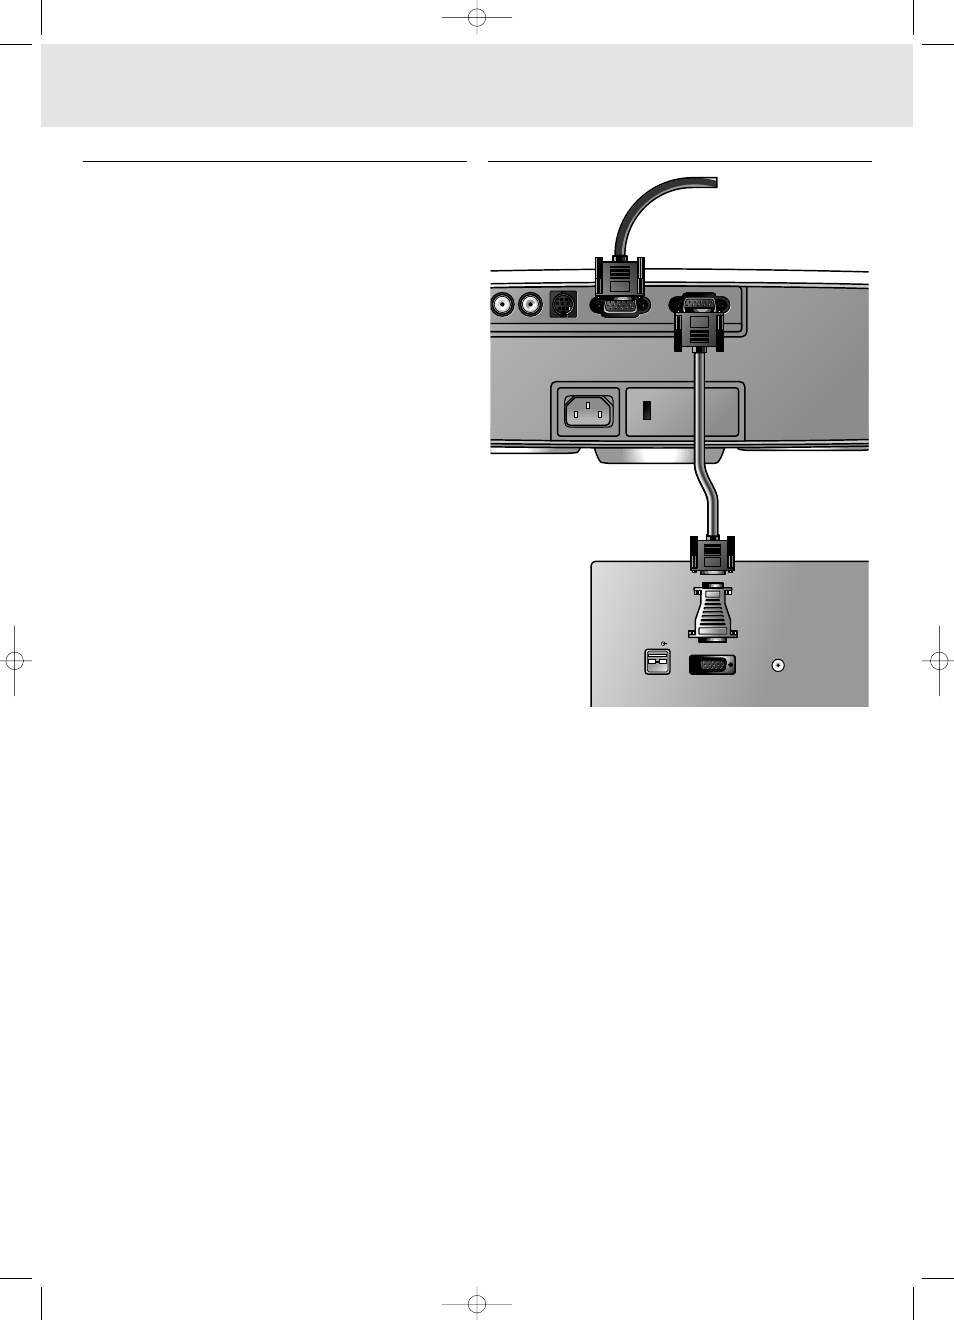
Connecting to an external monitor
Note: The characters in brackets (a) correspond to characters in
fig. 4 of ‘Controls and connections’.
Caution!
Always switch off PC, external monitor and projector before
making any connections.
1. Connect the Data out terminal of the computer to the Data in
terminal (g) of the projector and secure the plugs by
tightening the thumb screws.
For this, use the VGA/USB cable (1) supplied.
When connecting the projector to a Macintosh computer use
the VGA/MAC adaptor (optional).
2. Connect the Data out terminal (f) of the projector to the
external monitor and secure the plugs by tightening the
thumb screws.
For this, use an optional monitor cable.
To obtain the audio signal on the monitor instead of on the
projector:
•
Connect the Audio in sockets of the monitor to the Audio out
socket (a) of the projector.
•
Insert the white plug into the L socket and the red plug into
the R socket.
Some monitors have a single Audio in socket for which a
different audio connection cable with a 3.5 mm mini jack is
required.
Notes:
– One external monitor or projector can be connected at a time.
– For further details on the operation with
On Screen Displays see chapter ‘8 Operation’.
o in R
Video
S-Video
Data in
Data out
o in L
Video
S-Video
Data out
Data in
Audio out
Data out
Audio out
Data out
Mac/PC
USB
USB
Projector
Monitor cable
7. Installation
Connecting to an external monitor
14
(optional)
(optional)
(g)
(1)
XP Hopper SV30 Eng.* 05-09-2000 11:56 Pagina 14