Premier Mounts PP-FCMA-QL User Manual
Page 9
Installation
Instructions
Page
9
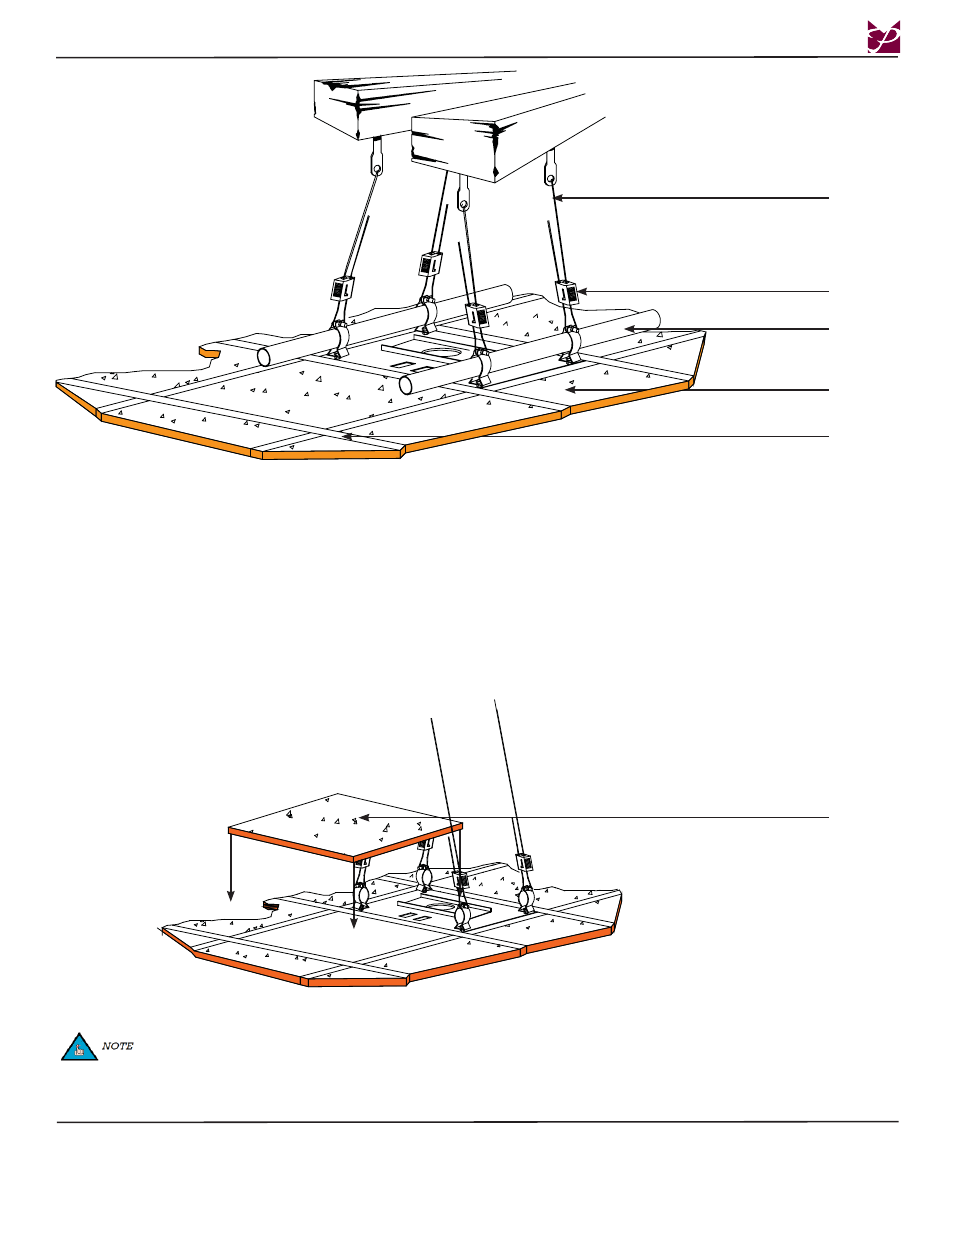
Braided
Cable
T-Bar
Frame
Ceiling
Tile
Cable
Lock
PP-FCMA-QL
EMT
Conduit
Step 1. Once the braided cables have been attached to the upper mounting structure (wood joist, concrete or ceiling truss), it is now
time to attach the braided cable to the PP-FCMA-QL.
Step 2. Thread each braided cable through the Quick Lock (see previous page).
Step 3.
Loop the braided cables through the space between the EMT conduit pipe and the top of the pipe clamp (see previous page).
Step 4. When adjusting the tension of the weight-bearing side of the Quick Lock, the cable must be pulled through the Quick Lock until
the desired tension is attained. Once attained, pull the braided cable through the other side of the Quick Lock
(see previous page).
Step 5. Once the tension has been adjusted, be sure that there is at least 6” of excess braided cable on the non-weight bearing side of the
Quick
Lock.
Step 6. Use cable cutters to remove any remaining braided cable (optional).
Step 7. Reinstall the ceiling tile.
If you chose to use the optional EMT conduit pipe, the ceiling tiles where the EMT conduit pipe crosses over must be
installed prior to installing the EMT conduit pipe.
Ceiling
Tile