Premier Mounts PP-FCMA-QL User Manual
Page 6
Page 6
Installation Instructions
The dual knock out plates for the electrical box
must be removed prior to installation.
PP-FCMA-QL
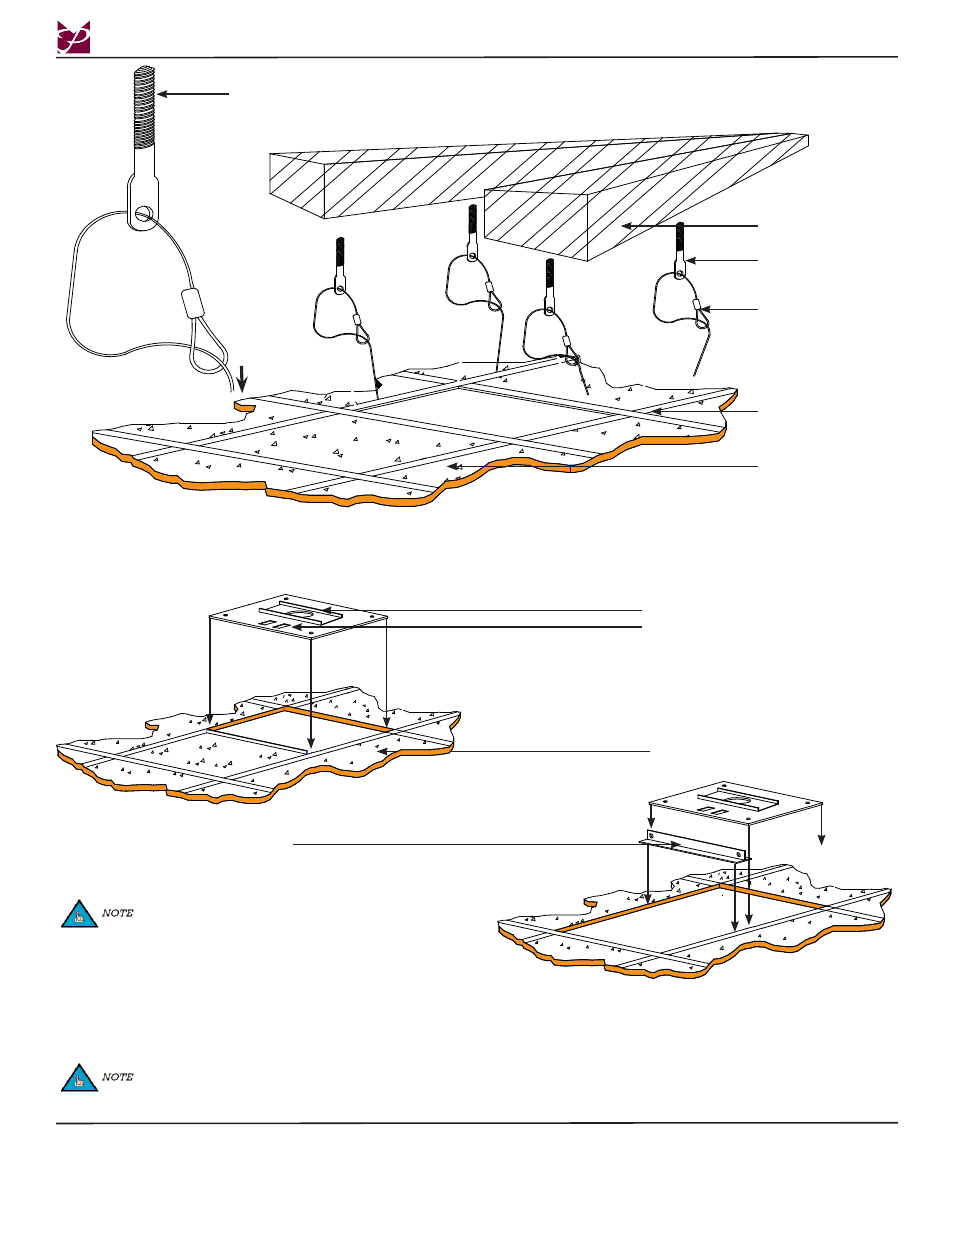
Step 1. Attach the braided cable, using the directions on page 5, in the appropriate manner for your mounting configuration.
Step 2. Let the four (4) strands of braided cable hang down off to one side of the opening in the ceiling.
Permanent Mounting
Structure
Eye Lag Screw
Braided
Cable
T-bar Frame
Ceiling Tile
Step 1. Install the PP-FCMA-QL plate securely onto the T-bar framework with the mounting studs face down (according to your
installation
configuration).
Ceiling
Mounting Studs on
the Bottom
24” ‘T’ Bar
(Commercially
Available)
Dual Knock Outs
In the event that you are using the PP-FCMA-QL in an opening that is 24” x 48”, a 24” piece of T-bar (commercially avail-
able) must be used to support the mount and ceiling tile. The T-bar (commercially available) will run from side to side
and help support the PP-FCMA-QL and 24” x 24” replacement ceiling tile (commercially available).
PP-FCMA-QL Installation
Eye Lag Screw
24”x24” Ceiling Tile
24”x48” Ceiling Tile