Premier Mounts PP-FCMA-QL User Manual
Page 7
Installation
Instructions
Page
7
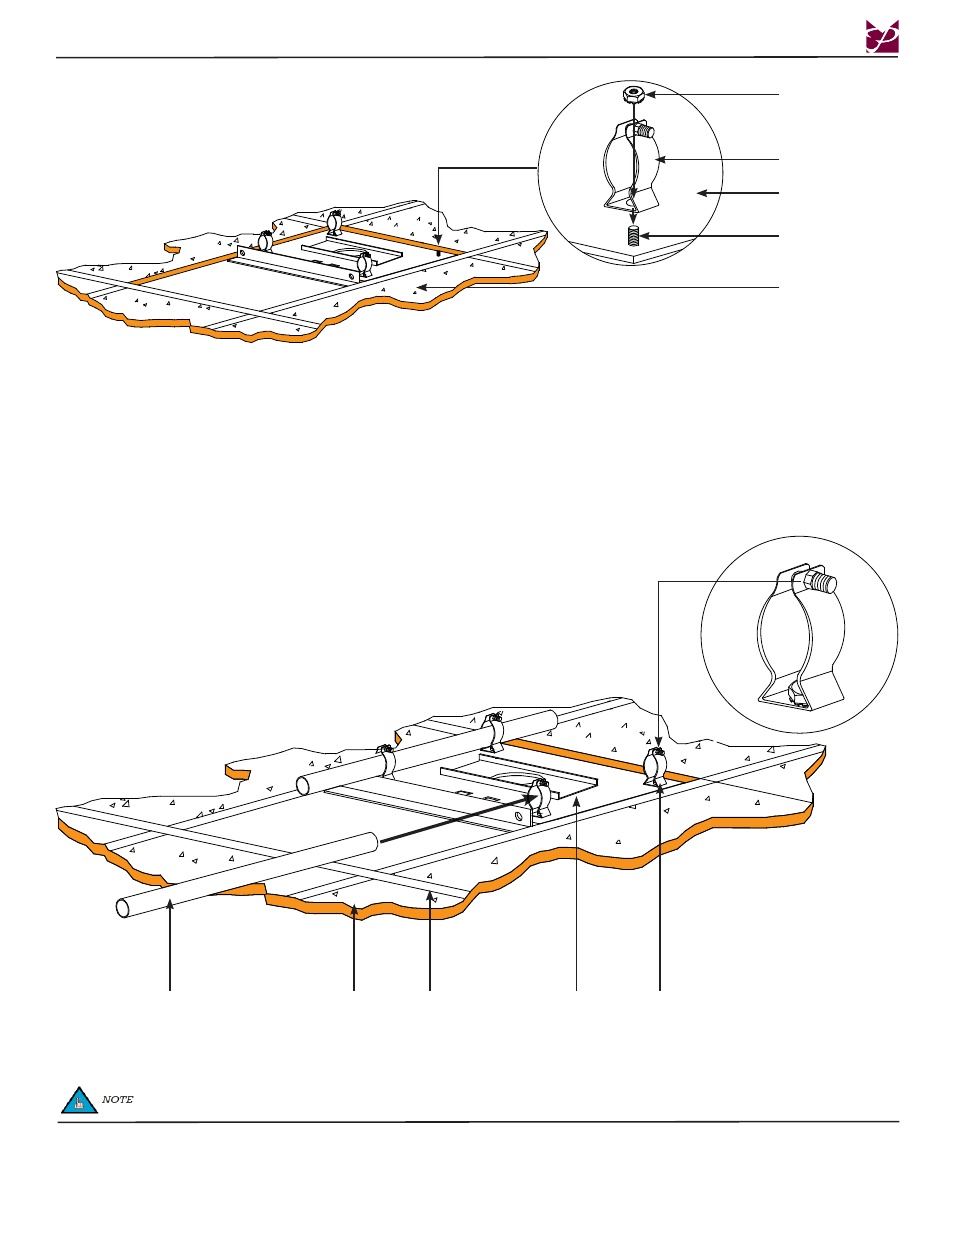
Step 1. Locate the pre-installed step bolts that are on the PP-FCMA-QL.
Step 2. Remove the four (4) black rubber caps from the step bolts.
Step 3. Lower the pipe clamp onto the step bolt.
Step 4. Secure the pipe clamp to the PP-FCMA-QL using a 1/4” KEP nut (see above).
Step 5. Tighten all hardware with a wrench (commercially available).
Step 6. Re-attach the four (4) black rubber caps onto the step bolts.
Step 7. Repeat steps 1 through 3 for the remaining pipe clamp installation.
Attaching the Pipe Clamps
PP-FCMA-QL
Step 1. For added security, slide two (2) 3/4” EMT conduit pipe
(commercially available) through the pipe clamps.
Step 2. Once the EMT conduit pipe
(commercially available) is installed, use a screwdriver to tighten the four (4) M8 x 20mm
Phillips head screws and four (4) M8 nuts.
1/4” KEP Nut
Pipe Clamp
Ceiling Tile
Step Bolt
PP-FCMA-QL
Attaching the EMT Conduit Pipe (Optional)
Pipe
Ceiling
T-Bar
PP-FCMA-QL
Pipe Clamp
M8 x 20mm Screw
and M8 Nut
The EMT conduit pipe must cross over two sections of the T-bar framework on both sides of the pipe clamps.