Installing the t1 nam – Paradyne Single T1 Network Access Module (NAM) 9161-A2-GN10-40 User Manual
Page 7
7
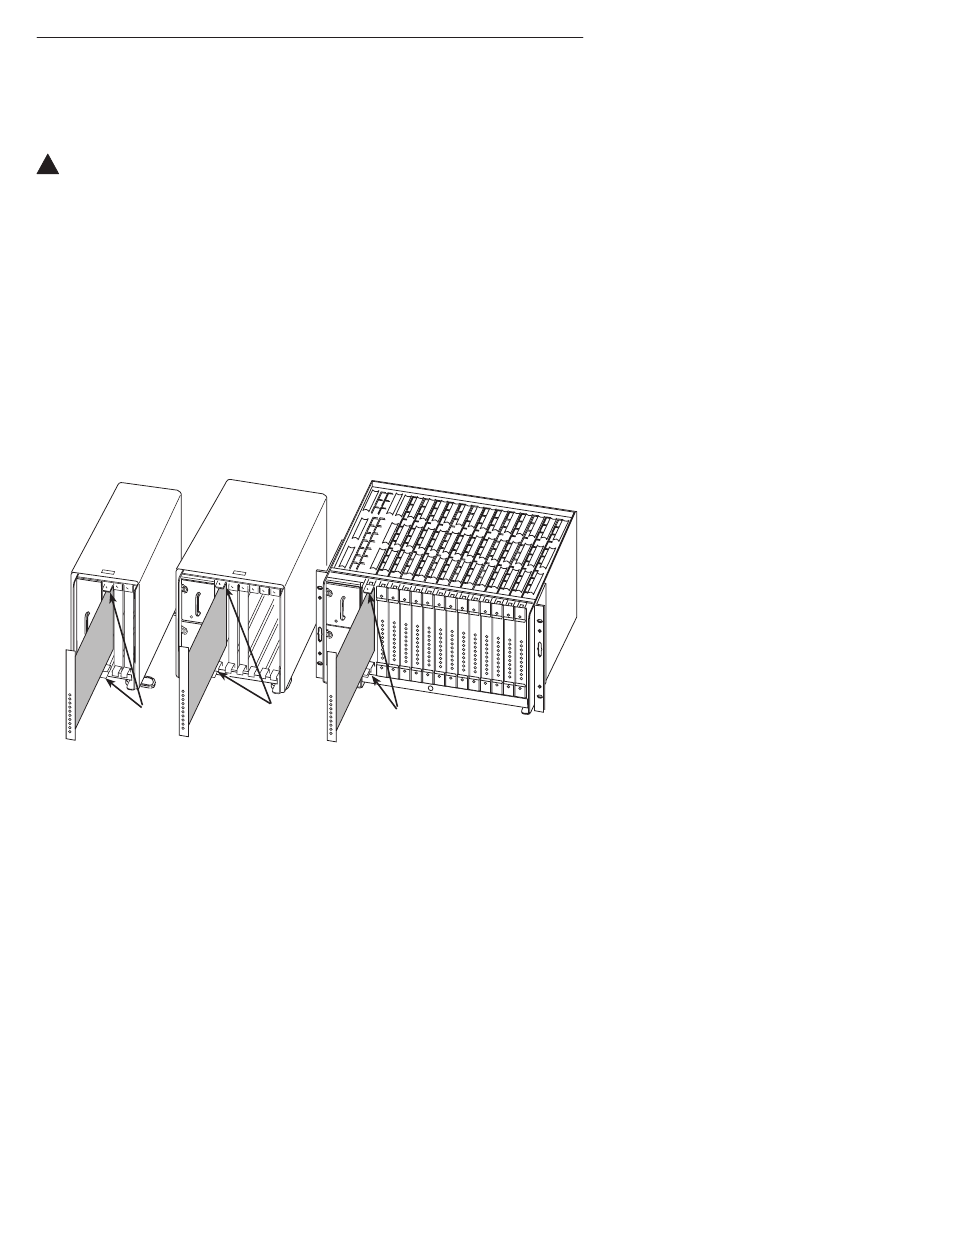
Installing the T1 NAM
In both the 2- and the 5-slot housings, the NAM is always installed in Slot 01. The NAM
can be installed in any slot in the access carrier.
!
WARNING:
Do NOT remove any jumpers located on the battery. To do so can cause
non-volatile memory loss. Should a jumper become separated from the
battery, contact your service representative immediately.
CAUTION:
Be sure that you install the NAM in the correct slot so that it mates with its
matching I/O card. Otherwise, you could damage your card.
1. Remove the housing’s bezel, if applicable. See the housing installation instructions
for information.
2. Remove the NAM from the shipping box. Handle only by the top and bottom edges
to avoid damaging the card.
3. At the front of the housing, align the NAM with the upper and lower tracks of
the appropriate slot.
2-Slot
Ejector
Latches
98-15750-01
Ejector
Latches
Front View
5-Slot
Ejector
Latches
Access Carrier
4. Slide into the tracks until the NAM seats with the midplane connectors. Be careful
not to force the card or bend any pins.
5. Close both the upper and lower ejector latches on the housing to lock in place,
then tighten the captive screws on the ejector latches.
6. Replace the housing’s bezel, if applicable.