Setting and fastening the window (continued) – Pella 812W0100 User Manual
Page 6
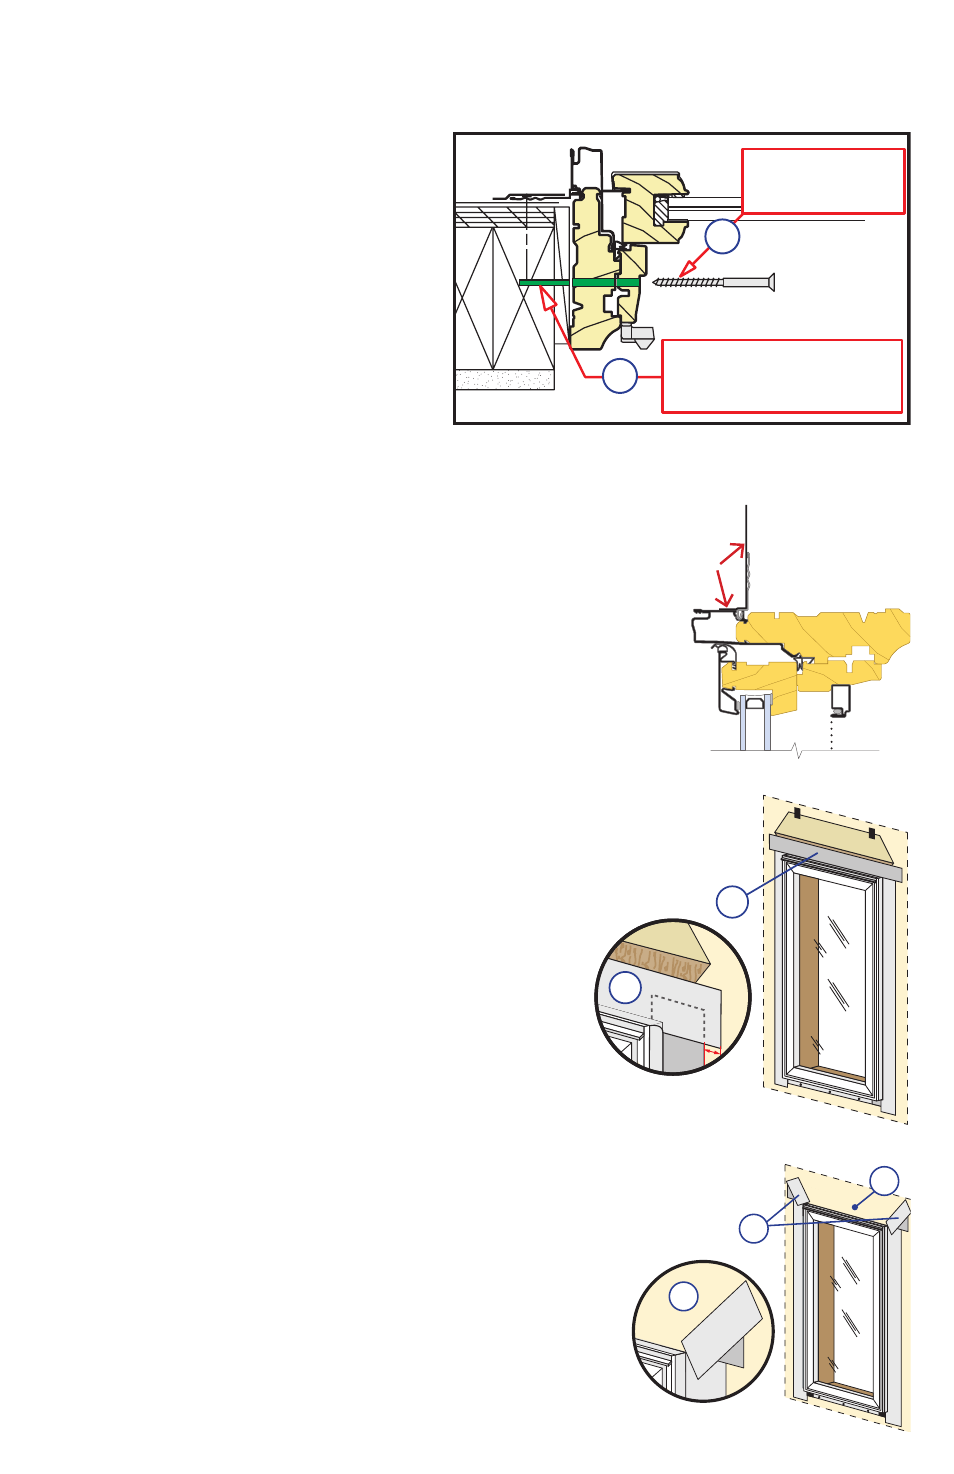
3D
3C
3D
C. Fold down top flap of water resistive barrier (3C).
D. Apply flashing tape to diagonal cuts. Cut pieces of
flashing tape at least 1" longer than the diagonal cuts in
the water resistive barrier. Apply the tape covering the
entire diagonal cut in the water resistive barrier at both
upper corners of the window.
Note: Be sure to overlap the top corners (3D).
2
SETTING AND FASTENING THE WINDOW (continued)
M. Drill 1/8” x 1” deep pilot holes
into the rough framing through the
clearance holes in the unit frame.
N. Install #10 x 3-1/2” corrosion
resistant wood screws
into each of
the clearance holes.
Note: Drive the screws snug but DO
NOT over-tighten the screws. DO
NOT bend or bow the unit frame.
#10 x 3-1/2"
corrosion resistant
wood screw
Drill 1/8" diameter pilot
hole through the clearance
hole in the frame
2N
2M
Note: The flashing tape must be applied
approximately 1/2" onto the frame cladding at the
jambs and head. Pre-folding the tape at 1/2" before
removing the paper backing will make it easier to
apply the tape correctly. If the siding is less than 1/2"
thick, adjust the dimension of the fold so the exterior
sealant line will cover the exterior edge of the tape.
3
INTEGRATING THE WINDOW TO THE
WATER RESISTIVE BARRIER
Flashing
Tape
Rectangular Units Only:
A. Apply side flashing tape. Cut two pieces of flashing
tape 4" longer than the frame height of the window.
Apply one piece to each side 1/2" onto the frame
cladding, over the nailing fin and onto the water
resistive barrier. The tape should extend 2" above the
top of the window and 2" below the bottom of the
window. Press the tape down firmly while folding
down the excess tape at the top and bottom of the
window.
B. Apply top flashing tape. Cut a piece of flashing
tape long enough to go across the top of the window
and extend at least 1" past the side flashing tape
on both sides. Apply the tape 1/2" onto the frame
cladding, over the top nailing fin as shown. Fold
the overlapping tape down, and press all tape down
firmly.
Note: DO NOT tape or seal the bottom nailing fin.
3B
3B
1"