Setting and fastening the window (continued) – Pella 812W0100 User Manual
Page 5
1
2 0 30
4 0 50
6 0 70
2
3
INCHES
mm
2G
2I
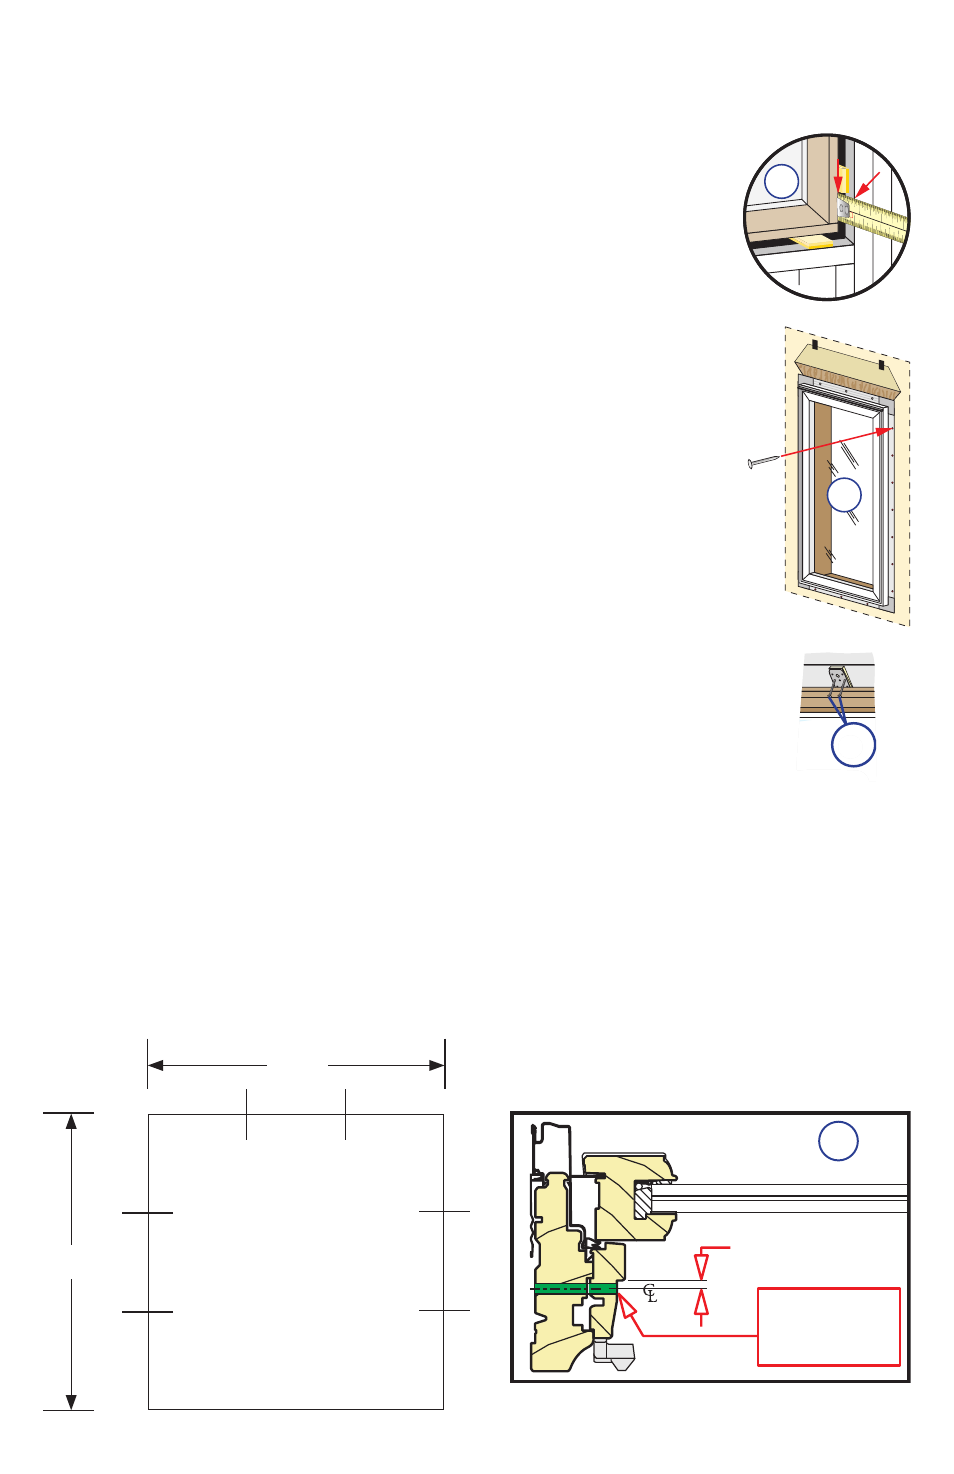
G. Check the interior reveal. Make sure the measurement from the interior
face of the window to the interior face of the wall is equal at several
points around the window.
Note: If the dimensions are not equal, check to make sure the fins are
folded out to 90° at all points.
H. Check window operation (vent units only). Unlock the window by
lifting the lock handle up. Open the window by rotating the crank
handle. Remove the shipping spacers. Open and close the window a few
times to check for proper operation. Close and lock the window.
Note: If there are any problems with the operation of the window,
recheck shim locations and adjust for plumb and square.
I. Fasten the window to opening by driving 2" galvanized roofing
nails into each pre-punched hole in the nailing fin.
Note: Make sure the fin corner is lying as flat as possible.
2
SETTING AND FASTENING THE WINDOW (continued)
J. For units with flexible non-structural curved fin on which clips were
added:
Fasten the clips to the opening by driving two #6 x 1-1/2" or longer
corrosion resistant into the pre-punched holes in the clips. If clips are bent
and fastened to the interior stud, install the screws as close to the bend as
possible.
Note: DO NOT shim above the window.
2J
K. For large units with frame height or frame width > 73”; additional frame support screws
must be installed at the head and jambs. On the roomside of the unit, drill 13/64” diameter
clearance holes through the head and jambs at the 1/3 points of the frame.
1/3
1/3
1/3
1/3
1/3
1/3
1/3
1/3
1/3
Screws not required at the sill.
>73"
>73"
2L
3/16"
Max.
Drill 13/64"
clearance hole
through frame
L. On the roomside of the unit, drill 13/64” diameter clearance holes through the head and
jambs at the 1/3 points of the frame.