Rough opening preparation, C. cut the water resistive barrier (1c) – Pella 812W0100 User Manual
Page 2
YOU WILL NEED TO SUPPLY:
TOOLS REQUIRED:
• Cedar or Impervious shims/spacers (12 to 20)
• 2" galvanized roofing nails (1/4 lb.)
• Closed cell foam backer rod/sealant backer (12 to 30 ft.)
• Pella
®
SmartFlash
™
foil backed butyl window and door
flashing tape or equivalent
• High quality exterior grade polyurethane or silicone sealant
(1 tube per window)
• Great Stuff
™
Window and Door Insulating Foam Sealant
by the Dow Chemical Company or equivalent low pressure
polyurethane window and door foam - DO NOT use high
pressure or latex foams
• Interior trim and/or jamb extensions (15 to 40 ft.)
• Tape measure
• Level
• Square
• Hammer
• Stapler
• Scissors or utility knife
• Small flat-blade screwdriver
• Sealant gun
SEALANT
SEALANT
REMEMBER TO USE APPROPRIATE PERSONAL PROTECTIVE EQUIPMENT.
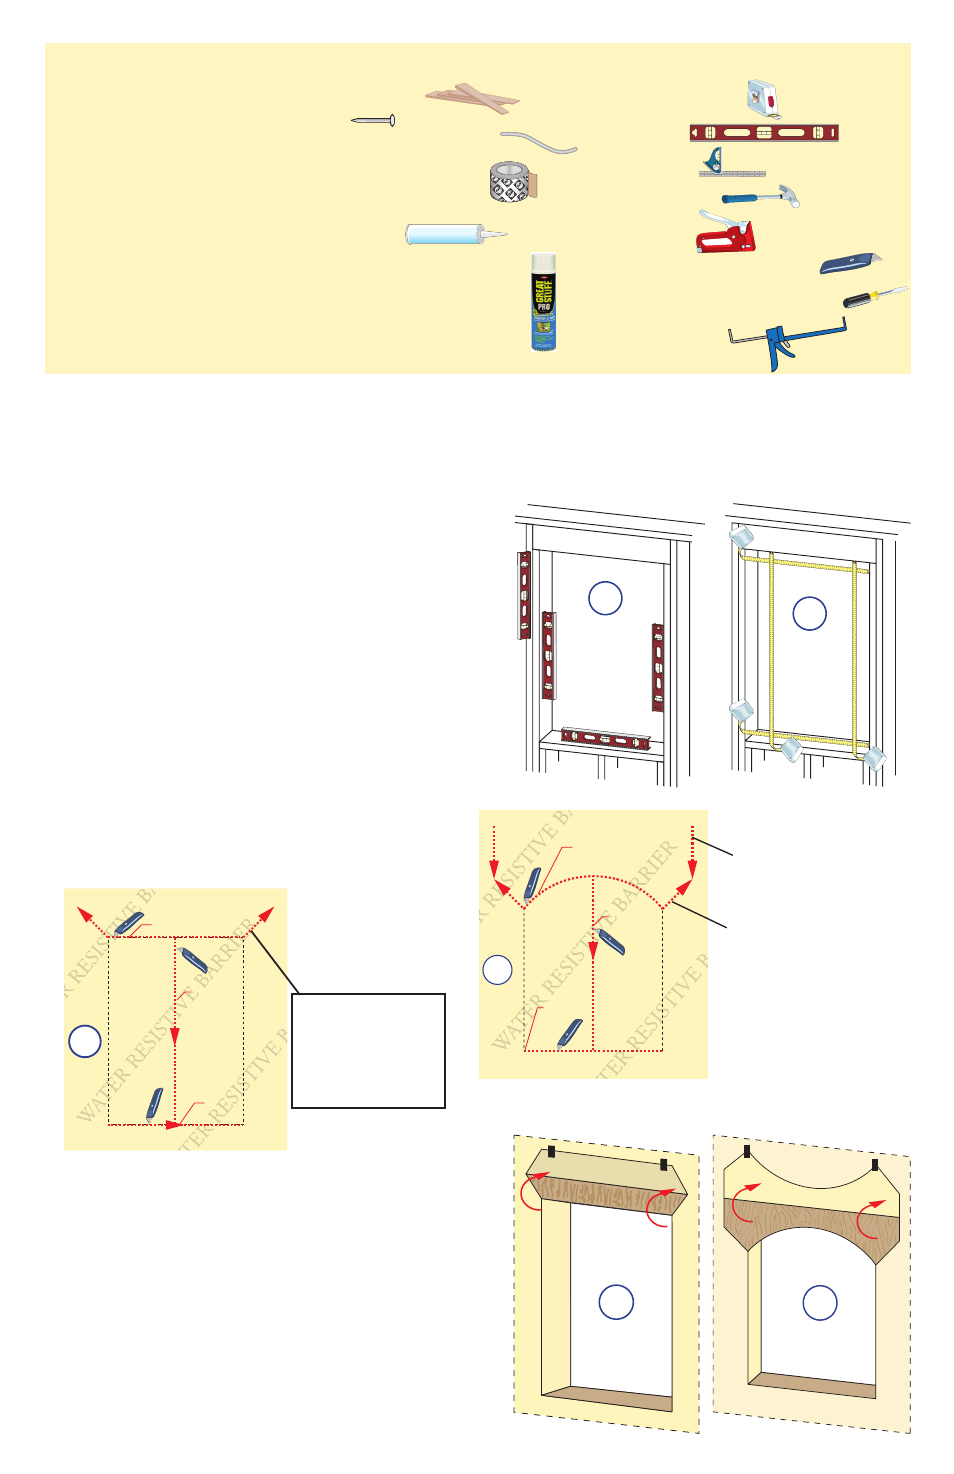
A. Verify the opening is plumb and level.
Note: It is critical that the bottom is level.
B. Verify the window will fit the opening.
Measure all four sides of the opening to make
sure it is 3/4" larger than the window in
both width and height. On larger openings
measure the width and height in several
places to ensure the header or studs are not
bowed.
Note: 1-1/2" or more of solid wood blocking
is required around the perimeter of the
opening. Fix any problems with the rough
opening before proceeding.
Interior
1A
Interior
1B
C. Cut the water resistive barrier (1C).
1D
Exterior
4th cut:
Make a 6" cut up from
each top corner at a 45˚
angle to allow the water
resistive barrier to be
lapped over the fin at the
head of the window.
1st cut
2nd
cut
3rd cut
Water Resistive Barrier
1C
4
th
cut:
Make a 6" cut up from
each top corner at a 45°
angle to allow the water
resistive barrier to be
lapped over the fin at the
head of the window.
1
st
cut
2
nd
cut
Water Resistive Barrier
5
th
cut:
Cut down to meet the 6"
45° cut on each corner.
1C
3
rd
cut
D. Fold the water resistive barrier (1D). Fold
side flaps into the opening and staple to
inside wall. Fold top flap up and temporarily
fasten with flashing tape.
*Additional shape cut patterns at end of instruction.
Exterior
1D
1
ROUGH OPENING PREPARATION