Setting and fastening the window (continued) – Pella 812W0100 User Manual
Page 4
Interior
2F
2F
F. Plumb and square window. Place shims 1" from
the bottom and top of the window between the
window and the sides of the opening. Adjust
the shims as required to plumb and square the
window in the opening. If the frame height
exceeds 53", place shims at the midpoint of the
window sides.
Note: Do not shim above the window or in the
space between the spacers at the bottom of the
window. DO NOT over shim.
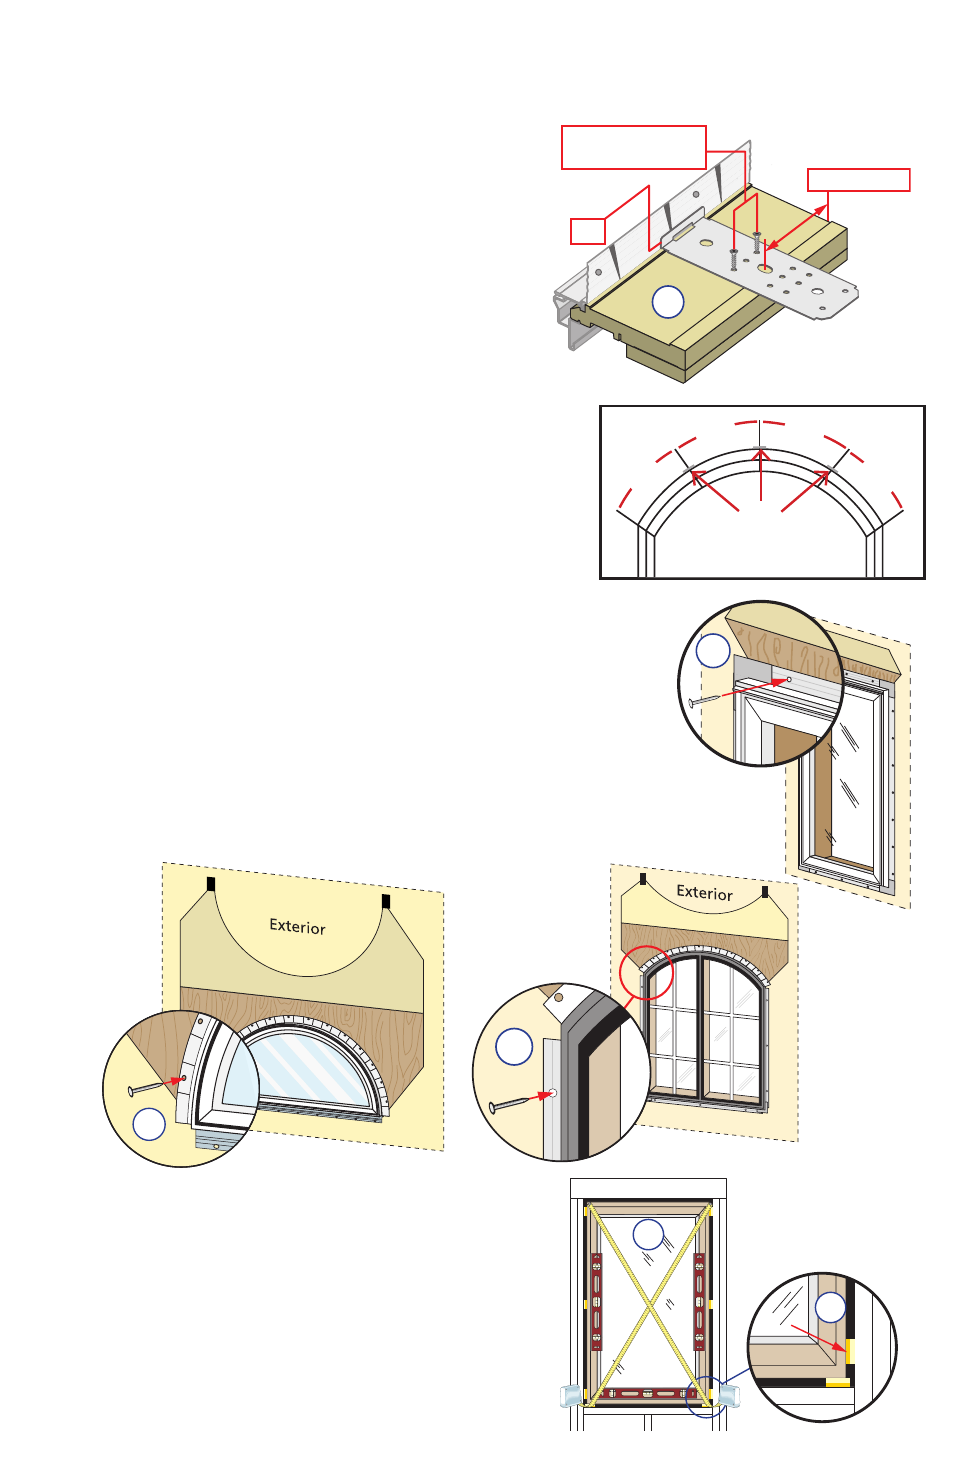
D. Curved Units with Fins (Continued):
Curved Units with frame radius ≤ 12", full circle
and elipse units will be provided with a flexible
non-structural fin on the curved portion of the
unit.
Note: This fin is intended for flashing only, not as
structural support.
Installation Clips for Structural Support:
Determine installation clip placement. Clips
(provided) should be evenly spaced across the curved
frame member and no more than 16" on center.
Place the clips so the lip is facing up and against the
instillation fin. Secure each clip by driving a #6 x 5/8"
corrosion resistant screws through the outer two holes
of the three holes shown.
2E
E. Insert the window from the exterior of the building. Place
the bottom of the window on the spacers at the bottom of the
opening, then tilt the top into position. Center the window
between the sides of the opening to allow clearance for
shimming, and insert one roofing nail in the first hole from
the corner on each end of the top nailing fin. These are used
to hold the window in place while shimming it plumb and
square.
TWO OR MORE PEOPLE WILL BE REQUIRED FOR THE
FOLLOWING STEPS.
2E
2E
2
SETTING AND FASTENING THE WINDOW (continued)
16"
max
16"
max
16"
max
16"
max
Clip
6“ from end
Lip
#6 x 5/8” corrosion
resistant screws
2D