Installation – Pitco Frialator PE14D User Manual
Page 8
INSTALLATION
2
L20-293, R2 (05/11)
1.2. INSTALLATION
CLEARANCES
The clearances shown below are for combustible and non-combustible installations and will allow for
safe and proper operation of your appliance.
In addition to the above clearances there must also be at least 16 inches (40.64cm) of aisle space in
front of the unit.
1.3. LEG/CASTER INSTALLATION AND LEVELING
When you receive your appliance it is completely assembled with the possible exception of the legs
(or casters). This appliance must be installed with legs or casters; it cannot be curb mounted. Curb
mounting will seriously inhibit this appliance’s ability to effect proper component ventilation. The
legs/casters must be installed before connecting the appliance to the power supply. The legs provide
the necessary height to meet sanitation requirements and assure adequate air supply for electrical
component ventilation. Use the following procedure.
Required tools: 7/16 “ wrench and socket and a large pair of water pump pliers.
1. Lay the appliance on its back, being careful not to damage the splash back by pulling on it.
Protect the outside of the appliance with cardboard or a drop cloth when laying it down.
2. Attach each leg/caster with the hex head screws and nuts supplied. Each leg/caster requires
four ¼-20 x 5/8” hex head screws and nuts. Insure that all screws are tight.
3. Mount the screws from the inside of the appliance with the nut on the outside (bottom) of the
appliance. The nuts have lock washers attached to
them, therefore it is not necessary to use separate lock
washers.
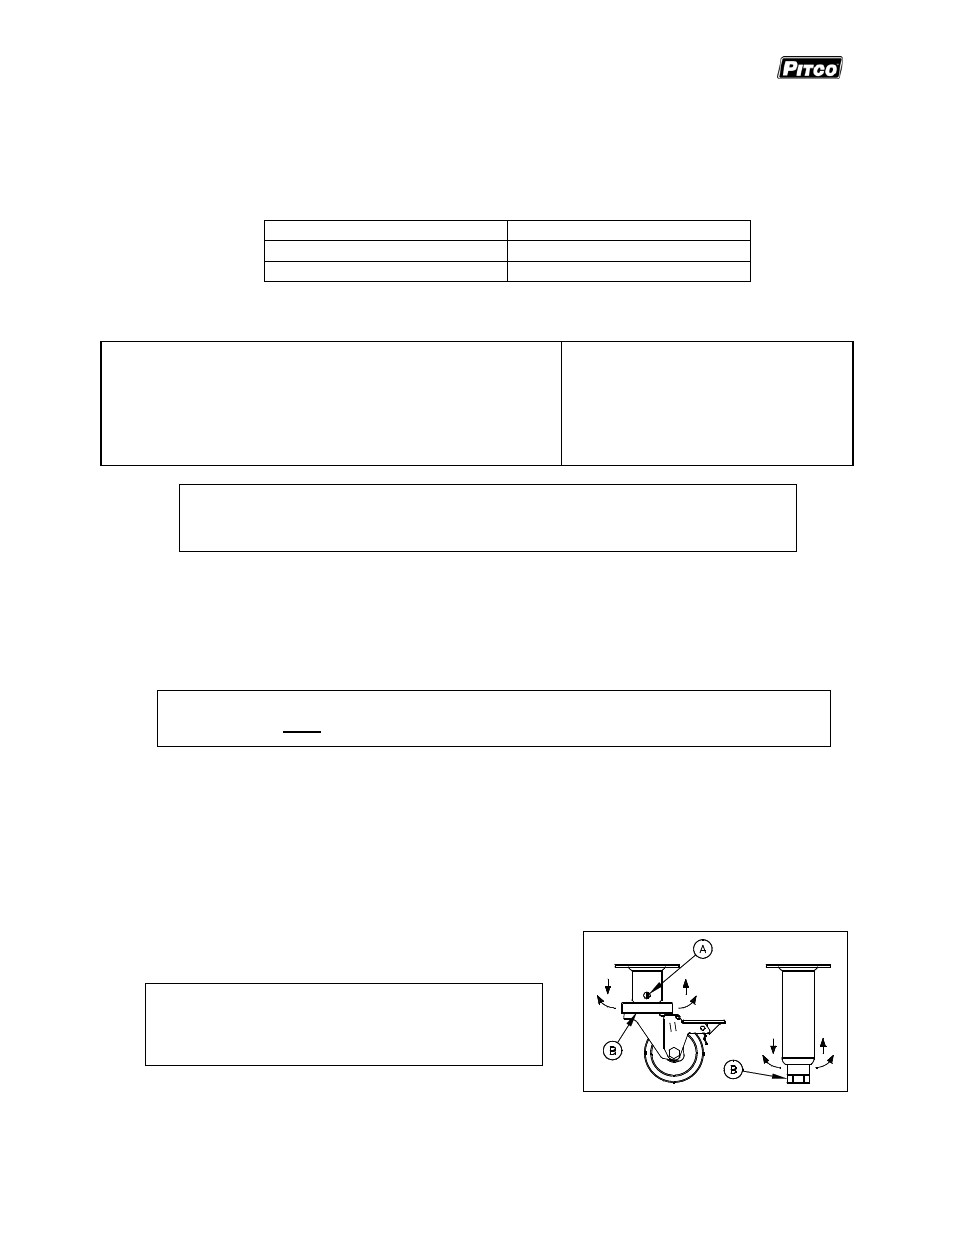
4. When all four legs/casters are securely mounted, stand
the unit up, being careful not to put too much weight on any one leg. Adjust the height and level
the appliance by adjusting the leveling devices (B) with water pump pliers. On casters, loosen 2
screws (A) before leveling, make your height adjustments, then retighten.
Combustible Construction
Non Combustible Construction
Inches (centimeters)
Inches (centimeters)
Back
6.0" (15.24cm)
0.0" (0.0cm)
Sides
6.0" (15.24cm)
0.0" (0.0cm)
Floor
6.0" (15.24cm)
6.0" (15.24cm)
WARNING
DO NOT install this appliance next
to a deep fat fryer. A splash over of
water into the hot oil may cause a
flash fire.
WARNING
DO NOT obstruct the flow of ventilation, or air openings
around the appliance. Adequate clearance around the
appliance is necessary for servicing and proper
component ventilation. Ensure that you meet the
minimum clearance requirements specified in this manual.
WARNING
DO NOT install legs or casters, or perform
leveling procedure when appliance is in operation
or full of hot liquids. Serious injury could result.
CAUTION
To prevent equipment damage and/or personal injury, do not tilt the appliance
onto any two of its casters or legs, or pull the appliance by the splash back.
WARNING
This appliance must be installed with the legs or casters provided by the manufacturer.