Audio adjustments, Operating this unit – Pioneer DEH P4200UB User Manual
Page 14
Audio Adjustments
1
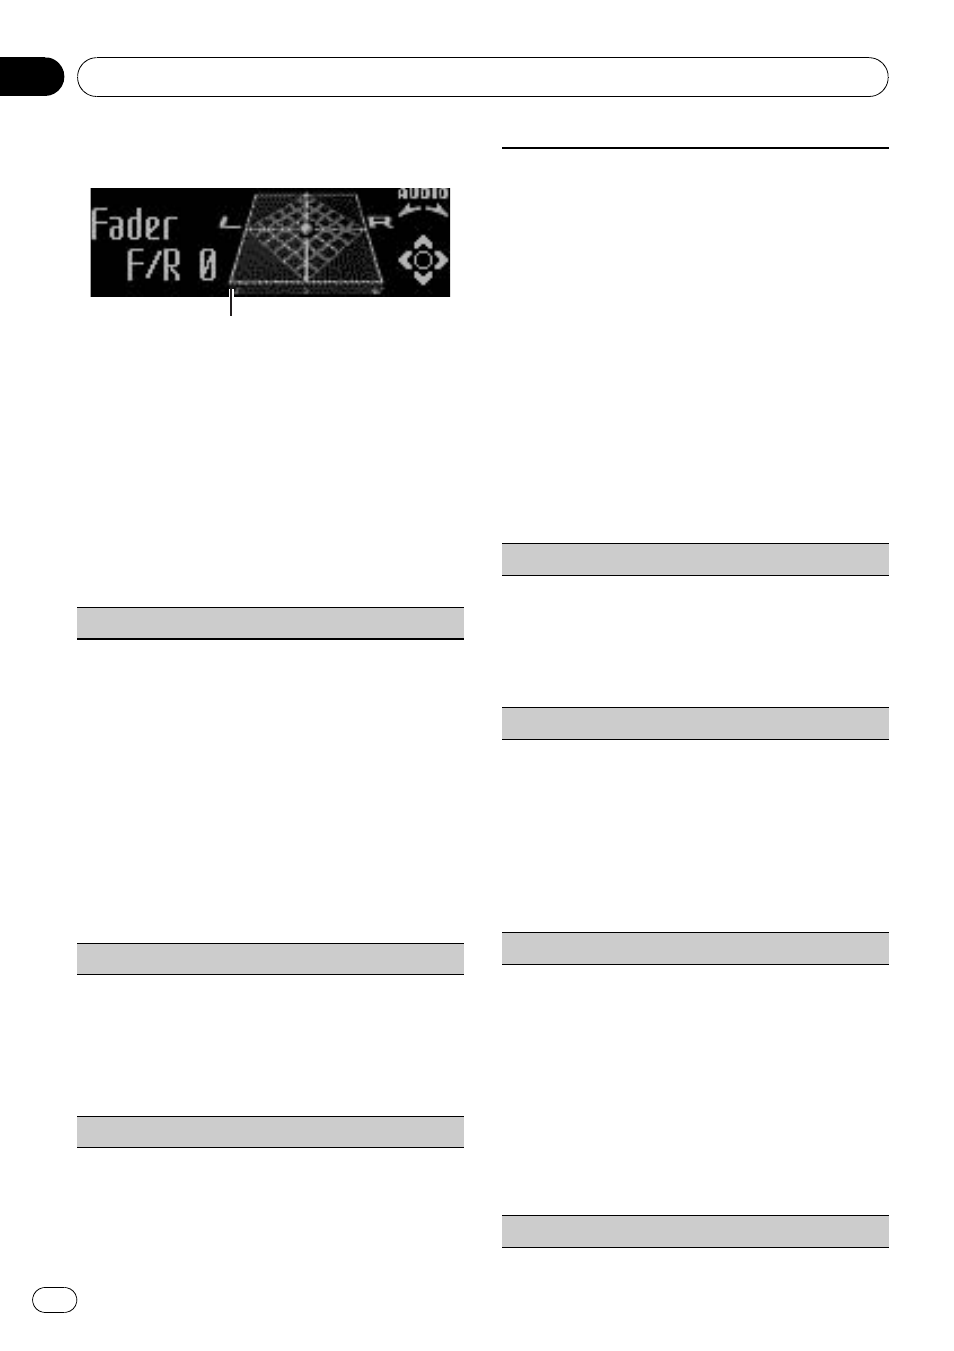
1 Audio display
Shows the audio adjustment status.
1
Press M.C. to display the main menu.
2
Turn M.C. to change the menu option
and press to select AUDIO.
3
Turn M.C. to select the audio function.
After selecting, perform the following proce-
dures to set the audio function.
Fader/Balance (fader/balance adjustment)
1 Push M.C. up or down to adjust front/rear speaker
balance.
F15 to R15 is displayed as the front/rear speaker
balance moves from front to rear.
! F/R 0 is the proper setting when only two
speakers are used.
! When the rear output setting is Rear SP :S/W,
you cannot adjust front/rear speaker balance.
Refer to
S/W control (rear output and subwoo-
2 Push M.C. left or right to adjust left/right speaker
balance.
L15 to R15 is displayed as the left/right speaker
balance moves from left to right.
Powerful (equalizer recall)
1 Push M.C. left or right to select an equalizer
curve.
Powerful
—Natural—Vocal—Custom1—Cus-
tom2
—Flat—S.Bass
! When Flat is selected no adjustments are
made to the sound.
100 Hz (equalizer adjustment)
You can adjust the currently selected equalizer curve
setting as desired. Adjusted equalizer curve settings
are memorized in
Custom1 or Custom2.
! A separate Custom1 curve can be created for
each source. If you make adjustments when a
curve other than
Custom2 is selected, the equali-
zer curve settings will be memorized in
Custom1.
! A Custom2 curve can be created common to all
sources. If you make adjustments when the
Cus-
tom2 curve is selected, the Custom2 curve will
be updated.
1 Recall the equalizer curve you want to adjust.
2 Push M.C. left or right to select the equalizer
band to adjust.
100Hz
—315Hz—1.25kHz—3.15kHz—8kHz
3 Push M.C. up or down to adjust the equalizer
curve.
+6 to
–6 is displayed as the equalizer curve is in-
creased or decreased.
LOUD (loudness)
Loudness compensates for deficiencies in the low-
and high-frequency ranges at low volume.
1 Press M.C. to turn loudness on or off.
2 Push M.C. left or right to select the desired set-
ting.
Low (low)
—Mid (mid)—High (high)—OFF (off)
Sub W.1 (subwoofer on/off setting)
This unit is equipped with a subwoofer output which
can be turned on or off.
1 Press M.C. to turn subwoofer output on or off.
2 Push M.C. left or right to select the phase of sub-
woofer output.
Push
M.C. left to select reverse phase and Re-
verse appears in the display. Push M.C. right to
select normal phase and
Normal appears in the
display.
Sub W.2 (subwoofer adjustment)
When the subwoofer output is on, you can adjust the
cut-off frequency and the output level of the subwoo-
fer.
Only frequencies lower than those in the selected
range are outputted from the subwoofer.
1 Push M.C. left or right to select cut-off frequency.
50Hz
—63Hz—80Hz—100Hz—125Hz
2 Push M.C. up or down to adjust the output level
of the subwoofer.
Each time
M.C. is pushed up or down, subwoofer
level increases or decreases.
+6 to -24 is dis-
played as the level is increased or decreased.
Bass (bass boost)
Operating this unit
En
14
Section
02