ProForm PFSY74490 User Manual
Page 12
12
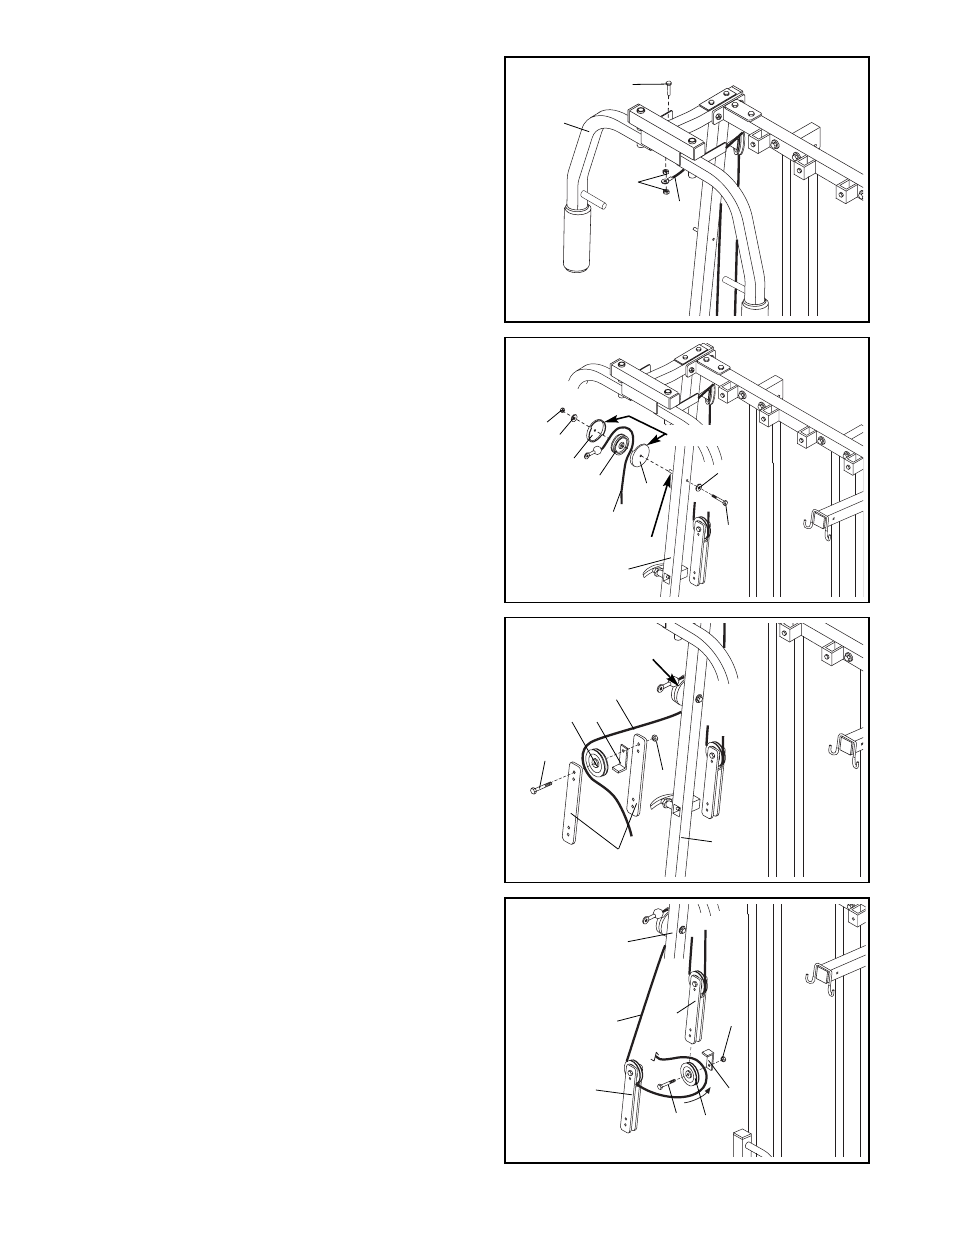
27. Remove both 3 1/2” Pulleys (24) from the second set
of pre-assembled Pulley Plates (23).
Wrap the Ab Cable (74) around a 3 1/2” Pulley (24) in
the direction shown. Attach the Pulley and a Cable
Trap (25) to the top hole in the two Pulley Plates (23)
with a 3/8” x 2” Bolt (54) and a 3/8” Nylon Locknut
(50).
Make sure the Cable Trap is oriented as
shown.
27
54
23
1
50
74
Pulley
25
24
28. Wrap the Ab Cable (74) around a 3 1/2” Pulley (24) in
the direction shown. Attach the Pulley and a Cable
Trap (25) to the bottom hole in the first set of Pulley
Plates (23) with a 3/8” x 2” Bolt (54) and a 3/8” Nylon
Locknut (50).
Make sure that the Pulley Bracket
and Cable Trap are oriented exactly as shown.
25
24
23
74
50
23
1
28
54
26. Identify the Ab Cable (74). It is the second longest
cable and has a ball on one end and a bolt on the
other.
Wrap the Ab Cable (74) around a 3 1/2” Pulley (24) in
the direction shown. Place two Pulley Covers (47)
over the Pulley, so that the large tabs are in the posi-
tion shown. Attach the Pulley and Pulley Covers to
the Butterfly Upright (1) with a 3/8” x 3 3/4” Bolt (59),
two 3/8” Flat Washers (48), and a 3/8” Nylon Jam Nut
(63).
Make sure the Cable is between the Pulley
and the welded pin on the Upright.
26
48
47
63
74
1
24
47
59
48
25. Attach the Butterfly Cable (73) to the bracket on the
Right Butterfly Arm (11) with a 3/8” x 1” Bolt (84) and
two 3/8” Nylon Jam Nuts (63).
Note: Do not over-
tighten the bottom Nylon Jam Nut; the Cable
must pivot freely on the Bolt.
25
63
84
73
11
Welded Pin
Large Tabs