General operation, Input selection, Automatic adjustment of analog rgb – PLUS Vision U7-137SF User Manual
Page 27: E-27
E-27
General Operation
This section describes the use of direct operation with the main unit or remote control buttons.
For information about operation using the menu, see “Menu Operation Method” on Page E-27 and the various items on
Pages E-44 to E-57.
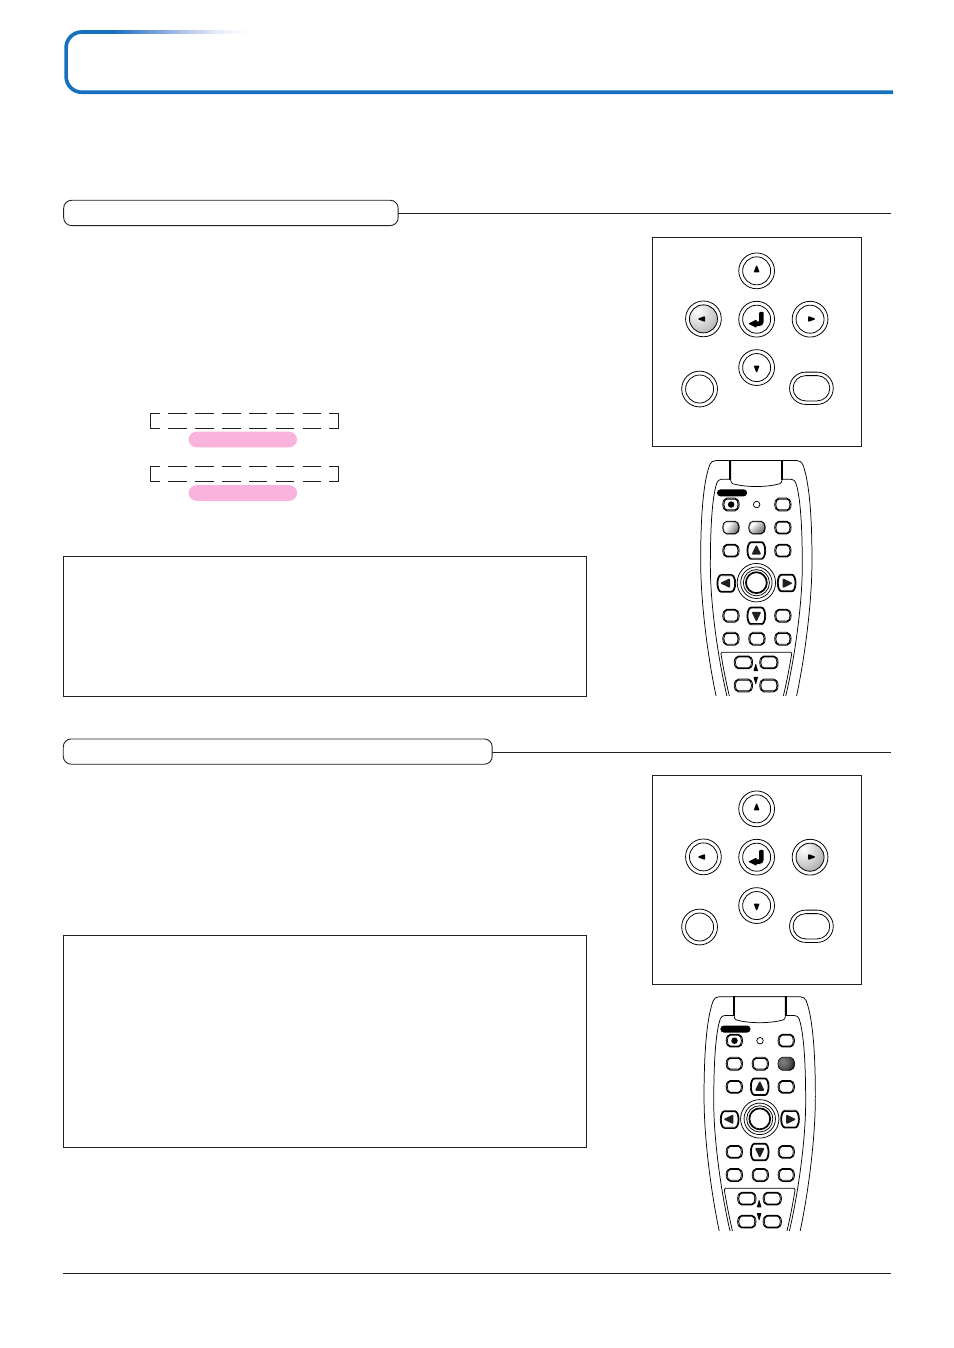
Input Selection
MENU
SOURCE
AUTO
QUICK
MENU
FREEZE
MUTE
LASER
AUTO
TIMER
VOL
ZOOM
R-CLICK/
CANCEL
QUICK
MENU
ENTER
STANDBY
Q
1
2
3
4
RGB
VIDEO
Note
* When you do not operate source selection, the projector will assume the input selec-
tion condition that was previously used.
* See “Auto Source” on Page E-51 for information about the Auto Source on and off
conditions.
* When the input format has been switched, you may be required to reconnect the
input signal.
Automatic Adjustment of Analog RGB
This procedure automatically adjusts the position, screen size, vertical stripes and
colors of the analog RGB or DVI analog input signals being projected.
Normally, this function is adjusted automatically at the time of signal selection.
Main unit operation/Remote control operation: Press the AUTO button. (This
will not function while the menu or the quick menu is displayed.)
A press of the AUTO button starts the automatic adjustment.
MENU
SOURCE
AUTO
QUICK
MENU
FREEZE
MUTE
LASER
TIMER
VOL
ZOOM
RGB
VIDEO
R-CLICK/
CANCEL
QUICK
MENU
ENTER
STANDBY
Q
1
2
3
4
AUTO
Note
* If the display position is shifted, vertical lines appear on the picture, or the projection
is not good even after using automatic adjustment, please perform image adjustment
manually. See “Picture Adj. / Fine Picture / H Position / V Position” on Page E-44.
* If the position is off or there are dark vertical bands on the picture, press the AUTO
button with the screen as bright as possible (make the screen as bright as possible by
for example displaying the trash window over the entire screen). If the problem per-
sists after pressing the AUTO button several times, set manually at the “Picture Ad-
justment” menu.
* When the image extends beyond the boundaries of the screen or is smaller than the
screen, set Aspect to “Auto”. See “Aspect” on Page E-49.
Select the input signal to be projected. Press the SOURCE button on the
projector or the RGB or VIDEO button on the remote control unit.
When one of the buttons is pressed, a menu for selecting the source ap-
pears. Use the SELECT
̆ and ̄ buttons or the SOURCE, RGB and VIDEO
buttons to select the desired source, then press the ENTER button.
When the “Auto Source” function is set to “On”, the input signals are searched
for automatically in sequence, but the next input signal is not detected while
the input signal selection menu is displayed.
SOURCE button
DVI
→ RGB → Image Viewer → Network → Video → S-Video
U7-137SF only
RGB button
DVI
→ RGB → Image Viewer → Network
U7-137SF only
VIDEO button
Video
→ S-Video