Recording clock, Vcd/cd/mp3-cd synchro start recording, Recording the mixed sound / one touch recording – Philips FW-V55 User Manual
Page 24: View clock, Clock setting
3139 115 20042
24
English
RECORDING
CLOCK
VCD/CD/MP3-CD Synchro Start
Recording
1 Load a blank tape into tape deck 2 and a
disc into a disc tray.
2 Press VCD to select VCD/CD/MP3-CD
mode.
• You can program the tracks in the order
you want them to be recorded (see
Programming Tracks). If not, select the
disc by pressing VCD (CD 1•2•3) and
the tracks are recorded according to the
order on the selected disc.
3 Press REC to start recording.
™ The
REC
starts flashing.
• Disc will start playback automatically.
4 Press Ç to stop recording.
Recording the mixed sound /
One Touch Recording
• During microphone mixing, you can
record the mixed sound on a tape in
tape deck 2 except dubbing mode.
• For One Touch Recording, as soon as you
press REC, the current source (VCD,
TUNER or AUX) will be recorded on tape
deck 2.
1 Load a blank tape in tape deck 2.
2 Press REC to start recording.
™ The
REC
starts flashing.
3 Press Ç to stop recording.
Note:
– When you press RECORD while in TAPE
mode, "SELECT SOURCE" will be
displayed. One Touch Recording is not
possible in TAPE mode.
SHUFFLE
PROGRAM
FM
STEREO
BACK
HSD
REPEAT
REC
LW
MW
AM
T.A.
NEWS
DUB
(HSD
)
REC
TIMER
FRONT
60Hz
500Hz
250Hz
1KHz
2KHz
4KHz
8KHz
INCREDIBLE
SURROUND
DYNAMIC BASS
BOOST
PROG
CLOCK/
TIMER
AUX
PRESET
▲
▲
STOP•CLEAR
SEARCH • TUNING
PLAY PAUSE
PREV
NEXT
C D 1 • 2 • 3
CDR/VIDEO
BAND
TAPE 1 • 2
DIGITAL
SOUND CONTROL
A. REV
STANDBY
ON
SIDE
MIC
MIC
LEVEL
SOUND NAVIGATION
VCD
RETURN
PBC
MP3•CD
ALBUM
MP3-CD
+
-
TITLE
+
-
TUNER
TAPE
VCD MINI HIFI SYSTEM
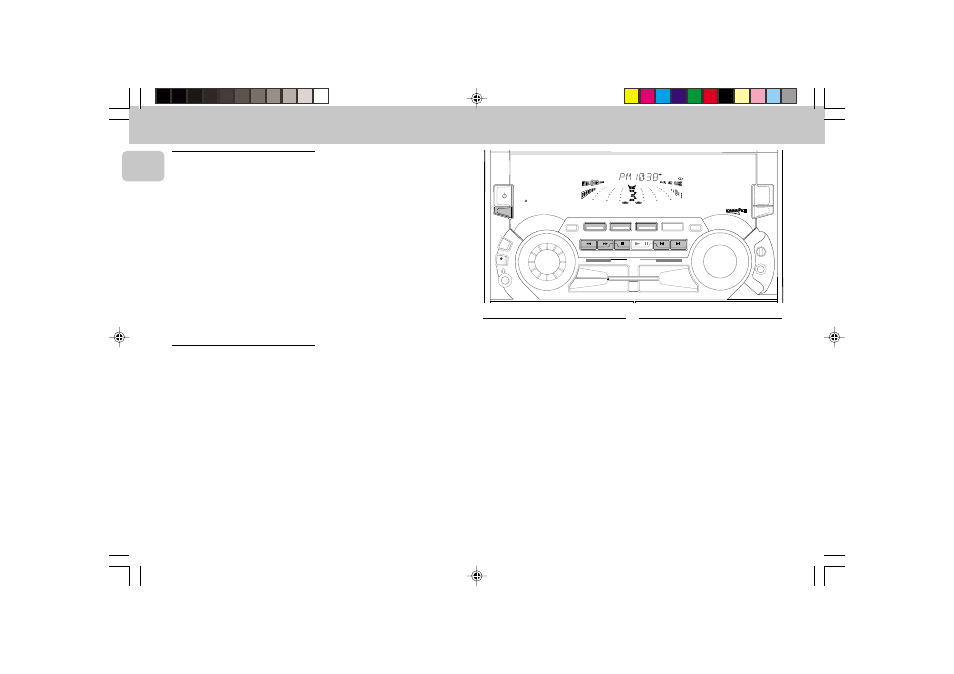
View Clock
You can view the clock (if it is set) if the
system is in Standby mode or when any
sound source is selected (CD, TUNER, etc.).
The clock will be displayed for about 7
seconds.
• Press CLOCK/TIMER briefly.
™ "PM 10:38 or 22:38" (the
current time) will be displayed
depending on whether you have
selected 12- or 24-hour mode.
™ "--:::::--" will be displayed if the
clock is not set.
Clock Setting
The clock can be set in either 12- or 24-
hour mode, e.g. "
AM 12:00" or
"
00:00". Before setting the clock, you
must be in the View Clock mode.
1 Press CLOCK/TIMER to select clock
mode.
2 Press PROG
(on the system only) to
select 12- and 24- hour mode.
™ If 12-hour mode is selected,
"
AM 12:00" starts flashing.
™ If 24-hour mode is selected,
"
00:00" starts flashing.
3 Set the hour with à or á on the
system.
4 Set the minute with í or ë on the
system.
pg 01-28/V55/21-En
6/8/01, 9:12 AM
24