Figure 14, Step 14 – ParaBody Hip Sled System User Manual
Page 18
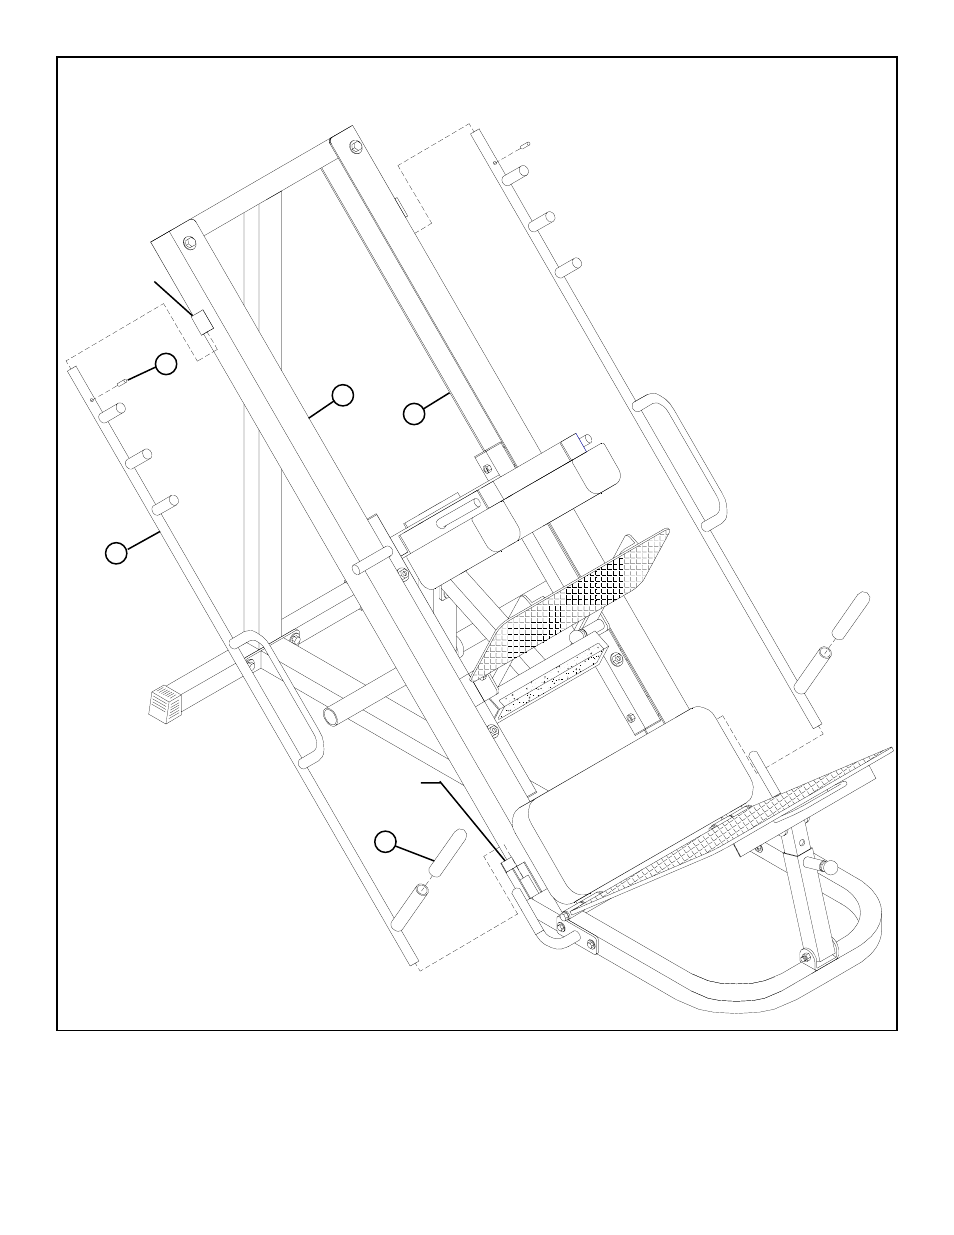
FIGURE 14
STEP 14:
18
• To assemble the CARRIAGE STOP BAR (7) to the side of the LEFT RAIL (8), start by inserting the top of the BAR (7) into the
BUSHING at the top of the RAIL as far as possible, then lower the BAR (7) into the SURE-LOC BUSHING at the bottom of the
RAIL. (MAKE SURE THE STOP PEGS ARE VERTICAL), then insert one 1-1/4” ROLL PIN (45) into the hole at the top of
the BAR (7). (DO NOT LET THE ROLL PIN PROTRUDE BENEATH THE BAR) Repeat this step on the RIGHT RAIL (9).
• Slide two 1-1/4 X 5” GRIPS (22) over the HANDLES on the CARRIAGE STOP BARS (7) as shown in FIGURE 14.
22
7
9
8
45
SURE-LOC
BUSHING
BUSHING
See also other documents in the category ParaBody Sports and recreation:
- Free Weight Systems (5 pages)
- 886101 (3 pages)
- 425/660 (2 pages)
- 822 (9 pages)
- 848101 (14 pages)
- 881 (26 pages)
- Free Weight Smith System (5 pages)
- Leg Press 100101 (14 pages)
- 360101 (11 pages)
- 777 (5 pages)
- 832102 (14 pages)
- Leg Press 100 (11 pages)
- 205101 (1 page)
- 425 (2 pages)
- 440 (33 pages)
- 426103 (45 pages)
- 824 (8 pages)
- 425103 (40 pages)
- GS2 (24 pages)
- 826 (8 pages)
- 856 (6 pages)
- 400101 (27 pages)
- 829 (14 pages)
- 435104 (13 pages)
- GS6 (8 pages)
- 842 (6 pages)
- 778 (13 pages)
- 375101 (22 pages)
- Leg Press 5 (15 pages)
- 838 (10 pages)
- 441101 440 (10 pages)
- LP5 (15 pages)
- Home Guide (9 pages)
- 888 (15 pages)
- cm3 (8 pages)
- 870 (4 pages)
- 893103 (20 pages)
- 890 (10 pages)
- 250101 (18 pages)
- 843 (12 pages)
- GS4 (1 page)
- 849 (7 pages)
- 855 AB (9 pages)
- 883 (31 pages)