Linksys EtherFast BEFSR41W User Manual
Page 9
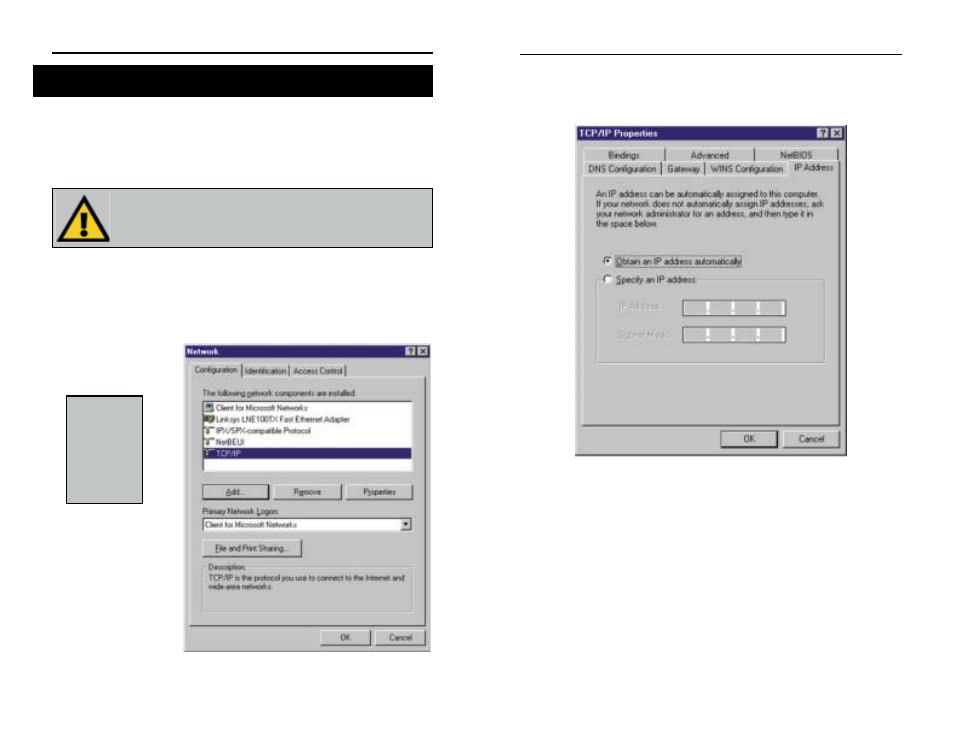
4. Click the Properties button, and then choose the IP Address tab. Select
Obtain an IP address automatically. (See Figure 3-2.) Click on the
Gateway tab and make sure that all fields there are empty. Click OK.
5. The Network Properties window will reappear. Click OK. All client settings
are complete. Windows may ask for original Windows installation files,
which can be found on your Windows CD-ROM (i.e.: D:\win98, D:\win95,
D:\ win9x - where “D” is the letter of your CD-ROM drive) or possibly on
your hard drive (c:\windows\options\cabs.)
6. Windows will ask you to restart your PC. Click Yes.
Repeat steps 1-6 for each PC on your network. When all PCs are config-
ured, continue on to set up the Router using the Router’s Web-based
Utility.
Figure 3-2
EtherFast
®
Cable/DSL Wireless-Ready Router with 4-Port Switch
11
Now that your Router is physically installed, you will have to configure your
PCs to accept the IP addresses that your Router will provide. If using the
default Windows TCP/IP network configuration, no changes are required; just
restart your PC so it will obtain an IP address from the Cable/DSL Wireless-
Ready Router.
1. Click the Start button, select Settings, then Control Panel.
2. Double-click the Network icon.
3. In the Configuration window, select the TCP/IP protocol line that has been
associated with your network card/adapter. (See Figure 3-1.)
These instructions apply only to Windows 95, 98 and Millennium
machines. For TCP/IP setup under Windows NT, Windows 2000,
or Windows XP, please refer to your Microsoft Windows docu-
mentation.
Configuring Your PCs to Connect to the Cable/DSL
Wireless-Ready Router
N
No
otte
e::
If the
TCP/IP protocol
is not config-
ured on your
PC, go to the
Appendix for
TCP/IP installa-
tion instructions
now.
Figure 3-1
Instant Broadband
TM
Series
10