Little Wonder Xtra User Manual
Page 23
replaces shaft and maintains alignment and
contains washers, spacer and gear in housing -
DO NOT TURN HOUSING OVER.
7.
Carefully push new blade shaft up into bearing
and tap through carefully so washers, crown
gear and spacer remain in position and the 3/8
bolt is pushed out (Fig. 2B).
8.
When through, turn assembly over and drive
blade shaft through so head of shaft is up
against inner bearing shoulder.
9.
Reassemble all parts (Fig. 1B and 1C), fit blade
and tighten up to 15-20 ft lbs or hand tight.
Head of blade shaft must pull up tight against
inner race,
otherwise blade will become loose during use.
NOTE: If shaft is difficult to knock out, remove
complete main body bearing cover housing
(see following para. 13 and Fig. 7).
R
EPLACING
C
LUTCH
D
RUM
, C
LUTCH
H
OUSING
OR
G
EARS
10. Remove blade cover wheel assembly and
handles, leaving throttle connected to engine.
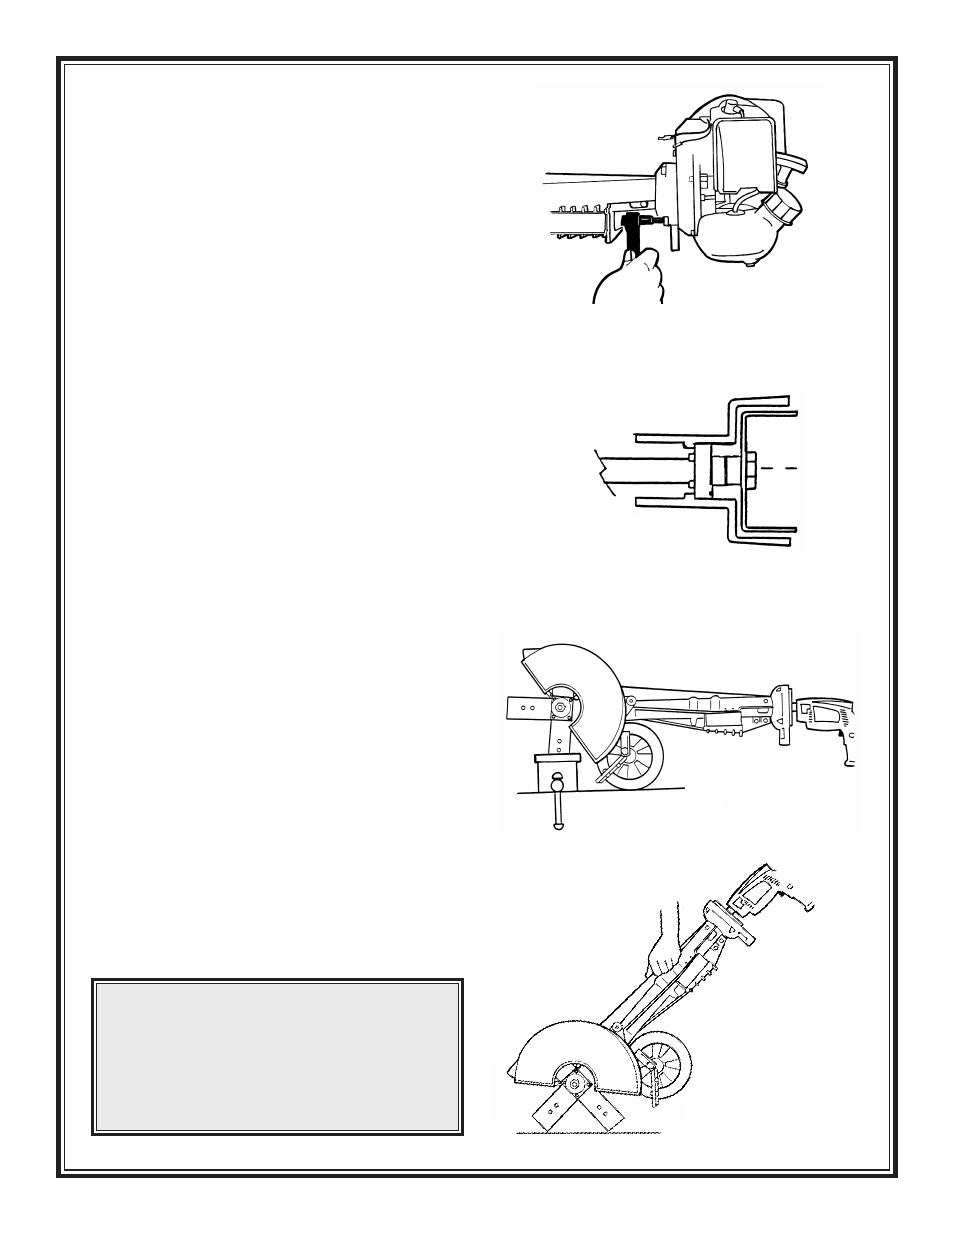
Remove engine from clutch housing using a
10mm wrench or socket or ratchet (Fig. 3).
R
EMOVING
C
LUTCH
D
RUM
11. If not overtightened by heavy work, it may be
possible to remove by holding blade in vice
(Fig. 5) or hold firmly pushing blades on
concrete or wooden floor as shown (Fig. 5A)
and ratcheting off counter-clockwise using hex
socket. Replace with new clutch drum.
23
WARNING
This method could unscrew
pinion, resulting in shaft not
being able to be turned. If
over-tight, proceed as follows.
▲
!
▲
!
FIG 3
FIG 4
FIG 5
SCREW ON CLUTCH DRUM
(Note: single large spacer between
hub and bearing)
CLUTCH
HOUSING
P/N 100134
FIG 5A
HOLD
DOWN