Little wonder, Body workshop manual, Dger – Little Wonder Xtra User Manual
Page 22
B
LADE
R
EPLACEMENT
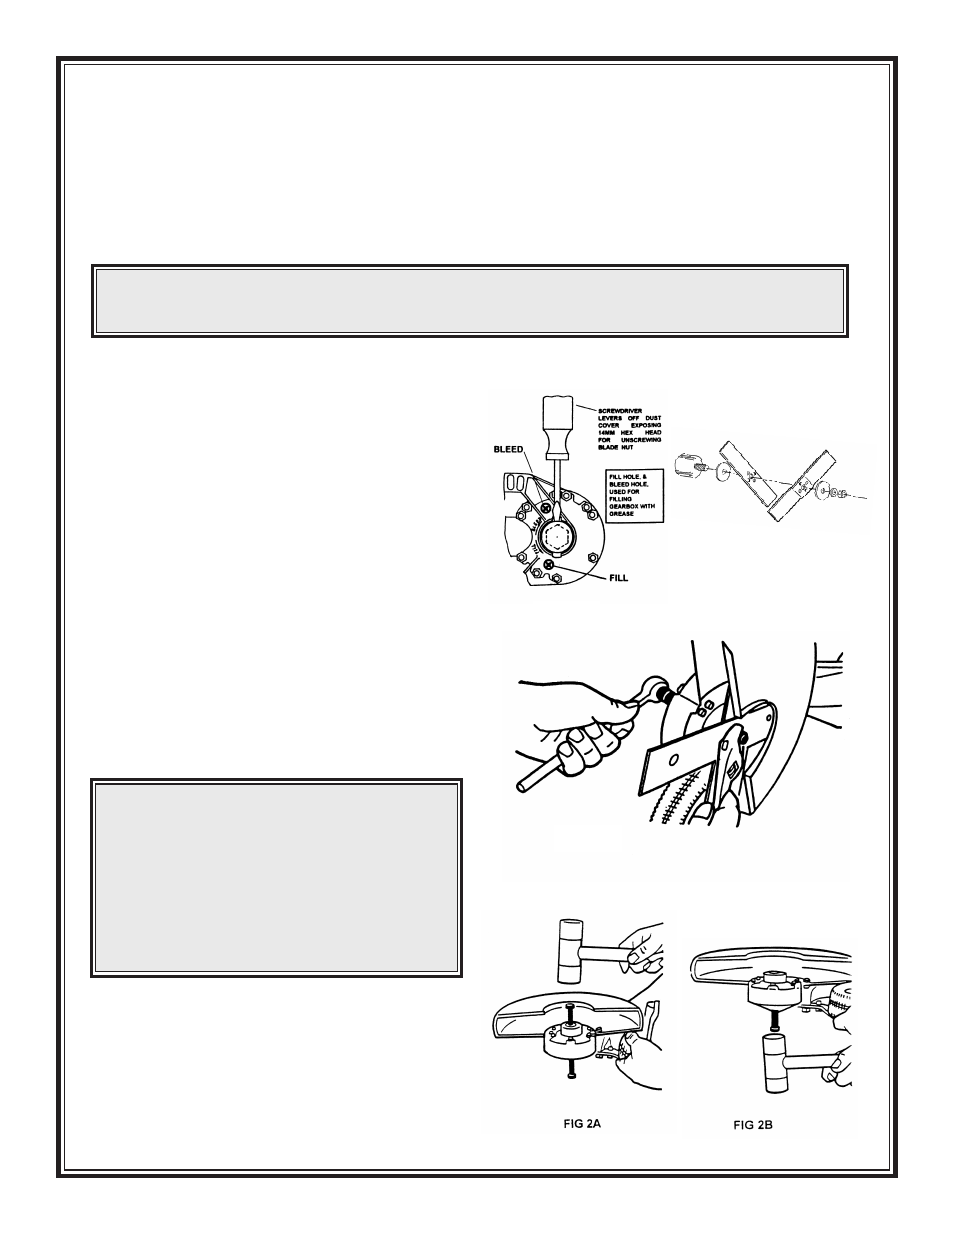
1.
Stop engine. Clean area around dust cover and
pry out with screwdriver (Fig. 1A).
2.
Through dust cover hole, place 14mm socket.
On blade end of shaft, place 18mm wrench on
blade nut (Fig. 1C).
3.
Unscrew nut counter-clockwise (normal right
hand thread).
4.
Remove one small washer, one large washer
and one straight and one formed blade. Before
fitting blade and washers, clean all grit and
grease. Assemble these parts clean and dry.
Fit large washer, new blades with flat blade on
inside then overlapping formed blade, large
washer, 1 small washer, and nut. Tighten nut
(Fig. 1B & 1C) to 15-20 ft. lbs. or hand tight.
F
ITTING
N
EW
B
LADE
S
HAFT
5.
Remove blades, washers, blade drum, and felt
seal using wrenches as shown (Fig. 1A, 1B,1C).
6.
Hold unit as shown and tap shaft through using
a 3/8 bolt or similar (Fig. 2A) so that bolt
READ ALL THIS INFORMATION BEFORE COMMENCING, SO YOU BECOME
FAMILIAR WITH SEQUENCE OF REPAIRS. CLEAN ALL PARTS BEFORE REASSEMBLY.
LITTLE WONDER
®
X
TRA
E
DGER
Body Workshop Manual
BLADE REPLACEMENT • FITTING NEW BLADE SHAFT
REPLACING CLUTCH DRUM HOUSING OR GEARS
WARNING
Use only Little Wonder Blades.
Other blades have larger size holes
(1/2”) which will cause out-of-balance
vibrations which will damage unit
and can cause injury. The use of
incorrect blades will void warranty.
▲
!
▲
!
22
FIG 1C
FIT BLADES AT RIGHT ANGLES.
2 SPIGOTS ON EACH BLADE FIT
INTO HOLES OF OTHER BLADE
FITTING INSTRUCTIONS
FIG 1A
FIG 1B