Pixel polish – correcting images automatically, Main window and pixel polish tab, Image scan dual iii utility – Konica Minolta DiMAGE Scan Dual III AF-2840 User Manual
Page 40: Basic scanning
Scan button
(p. 43)
Image-correction tab (p. 64)
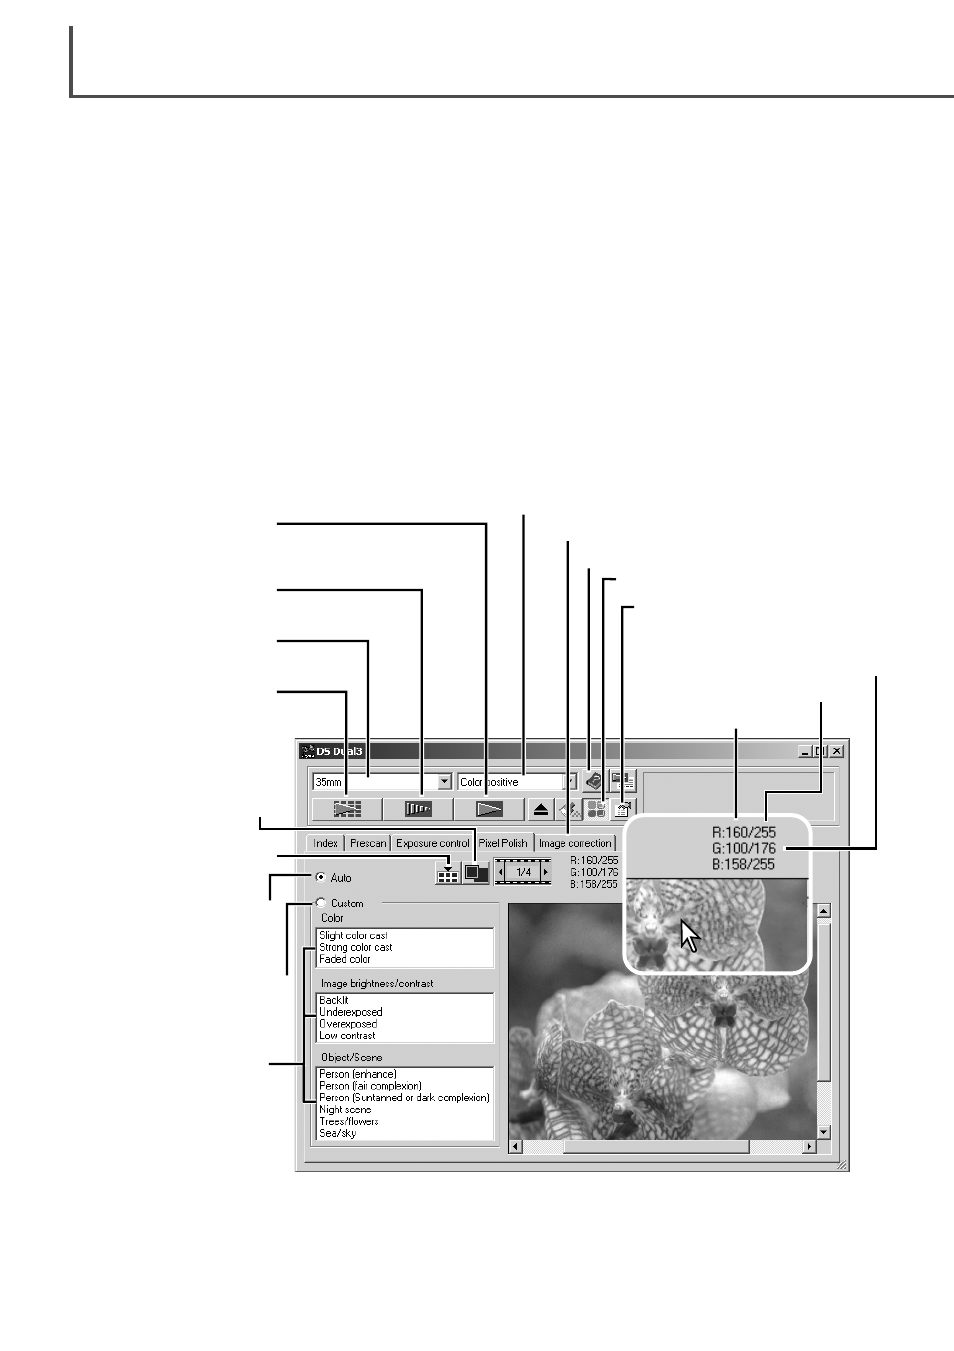
The RGB display will show the color values for any point on the image.
Simply place the mouse pointer on the image area to see the RGB val-
ues of that point. Pressing the shift key (Windows) or command key
(Macintosh) will display the CMY values.
D
IMAGE SCAN DUAL III UTILITY
–
BASIC SCANNING
40
Pixel Polish – Correcting images automatically
Main window and Pixel Polish tab
Film format (p. 31)
Film type (p. 31)
Pixel Polish button
Index scan button
(p. 33)
Prescan button
(p. 37)
Help
Preference button (p. 44)
Pixel Polish makes automatic image corrections or custom corrections using straightforward para-
meters displayed in the window. Once the Pixel Polish button is pressed, corrections are immedi-
ately applied to all the frames in the holder. Image corrections performed prior to the use of the
Pixel Polish function are all reset for all images in the holder. Scanning time increases with the
use of Pixel Polish. Pixel Polish cannot be used with black and white film, 16-bit or 16-bit linear
color depth (p. 45).
With Macintosh operating systems, to use Pixel Polish when the utility is launched through
Photoshop or Photoshop Elements, the largest unused block of memory in the system must be
more than 128MB. To check and redistribute the system memory allocation, see page 87.
Auto correction radio
button
Custom correction radio
button
Custom correction list
boxes
-
Color list box
-
Image brightness/
contrast list box
-
Object/scene list
boxes
RGB display
Original RGB values
Current RGB values
Fit-to-window button
(p. 35)
Apply-all button