Installation – Kenwood KCA-S210A User Manual
Page 4
Installation
4-
English
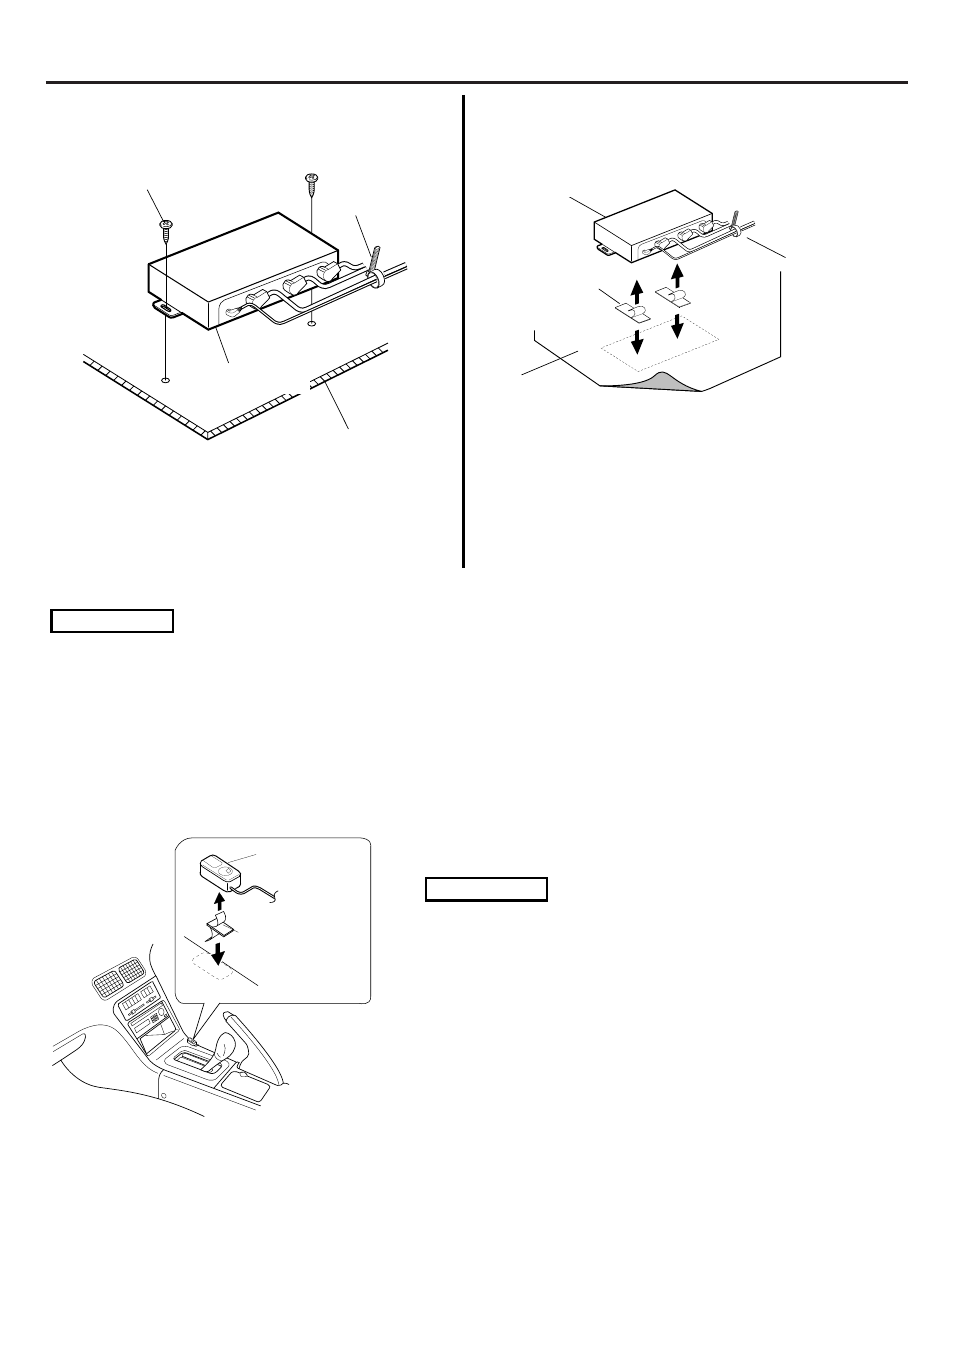
Installing the switching unit with a
board in the trunk space
1. Install the switching unit with self-tapping
screws5 (
φ
4
×
16 mm).
2. Bind the cables with cable band6.
Self tapping screw5
(
φ 4 × 16 mm)
Switching unit1
Cable band6
Board etc.
thickness: 17mm or more
;;;;;
;;;;;
;;;;;
carpet
Velcro strips4
1. Remove the backing from the Velcro strips4 and
attach it to the bottom of the switching unit1.
Install the switching unit on the carpet.
2. Bind the cables with cable band6.
Installing the switching unit on the
carpet under a seat
• Install the switching unit1 in places that do not obstruct driving.
• Install the switching unit1 in places where it is not touched by the tip of the shoes of a rear seat
passenger.
• Do not install the unit in places where it is exposed to direct sunlight, high heat, or where water may
splash over it.
• Do not place anything on top of the switching unit 1.
2CAUTION
Installing the controller
Controller2
Double-sided
adhesive
tape7
1. Wipe off the installation location with a cleaning cloth.
• Install the controller2 on a flat surface. If it is
installed on a curved surface, the tape adhesion may
weaken and the controller may come off.
• Do not install the controller2 in places (such as on
the dashboard) where it is exposed to direct sunlight
and the temperature becomes high. Otherwise, the
controller2 will become deformed and unusable.
• Install the controller2 in places that do not obstruct
driving. Install the controller2 temporarily and verify
that the handle, shift knob, and side brake can be
operated smoothly.
2. Secure the controller2 in the specified place with the
double-sided adhesive tape7.
2CAUTION
Cable band6
Switching unit1