Installation, Mobile installation, Installation example – Kenwood TS-480SAT User Manual
Page 9: Remote control panel installation
1
INSTALLATION
MOBILE INSTALLATION
When you use this transceiver for mobile operation, do not attempt to perform any kind of configuration or menu
setup configuration while driving your car; it is simply too dangeous. Stop the car and then perform transceiver
configuration. In addition, do not wear headphones while driving.
You should install the transceiver in a safe and convenient position inside your vehicle so as not to subject
yourself to danger while driving. For example, install the transceiver under the dash in front of the passenger seat
so that knees or legs will not strike the transceiver if you brake suddenly. Additionally, do not install the
transceiver and its accessories on to the air bag lids. We recommend you consult your car dealer for the
transceiver installation to ensure safety.
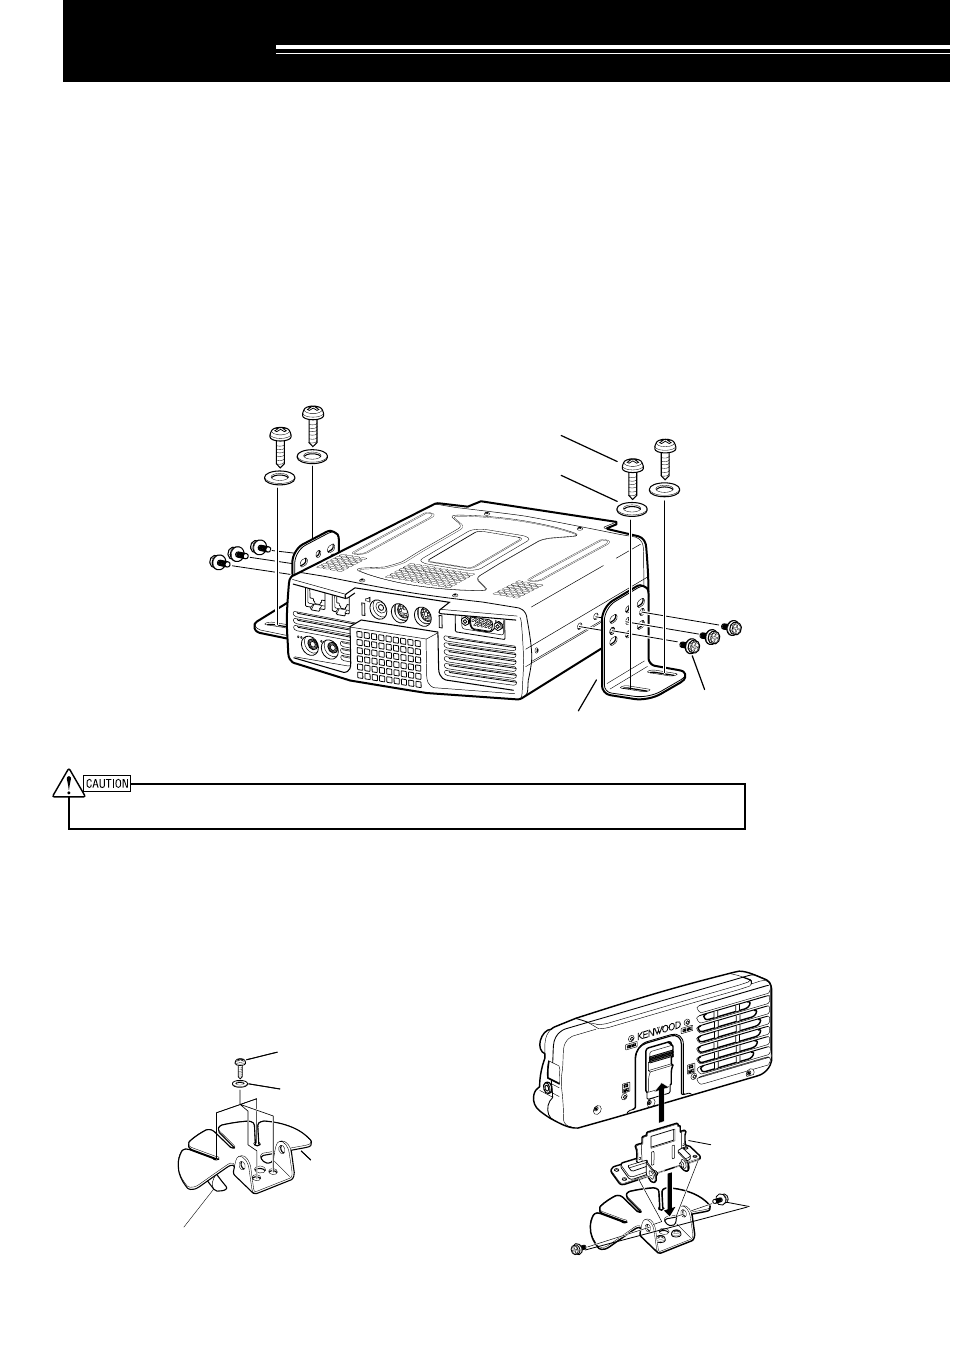
INSTALLATION EXAMPLE
1 Attach the 2 L-brackets using the 6 supplied SEMS screws (M4 x 10 mm) as shown below.
2 Position the transceiver in the mounting bracket and tighten the 4 supplied tapping screws (5 mm x 16 mm) to
fix the transceiver in place.
Do not install the TX/ RX unit in non-ventilated areas. Air must flow through the TX/ RX unit to keep the unit cooled.
REMOTE CONTROL PANEL INSTALLATION
1 Peel off the adhesive tape cover from the bottom of the fan-shaped base.
2 Afix the holder to the vehicle with 4 tapping screws.
3 Attach the Remote Control panel holder to the base with 2 supplied SEMS screws.
PADDLE
KEY
EXT.SP
DATA
REMOTE
COM
MIC
PANEL
SEMS screw
(M4 x 10 mm)
Tapping screw
(5 mm x 16 mm)
Flat washer
(5 mm)
L-bracket
Remote Control
panel holder
SEMS screws
(M4 x 10 mm)
Adhesive tape cover
Flat washer (4 mm)
Tapping screw
4 mm x 12 mm