Installation, Non-japanese cars, Japanese cars – Kenwood KDV-412 User Manual
Page 76: Screwing the faceplate on the unit
76 KDV-412
Non-Japanese cars
Firewall
Accessory
90
Attachment screw
Bend the tabs of the mounting sleeve with a screwdriver
or similar utensil and attach it in place.
Accessory
!
Rubber Bush
• When the space between the unit and Firewall is
narrow
• When the space between the unit and Firewall is
wide
Unit
Unit
Firewall
Accessory
!
Rubber Bush
Accessory
9
Attachment screw
Firewall
Accessory
!
Rubber Bush
Accessory
0
Attachment screw
• Make sure that the unit is installed securely in place. If
the unit is unstable, it may malfunction (for example, the
sound may skip).
Japanese cars
1
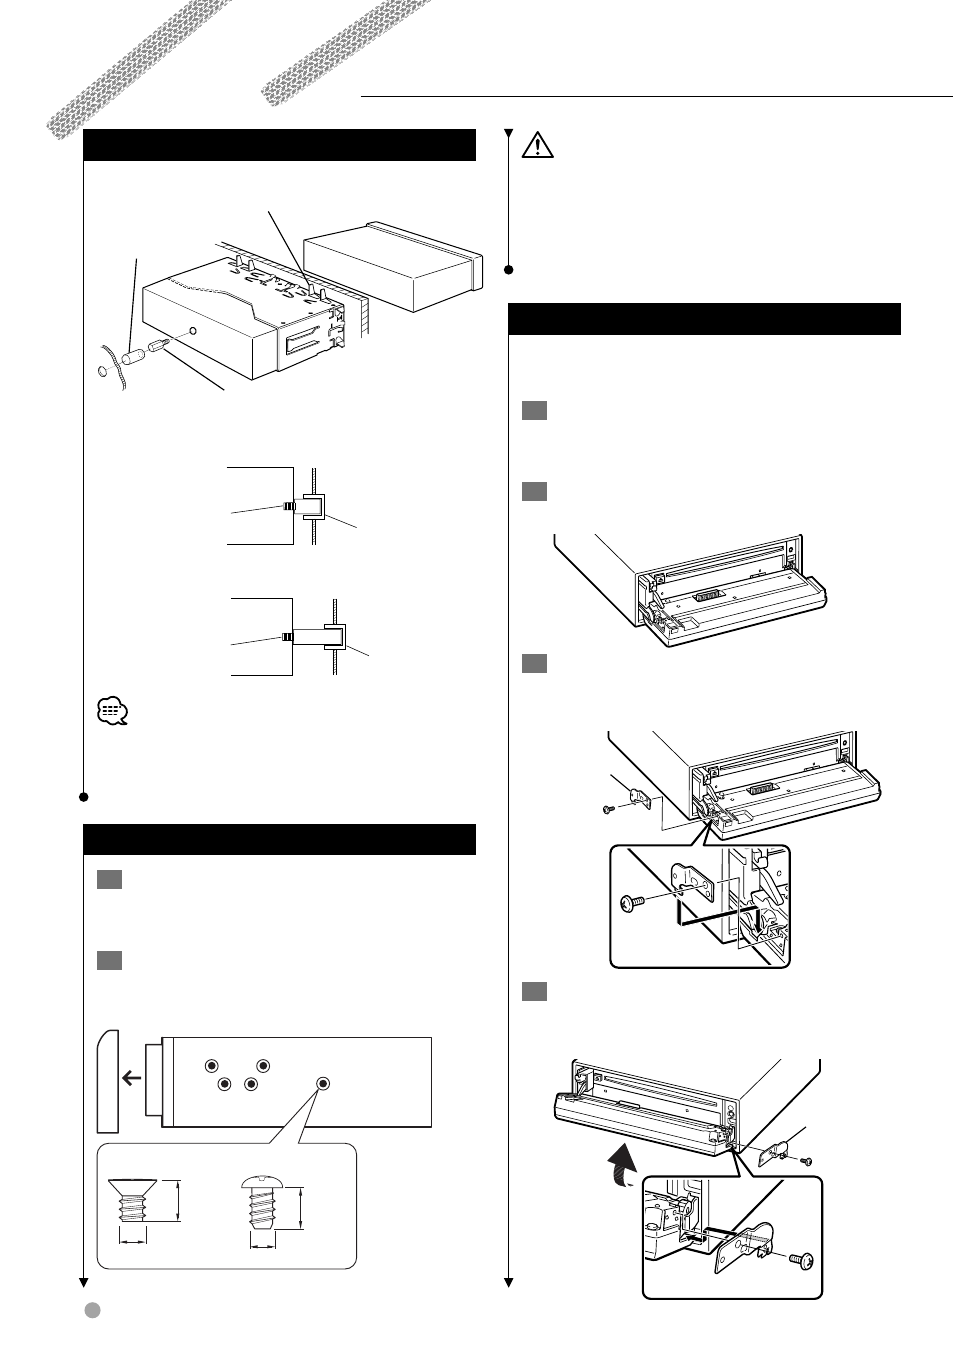
Refer to the section rubber frame> (page 77) and then remove the 2 Align the holes in the unit (two locations on each side) with the vehicle mounting bracket 8 mm ø5mm ø5mm 8mm T N T N T/N T : Toyota cars 3 4 For Nissan car For Toyota car Installation • During installation, do not use any screws except for those provided. The use of different screws might result • Damage may occur if a screwdriver or similar tool is used with excessive force during the installations. Screwing the Faceplate on the Unit If you want to fasten the faceplate to the main 1 Refer to the section rubber frame> (page 77) and then remove the 2 Drop open the faceplate by pressing the Release button. 3 Tighten the screw (ш2 Ч 5 mm) (Accessory 5) and bracket (Accessory 6) in the hole shown on the diagram. Accessory 5 Accessory 6 4 Tighten the screw (ш2 Ч 5 mm) (Accessory 5) and bracket (Accessory 7) in the hole shown on the diagram. Accessory 7 Accessory 5
hard rubber frame.
and secure the unit with the accessory screws.
MAX.
MAX.
N : Nissan cars
in damage to the main unit.
unit so that it does not fall off.
hard rubber frame.