Installation (for honda acura car), Installation type 1 1, Assembly – Kenwood DPX-MP4070 EN User Manual
Page 34
34
|
English
Installation (For HONDA ACURA Car)
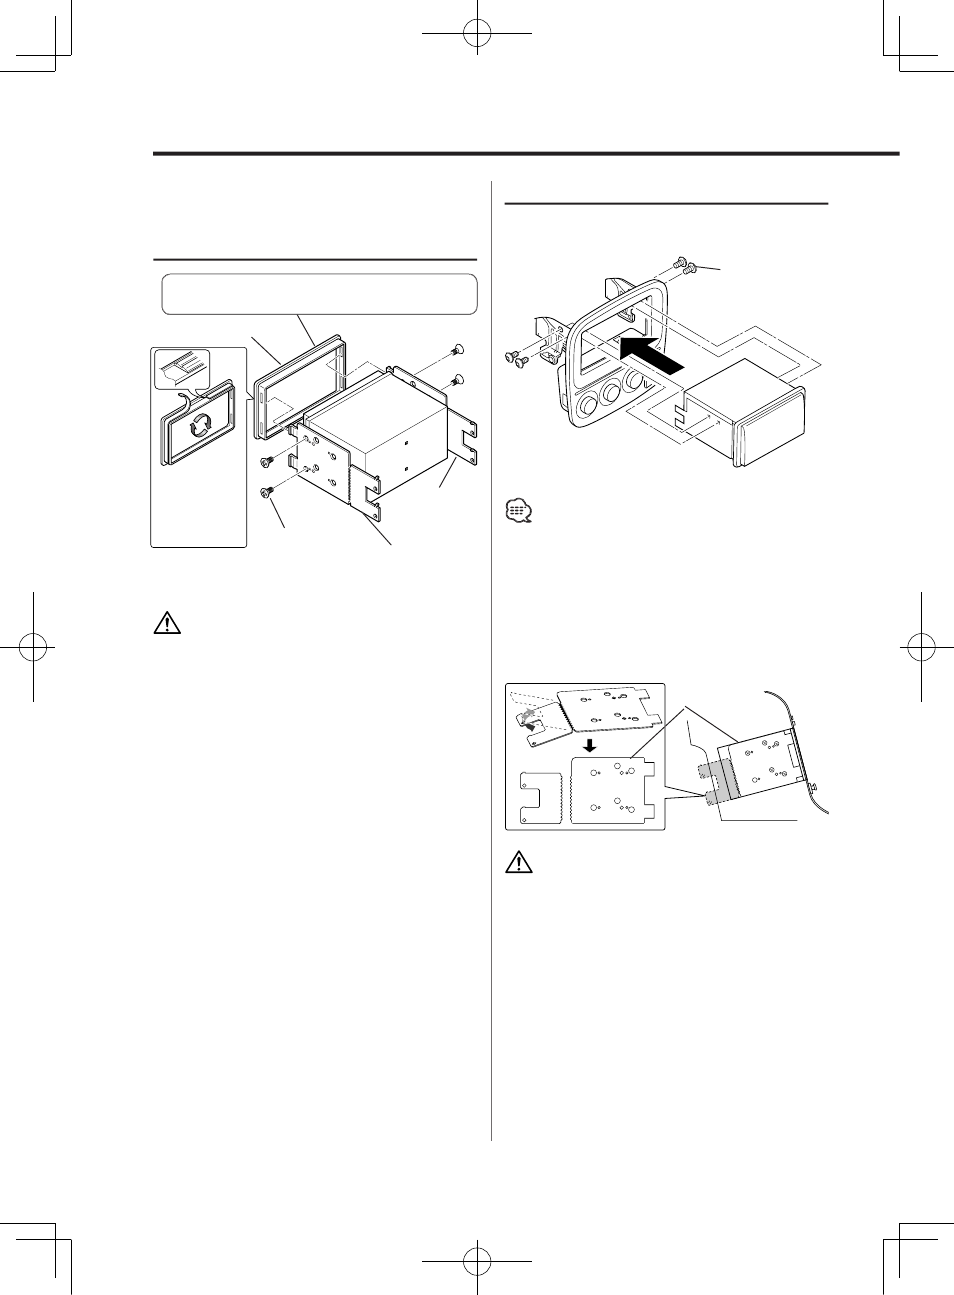
Installation type 1
1
Use Accessory4 to attach the unit which was
assembled in Assembly.
2
Install the center panel with the unit in your car
• The illustration shows an example of installation using
a vehicle bracket. The shape of the bracket varies with
the vehicle to be installed. Some bracket requires three
screws (Accessory4) on each side.
• If accessories 7 and 8 hit the inside of the console,
preventing the unit from being attached tightly, snap
their end parts off as shown below.shipped with the
unit, as shown above
Accessory4
(M5 × 6 mm)
Accessory78
Be careful not to get injured with the new edge.
You can choose from three installation types to fit
your car. Perform 'Assembly' before installation.
Assembly
Fit the projections on both sides of the Accessories 7
and 8 into the slits on the Accessory5.
(The application
position of
Accessory6 is
at the bottom
panel)
Bottom
panel
Accessory3
(M5 × 7 mm)
Accessory7 (L)
Accessory8 (R)
Accessory
Accessory5
• During installation, do not use any screws except for
those provided. The use of different screws might result
in damage to the main unit.
• Damage may occur if a screwdriver or similar tool is used
with excessive force during the installations.