Advertencia, Warning – Kolcraft S50J-R1 User Manual
Page 6
6
S50J-R1 6/03
Requires 4 “AA” Batteries (Not
Included)
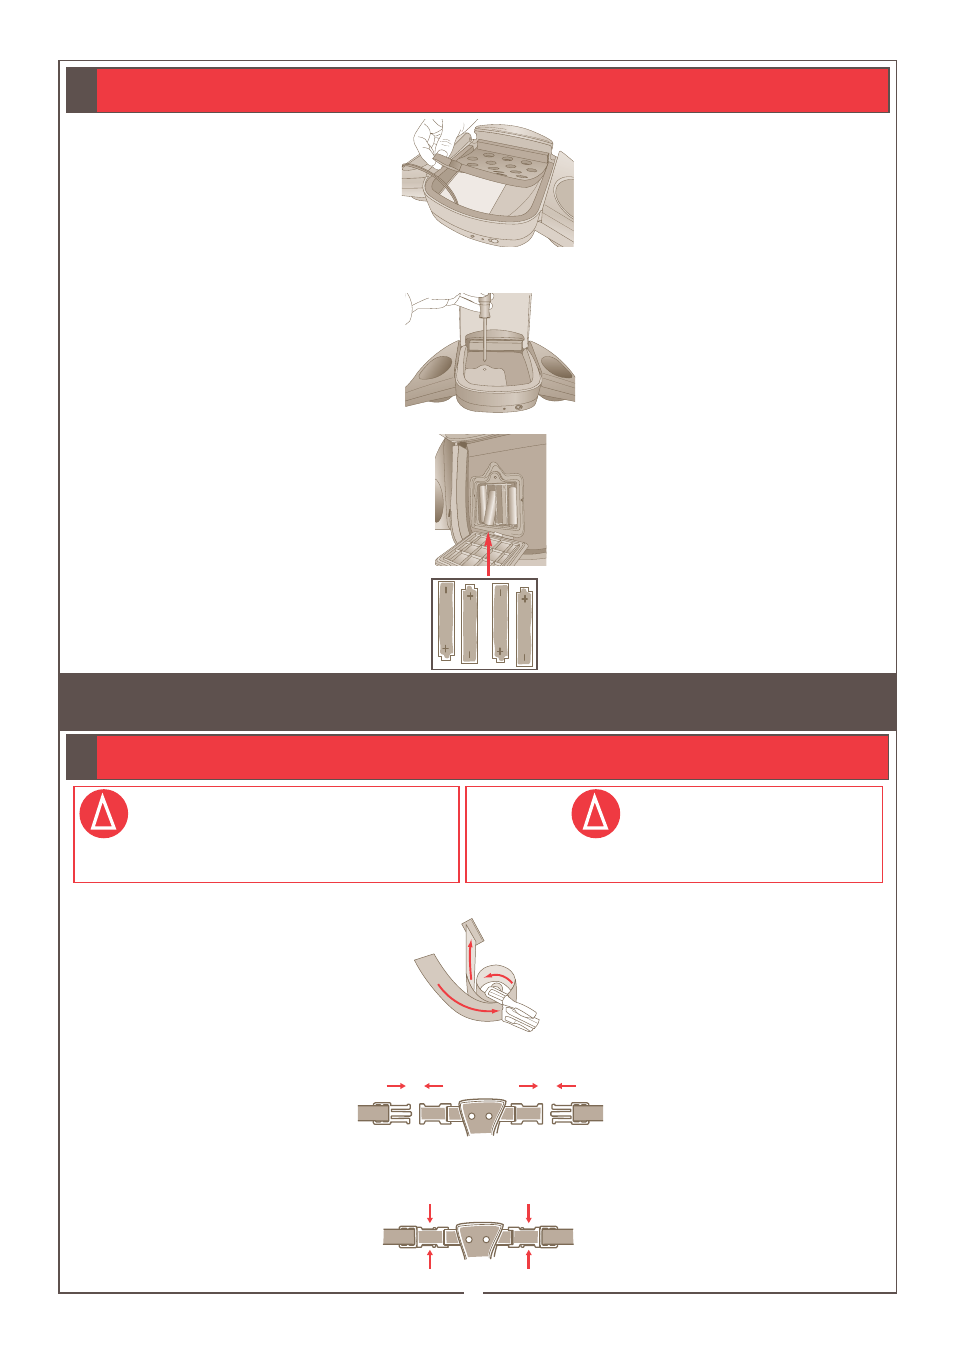
Step 1.
Lift up the foam padding
in the bottom of the unit (Figure A).
Note:
Foam is used to reduce
skipping & eliminate sliding of your
portable unit. If your player does not
fit inside, remove foam.
Step 2.
Use a phillips screwdriver
to remove the battery door
(Figure B).
Step 3.
Place batteries in the
battery compartment as shown
(Figure C).
Step 4.
Screw the battery door
back onto the unit and replace the
foam.
Requiere 4 Pilas “AA” (No Incluidas)
Paso 1.
Eleve el colchón de
espuma en la base de la unidad (Figura
A).
Nota:
se utiliza espuma para
reducir el movimiento y el desliza-
miento en su unidad portatil. Si su
reproductor no cabe dentro, remueva
la espuma.
Paso 2.
Use un destornillador
phillips para desatornillar la puerta de
la batería (Figura B).
Paso 3.
Sitúe las baterías en el
compartimiento como se muestra
(Figura C).
Paso 4.
Atornille de nuevo la
portezuela de las baterías y sitúe la
espuma.
A
VOID SERIOUS INJURY FROM FALLING OR SLIDING OUT
.
A
LWAYS USE RESTRAINT SYSTEM
.
E
VITE DAÑOS SERIOS CAUSADOS POR CAÍDAS O AL DESLIZARSE
DEL ASIENTO
. S
IEMPRE USE EL SISTEMA DE CINTURÓNES
.
¡ADVERTENCIA!
!
!
WARNING!
How to Properly Use Your New Stroller
Cómo Usar Correctamente su Nueva Carriola
Lock both foot brakes to keep
stroller from rolling.
Step 1.
Place crotch strap
between child’s legs.
Step 2.
Adjust restraint system
to fit snugly around child’s waist
(Figure A).
Step 3.
To fasten restraint system
buckles - push together. Be sure
both buckles are fastened to secure
child safely (Figure B).
Step 4.
To unsnap restraint sys-
tem buckles - press tabs to release
(Figure C).
Asegure los dos frenos de pie para evitar
que la carriola ruede accidentalmente.
Paso 1.
Coloque la correa de la
entrepierna entre las piernas del niño.
Paso 2.
Ajuste adecuadamente el
sistema de cinturón alrededor de la
cintura del niño (Figura A).
Paso 3.
Para abrochar la hebilla del
sistema de cinturón ensártelo en el
otro extremo del cinturón. Asegure
que las dos hebillas estén abrochados
para segurar el niño (Figura B).
Paso 4.
Para desabrochar la hebilla
del sistema de cinturón, presione las
lengüetas - para liberar (Figura C).
1
TO SECURE CHILD IN STROLLER:
PARA ASEGURAR AL NIÑO EN
LA CARRIOLA:
A
A
B
C
12
TO INSTALL BATTERIES INTO MUSIC
ON THE MOVE™
(SELECT MODELS)
:
PARA INSTALAR LAS PILAS EN MUSIC
ON THE MOVE™
(MODELOS SELECTOS)
:
B
C