Tensioning.v-belts, Replacing.v-belts – Woodstock W1770 User Manual
Page 50
-48-
W1770 21" Bandsaw w/Foot Brake
SE
RV
IC
E
Tensioning.V-Belts
1. Follow Steps.1-2 in Checking.V-Belts on Page.47.
2. Loosen the motor adjustment screws shown in
Figure.68.
3. Adjust the belt tension:
— If the belt is too loose, turn the tension nut clock-
wise to tighten the belts.
— If the belt is too tight, turn the tension nut counter-
clockwise to loosen the belts.
4. Push the center of the V-belt. If deflection is approx-
imately
3
⁄
4
" with moderate pressure (see
Figure.67)
Page.47), then the tension is correct. If the deflec-
tion is more than
3
⁄
4
", repeat
Step.3.
5. When the V-belt tension is correct, tighten the
motor adjustment screws, and close the wheel cov-
ers.
Replacing.V-Belts
1. Follow
Steps.1-2 in Checking.V-Belts on Page.47.
2. Remove the bandsaw blade (refer to Blade.Changes.
on
Page.43).
3. Loosen the motor adjustment bolts and tension nut
shown in
Figure.68, then turn the tension bolt coun-
terclockwise.
4. Unthread the wheel cap screw shown in Figure.69,
slide the lower wheel off of the bearing shaft.
5. Slip the old V-belts off the pulleys, then install the
new V-belt set in their place.
.
Note: Replace both V-belts as a matched set.
6. Install the lower wheel back onto the bearing shaft,
tighten the wheel mount cap screw, then tension the
V-belt (see
Tensioning.V-Belts on this page).
7. Close the lower wheel cover.
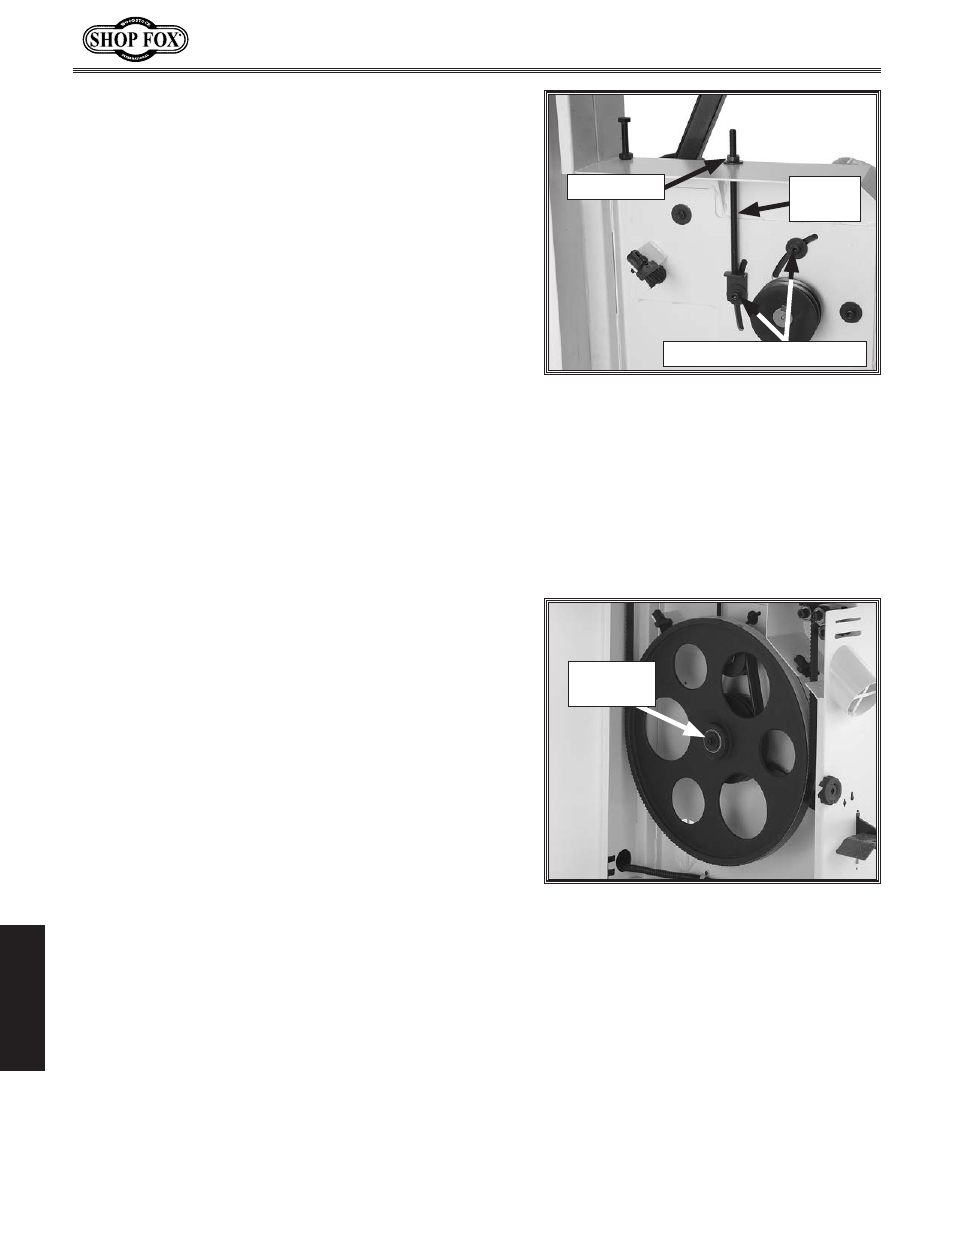
Figure.68. Motor mount bolts and tension
bolt. (Lower wheel removed for clarity.)
Figure.69. Wheel cap screw for removing
the wheel.
Wheel
Cap Screw
Motor Adjustment Screws
Tension Nut
Tension
Bolt