Panel installation – Sub-Zero 427G User Manual
Page 26
26
|
Sub-Zero Customer Care 800.222.7820
MODEL WS-30 INSTALLATION
Panel Installation
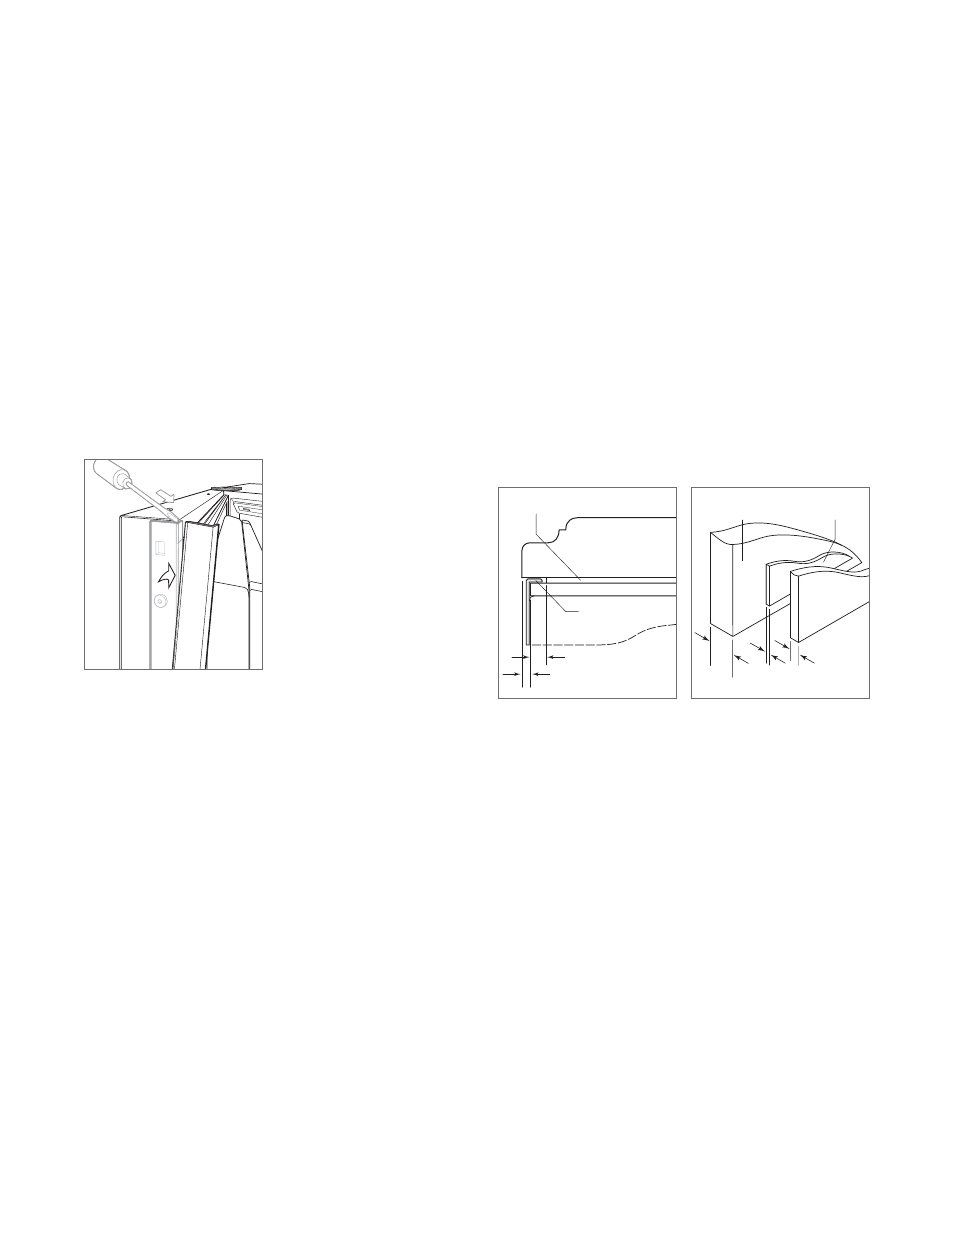
DOOR PANEL
To install the custom door panel, remove the handle side
trim molding. Insert a screwdriver tip into the top corner slot
on the handle side and pop out the trim. Remove the screws
and frame. Refer to the illustration below.
The door has a
1
/
4
"
(6)
frame for the custom panel to slide
into. If the panel is thicker than a
1
/
4
"
(6)
, rout an edge
around the panel or mount the panel on a sheet of
1
/
4
"
(6)
thick material, then insert into the frame.
A .10"
(3)
space is required between the backer panel and
the custom panel to allow the panel to slide into the door
frame. Refer to the illustrations below for critical dimensions.
Install handle hardware before inserting the panel. Large
D-style handles are recommend rather than knobs. Screw
heads must be countersunk into the panel.
Slide the panel into the frame.
To reinstall the door trim molding, insert the top of the trim
into grooves at the top of the door and work downward,
snapping the trim into clips on the door frame.
1
/
8
"
(3) (OVERLAY)
CUSTOM PANEL
SPACER PANEL
BACKER PANEL
TRIM
5
/
16
"
(8) min
1
/
4
"
(6)
.10"
(3)
CUSTOM
PANEL
SPACER
PANEL
BACKER
PANEL
3
/
4
"
(19)
typical
Panel assembly cross section
(overlay).
Panel assembly rear view.
Door side trim.