Sonic Blue MVP841 User Manual
Page 21
21
How to Set Digital Audio Output
This allows you to configure the MVP841 Digital Audio
Output Mode to match the type of A/V Control Center and/
or Decoder being used. Follow the recommended Audio
Mode Selections that match your A/V Electronics.
Notes: 1. Certain Dolby Digital and dts discs display their
own unique Audio Mode Selection menu, every
time the disc is loaded into the player. If you do not
make a choice from this menu, the disc will revert
to its default Audio Mode when play is started. The
Audio Mode selected from this menu remains in
effect as long as that disc is loaded into the player.
If you wish to change the Audio Mode after disc
play has started, the disc tray must be opened and
closed again, with a new selection made from the
menu.
2. If a disc is loaded, the player must be in STOP
mode before any SETUP operation can occur.
1. Press the SETUP push-button to access the Initial
Setup menu.
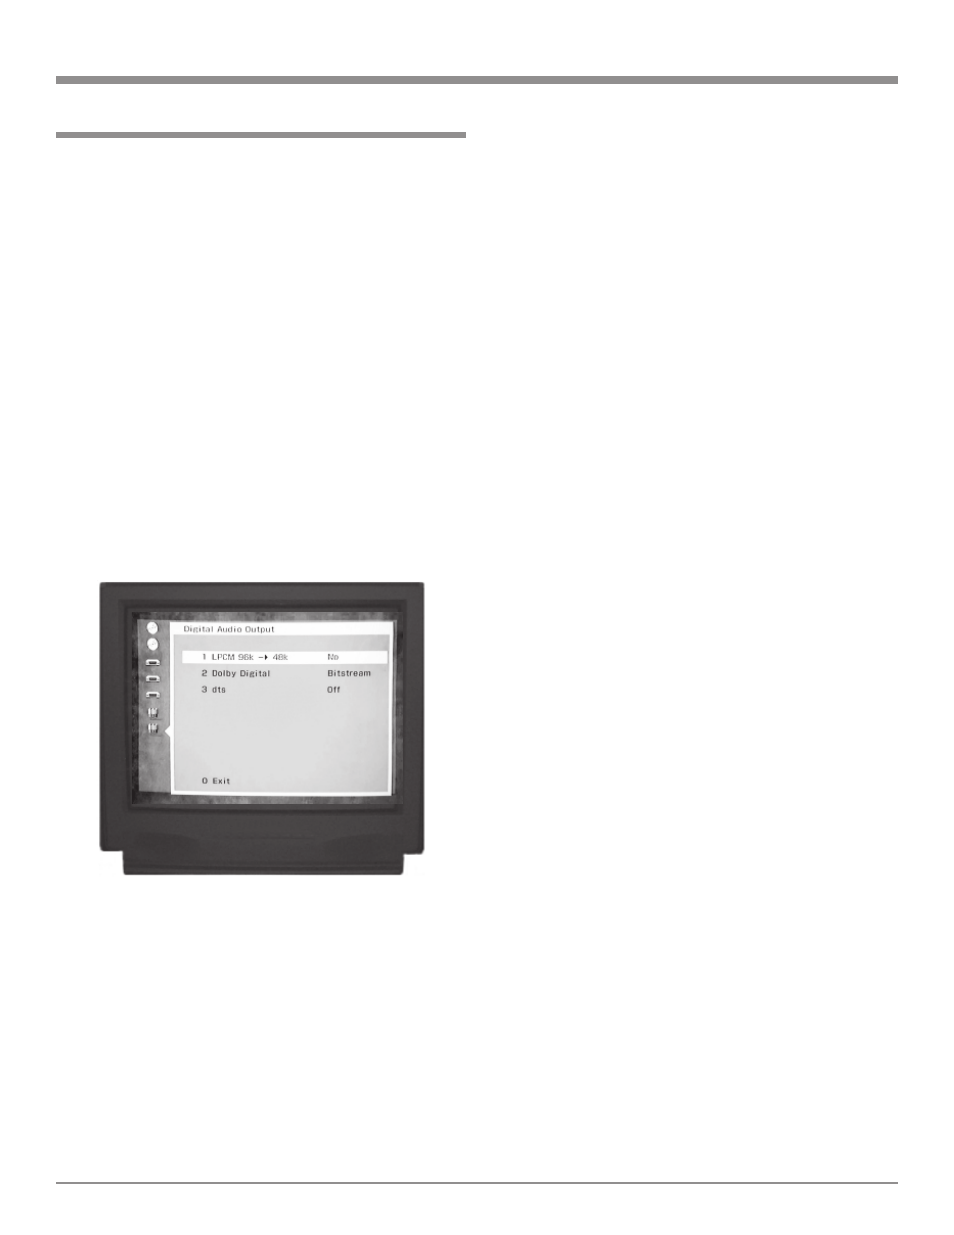
2. Press push-button Number 7 to select the Digital Audio
Output Menu. Refer to figure 18.
Settings when only Analog Outputs are being used
1. Press push-button Number 1 to access LPCM 96k ®
48k.
2. Press 1 to select Yes.
3. Press push-button Number 2 to access Dolby Digital.
4. Press 2 to select PCM.
5. Press push-button Number 3 to access dts.
6. Press 1 to select Off.
SETUP, cont
Figure 18
Settings for A/V Electronics with a 2 Channel Digital to
Analog Converter (DAC)
1. Press push-button Number 1 to access LPCM 96k ®
48k.
2. Press 2 to select Yes.
3. Press push-button Number 2 to access Dolby Digital.
4. Press 2 to select PCM.
5. Press push-button Number 3 to access dts.
6. Press 1 to select Off.
Settings for A/V Electronics with Dolby Digital Decoder
1. Press push-button Number 1 to access LPCM 96k ®
48k.
2. Press 2 to select Yes.
3. Press push-button Number 2 to access Dolby Digital.
4. Press 1 to select Bitstream.
5. Press push-button Number 3 to access dts.
6. Press 1 to select Off.
Settings for A/V Electronics with a dts Decoder
1. Press push-button Number 1 to access LPCM 96k ®
48k.
2. Press 1 to select Yes.
3. Press push-button Number 2 to access Dolby Digital.
4. Press 2 to select PCM.
5. Press push-button Number 3 to access dts.
6. Press 2 to select Bitstream.
Settings for A/V Electronics with Dolby Digital and dts
1. Press push-button Number 1 to access LPCM 96k ®
48k.
2. Press 2 to select Yes.
3. Press push-button Number 2 to access Dolby Digital.
4. Press 1 to select Bitstream.
5. Press push-button Number 3 to access dts.
6. Press 2 to select Bitstream.
After a selection is made, the initial setup menu will reap-
pear. If all setup adjustments are complete, press push-but-
ton Number 0 to exit the Initial Setup Menu.