Connecting cameras – Swann ADVANCED-SERIES H.264 User Manual
Page 9
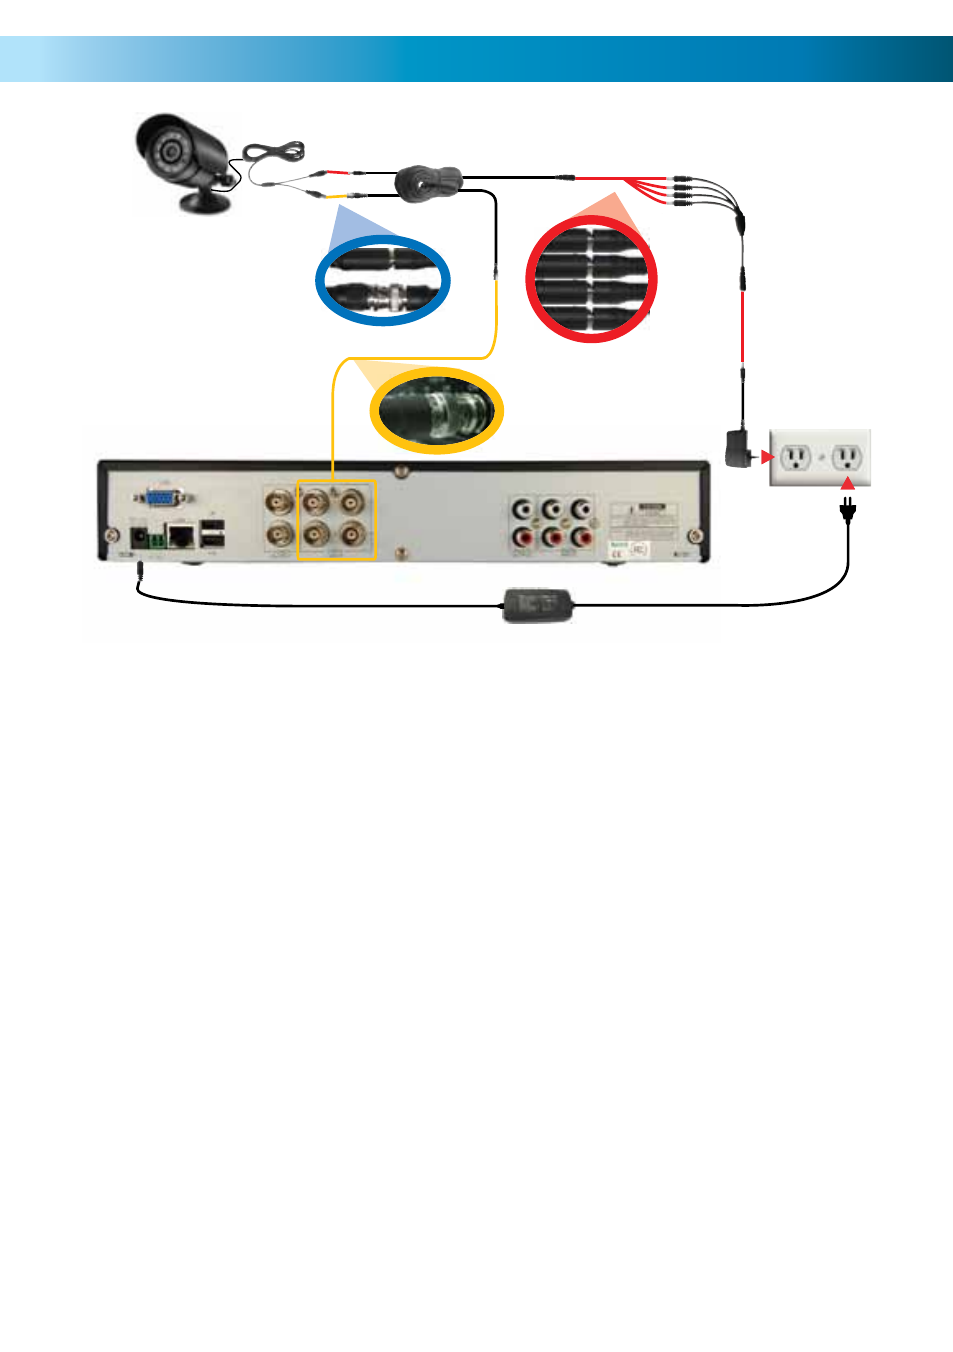
1. Connect the power and BNC ends of the
security camera to an extension cable.
Ensure these connections are secure, and
shielded from weather, moisture or other
hazards. Though Swann cameras use low
voltage DC power supplies, there is still the
possibility of short circuits if water gets into
the power plug or socket.
2. If you have multiple cameras which share a
power adapter, connect the DC end on the
extension cables to the 4 way power splitter
plugs. If you’ve got a dedicated power
supply for each camera, skip this step.
3. Connect the camera power supply to the
other end of the cable or power splitter, as
applicable.
4. Connect the BNC end of the extension
cables to the camera connections on the
back of the DVR unit (CH1 ~ CH4).
5. Repeat steps 1 ~ 4 for each camera.
6. If your camera has a microphone, connect
the audio out to one of the audio input
channels.
7. Connect the DVR power supply plug into
the power supply socket on the back of
the DVR. Ensure you use the right power
supply. Although most cameras also use a
12V power supply (though some do not - be
careful!) they don’t supply enough current
to run the DVR and the installed hard
drive(s).
8. Plug in the camera power adapter and the
DVR power adapter to mains power outlets.
Avoid using multiple double-adapters or
power boards - if possible, use a single
outlet for each power adapter.
9. Connect a monitor or television. Use the
MAIN Video Output for older televisions,
or ones lacking a VGA port. The VGA
output will connect to a computer
monitor and many more recent televisions.
(Television not pictured above)
1
4
3
Note: Cameras and
accessories are
optional, and may not
be included.
Connecting Cameras
9
2
(Optional)