Picture options – Samsung BN68-01783B-00 User Manual
Page 30
English - 30
Picture Options
You can set detailed picture settings.
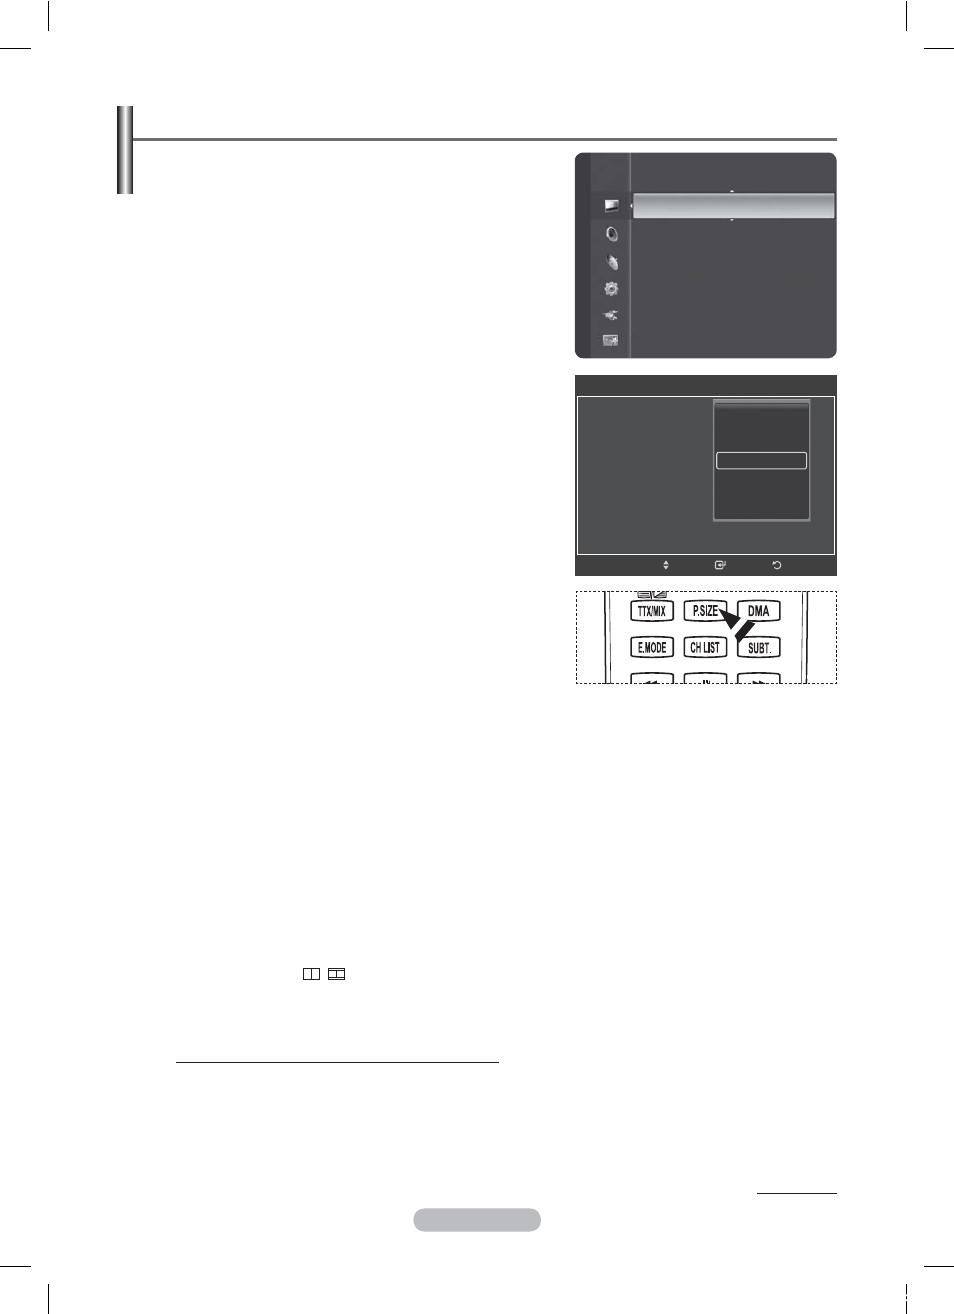
1 Press
the
MENU button to display the menu.
2 Press
the
ENTER button to select Picture.
3
Press the ▲ or ▼ button to select Picture Options, then
press the ENTER button.
4
Select the required option by pressing the ▲ or ▼ button,
then press the ENTER button.
5
When you are satisfied with your setting, press the ENTER button.
6 Press
the
EXIT button to exit.
®
In PC mode, you can only make changes to the Colour
Tone, Size and Screen Burn Protection from among the
items in Picture Options.
Colour Tone: Cool2/Cool1/Normal/Warm1/Warm2
®
When the picture mode is set to Dynamic or
Standard, Warm1 and Warm2 cannot be selected.
Size: Auto Wide/16:9/Wide Zoom/Zoom/4:3/Just Scan
You can select the picture size which best corresponds to
your viewing requirements.
− Auto Wide: Expanding and pulling up the picture from
4:3 to 16:9 ratio.
®
Auto Wide function is available only in TV, Ext.1,
Ext.2, AV and S-Video mode.
− 16:9: Sets the picture to 16:9 wide mode.
− Wide Zoom: Magnify the size of the picture more than
4:3.
Move the screen up/down using the ▲ or ▼ button after
selecting the Position by pressing the ► or ENTER
button.
− Zoom: Magnify the size of the picture vertically on screen.
− 4:3: Sets the picture to 4:3 normal mode.
− Just Scan: Use this function to see the full image without any cutoff when HDMI(720p/1080i/
1080p), Component(1080i/1080p) signals are input.
After selecting Just Scan in HDMI (1080i/1080p) or Component (1080i/1080p) mode: Press
the ◄ or ► button to select Position, then press the ENTER button. Press the ▲, ▼, ◄ or ►
button to move the picture.
Reset: Press the ◄ or ► button to select Reset, then press the ENTER button. You can initialize the setting.
®
With the HDMI Just Scan picture size, depending on the AV devices, the screen may be cut off
or a specific colour appears on the screen.
®
For an HDMI (1080p) connection of 24, 25, 30, 50, and 60 Hz, and for a Component (1080p)
connection of 50 and 60Hz, only the input source is supported.
¯
You can change the picture size simply by pressing the P.SIZE button on the remote control.
®
Depending on the input source, the picture size options may vary.
®
The items available may differ depending on the selected mode.
®
When Double (
,
) mode has been set in PIP, the Picture Size cannot be set.
®
In PC Mode, only 16:9 and 4:3 mode can be adjusted.
®
If you use the Just Scan function with HDMI 720p input, 1 line will be cut at the top, bottom, left
and right as in the overscan function.
Positioning and Sizing the screen using Zoom
− Resizing the screen using the Zoom enables the positioning and sizing of the screen to up/down
direction using the ▲ or ▼ button as well as the screen size.
− Move the screen up/down using the ▲ or ▼ button after selecting the Position by pressing the ◄
or ► button.
− Resize the screen vertically using the ▲ or ▼ button after selecting the Size by pressing the ◄ or
► button.
Continued...
Picture
Tint (G/R)
: G50/R50
Detailed Settings
Picture Options
►
Picture Reset
Return
Enter
Picture Options
Colour Tone
:
Size
Screen Mode
:
Digital NR
:
DNle
: 2min
HDMI Black Level
: 2min
Movie Plus
:Low
Move
Cool2
Cool1
Normal
Warm1
Warm2
iu]_TWX^_ZiTlUGGGZW
YWW_TW`TY\GGG㝘㤸GXXaZ`a[Z