P. 14), P. 14, Step 2: attaching the supplied items (continued) – Sony HVR-Z7E User Manual
Page 14: Attaching the lens hood with lens cover
14
z
Tips
• See page 43 for adjusting the volume.
• Set the INPUT1/INPUT2 switch to MIC+48V
when you use the supplied microphone.
• When you connect a device that supports the
+48V power source to the INPUT1 or INPUT2
jack, set the INPUT1/INPUT2 switch to MIC
prior to connecting the device. When you
disconnect the device, set the INPUT1/INPUT2
switch to MIC first, then disconnect it.
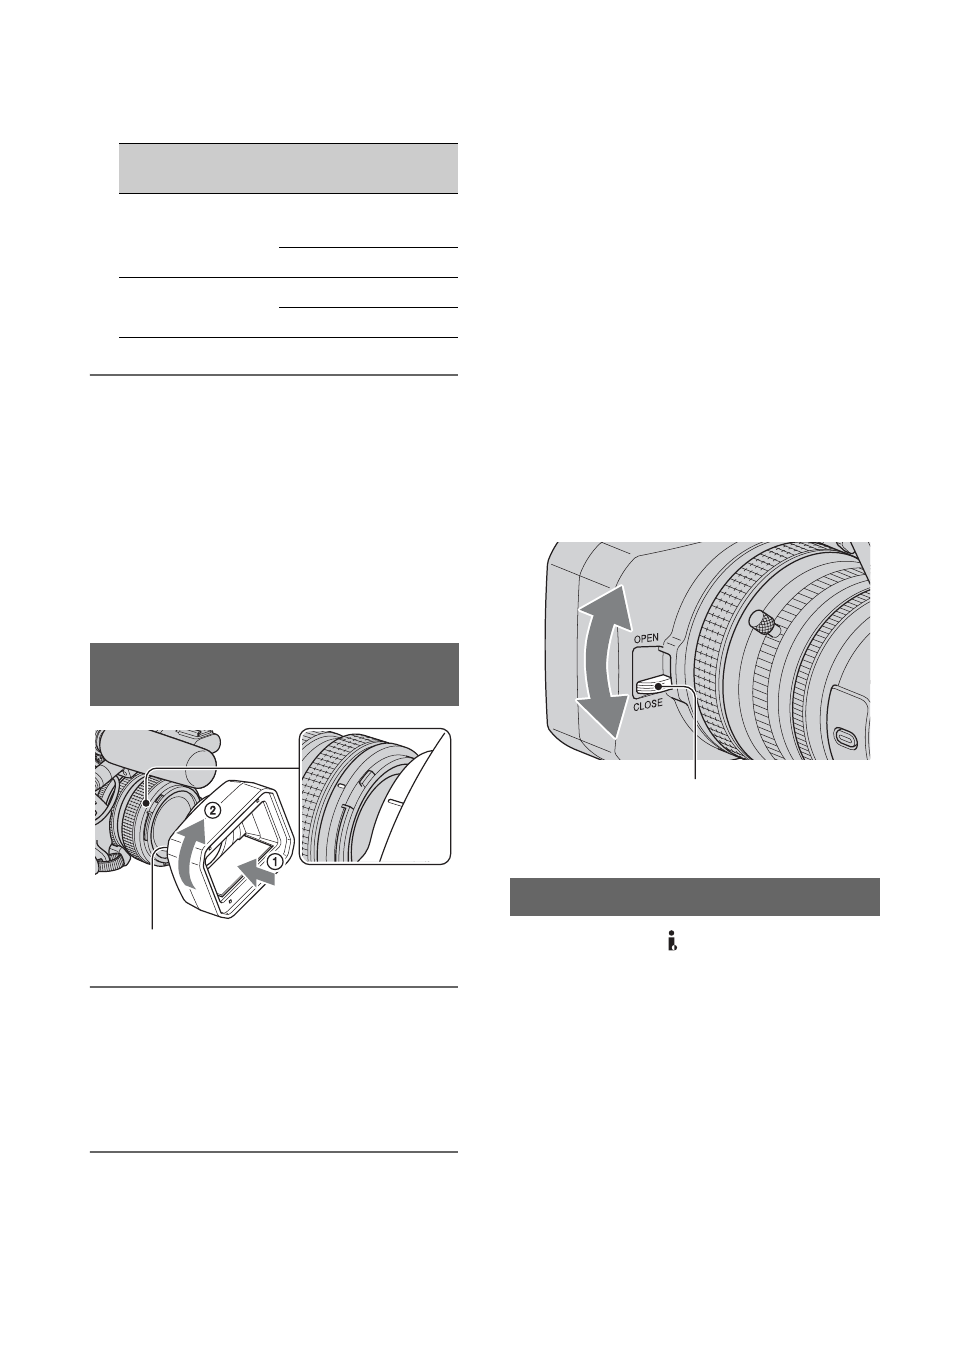
Align the marks on the lens hood to
those on the camcorder, and turn the
lens hood in the direction of the
arrow 2.
To remove the Lens hood with lens
cover
Turn the lens hood in the opposite direction
to the arrow 2 in the illustration while
pressing the PUSH (lens hood release)
button.
z
Tips
• If you attach or remove a 72mm (2 7/8 in.) PL
filter or MC protector, remove the lens hood
with lens cover.
To open or close the shutter of the
Lens hood with lens cover
Move the lens cover lever up or down to
open or close the lens cover.
Make sure that the HDV/DV jack cover is
closed.
Attach the Memory Recording Unit to your
camcorder as illustrated after inserting your
CompactFlash Card into it.
For details, refer to the Operating
Instructions of the Memory Recording Unit
on the CD-ROM.
REC CH SELECT
switch position
Input jack
Channel to
be used
CH1, CH2
INPUT1
Channel1
Channel2
INPUT2
-
CH1
INPUT1
Channel1
INPUT2
Channel2
Attaching the lens hood with lens
cover
PUSH (lens hood release) button
Attaching Memory Recording Unit
Move the lens cover lever to OPEN to
open the lens cover, and move the lever to
CLOSE to close the lens cover.
Step 2: Attaching the supplied items (Continued)