Dv dubbing, Ab c, Editing – JVC DR-MH50S User Manual
Page 60
60
EN
EDITING
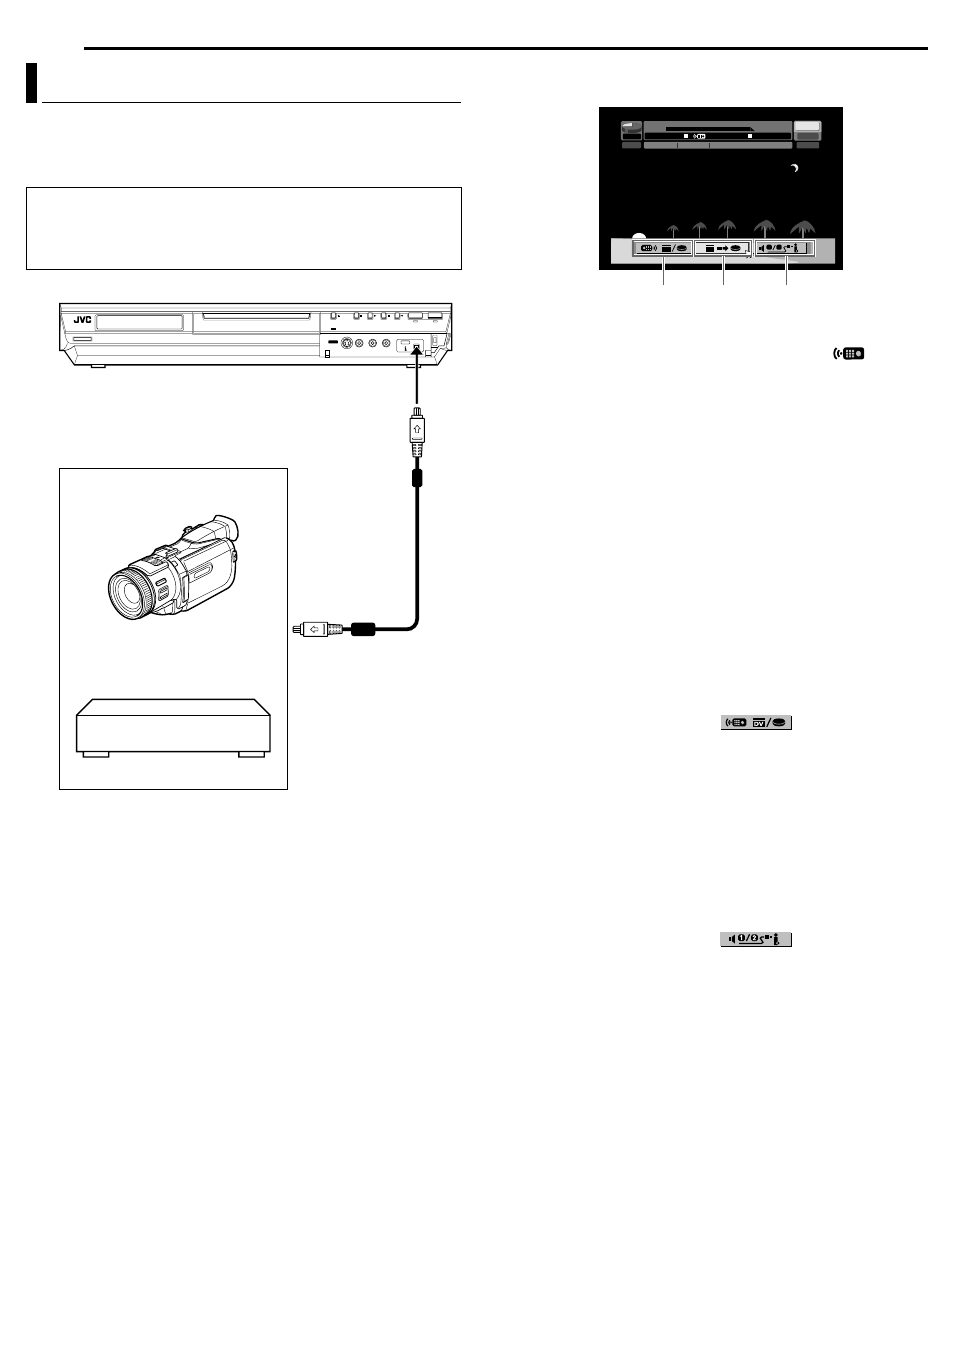
You can dub programmes from a camcorder or DV equipment
connected to the unit with a DV cable. The unit’s remote control
allows you the limited control of the connected camcorder or DV
equipment functions during dubbing.
The following on-screen display for DV dubbing appears when
ON SCREEN is pressed while the channel has been set to
ADVB.
A Remote control switch
To switch between the devices operable by the remote control
unit. The unit is operable when the remote icon (
)
displayed faces to the left, while the DV device is operable when
the remote icon is facing to the right.
B Auto capture button
Select to start or pause the dubbing. If ENTER is pressed when
the DV device is in the pause condition, preroll editing* where it
is possible to dub with a start time that is highly accurate will be
activated. When the DV device cannot be operated from the unit
(such as in camera mode), proceed with normal recording
(
A pg. 35, 38).
* Preroll editing refers to the playback after the DV tape is slightly rewind.
(For DV devices that do not support the –1x speed, the rewinding time
may be longer.)
C Sound monitor switch
For selecting the desired sound format for dubbing.
1
Connect a camcorder or DV equipment to the [DV IN] connector
on the unit’s front panel.
2
Press HDD so that the HDD lamp lights up on the unit.
3
Press PR +/– to set the channel to
ADVB.
4
Press ON SCREEN.
●
The on-screen display for DV dubbing appears.
5
Press selection keys to select
, then press ENTER
to display the remote icon (facing to the right) for the DV
equipment.
6
Press REC MODE repeatedly to set the recording mode.
7
Locate the point from where you want to start dubbing, then
stop or pause playback by pressing the following buttons on the
remote control:
I, N, O, o, W.
●
To play back in slow speed (1/10 of the normal speed), press
W
to pause playback, then press
O or N.
●
To play back frame-by-frame, press
W to pause playback, then
press
W repeatedly. Each press of W advances a frame.
●
To change the playback direction, press
O or N.
8
Press selection keys to select
, then press ENTER
repeatedly until the desired sound track appears on the TV
screen.
SOUND 1
:
Select this to record the original stereo sound played back on
the connected DV equipment.
SOUND 2
:
Select this to record the dubbed stereo sound played back on
the connected DV equipment.
MIX
:
Select this to record the sound of both
ASOUND 1B and
ASOUND 2B.
●
Note that this selection is not available when the source
programme is recorded in 16BIT (48 kHz) mode.
DV Dubbing
NOTES:
●
Use the DV cable VC-VDV 204U for connection.
●
When you connect a PC to the [DV IN] connector, we do not
assure the normal operation of this unit.
To [DV IN]
DV cable
(VC-VDV 204U)
(not supplied)
Camcorder
DV connector
Your unit
DV equipment
L – R
SOUND1
0:00
1:00
2:00
GR-DV3500
GR-DV3500
DV
HDD
00:00:00. 00
12bit
JVC
00:00:00. 00
DV
FR360
DV
DV
1 2
A
B
C